
Despite this being a hobby blog, I do keep an eye on what seems to be doing well for me in terms of stats. My Starting Lists for Spectre Operations have done really well but I now want to expand it and provide something a little more useful than just “here am list”. Simple lists are good to begin with but there comes a time when you want to feel less like an accountant moving numbers of points around and more like a military commander, analysing problems and finding solutions with what meager forces your supplies (and wallet) allow.
To get you on your way, welcome to Building a Force! This series will be in multiple parts and cover some hints and tips when it comes to building your forces. In future installments, we’ll look at vehicles, Off Table Assets and getting your rabble together when playing the OPFOR.
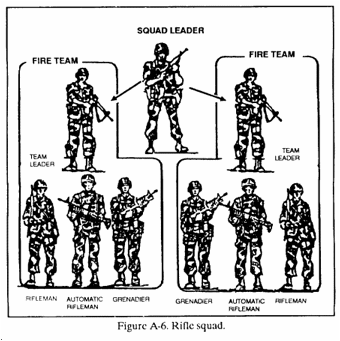
This time however, we’re going to look at building a force for more well trained and organised armies (including Special Forces teams). In particular, we’re going to work on how you can pick your force more easily by selecting for the right tools for the job.
Using TOEs
“But Charge”, I hear you say “Why not just use the written down Tables of Organisation and Equipment?”
Okay, lets talk about TOEs.
TOE’s are a great tool when understanding history and tactics, writing rules or building a collection. Its much easier to balance a preset force or know how many figures you may need when making a platoon. However, from my understanding, when it comes to day by day operations the times when a unit deploys exactly to TOE is not 100%. Soldiers fall ill and aren’t replaced in time, squads are formed into multiples for specific missions and specialists are attached.
For this reason I suggest treating TOEs as a guideline. Start from them but when writing a scenario or preparing a force for a possible operation there is nothing stopping you from tweaking and adjusting the composition. Obviously this needs to be within reason – a squad made entirely of M249 LMGs and LAWs would be powerful but in reality they would have some ammo consumption issues and be a bit clunky to move round.
Basic Advice
Instead I recommend building your team around the objective given to you. Look at the goal, plan out what you think you need and pick from the example teams below. After a few games, I’d even suggest making up your own teams that you find effective. I look forward to seeing what everyone comes up with
Here are a few other bits of advice when picking your force:
- Take attachments – red dots, lasers and scopes really help to improve your chances in ranged combat while different ammo types and suppressors can quickly change your role on the battlefield.
- Suppressors and Subsonic ammo can be combined for ultimate efficiency in stealth but even just using the suppressor with regular ammo will give you a considerable benefit.
- If you’re using Trained soldiers, adding a few additional riflemen to each team will increase your firepower and surviability.
- Body Armour and Personal Med-kits will save your soldier’s lives. By affecting lethality and potentially reducing the damage from a hit, combining both is recommended.
- Grenade choices are important – frag and smokes are good generic choices to expand your tactics while the other grenades are better in specific situations such as close quarters or asset destruction.
- There are several weapons that can be added to the teams to give them additional edges in combat but don’t necessarily require a full additional team.
- A Light Anti-Tank weapon to a team gives you a multi-role explosive device that lets you cause massive damage on a group of enemies or a vehicle/strongpoint.
- A UGL can easily be swapped for a Multiple Grenade Launcher or a Airburst Grenade Launcher depending on your needs – the MGL is good for large numbers of enemies while the Airburst is perfect for when you are fighting enemies that are entrenched.
- The humble RPG is actually a pretty tempting prospect – the multiple warheads (AT, HE and Thermobaric) gives you access to a range of effects for a reasonable points cost.
- Shotguns are useful upgrades. Combat and Auto Shotguns may steal the headlines with Rapid and Auto fire but don’t underestimate the Under Barrel/Sawn Off Shotgun; It’s a cheap way to up your breaching skill and provide a nasty kick in close quarters when combined with the various ammo options.
- Tasers can make capturing OPFOR alive much easier, reducing the need to get into close quarters.
- Extra equipment like tactical ladders and climbing gear is very situational but can be the difference between success and failure. This is especially important when using the small Elite forces.
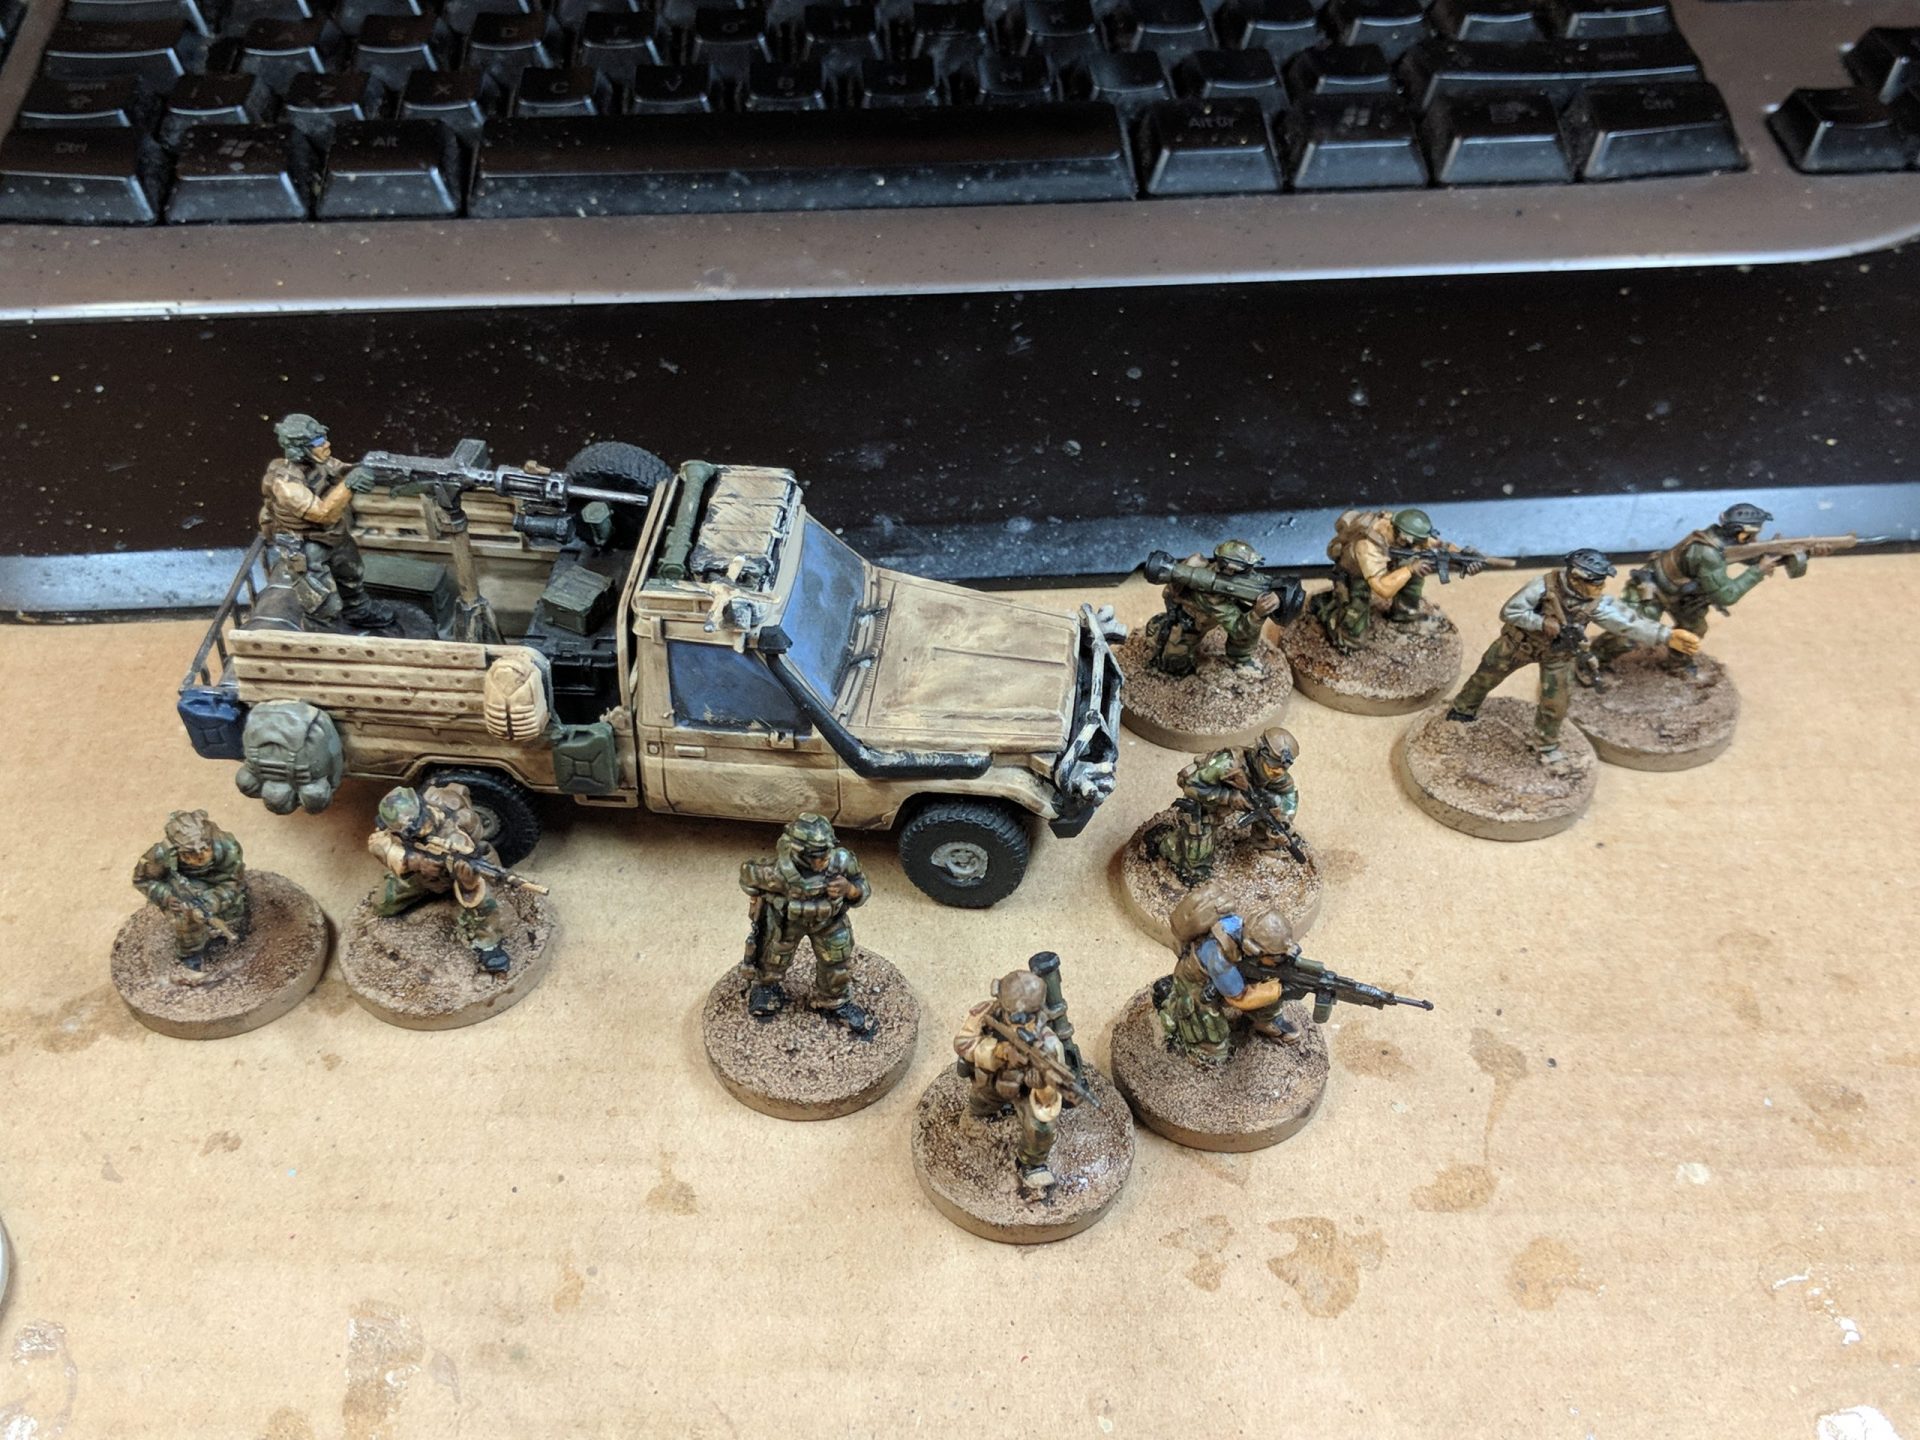
The Teams
The nine teams I’ve developed are below. Each will explain their task, show off the composition and then be accompanied by several notes explaining the idea behind them and how best to use them.
I’m going to use the term Service Rifle when describing the various teams. This can, depending on your forces nationality and skill level, be a carbine, an assault rifle or a battle rifle. There are only minor differences between them (the carbine has less range but gains bonuses in RI 1, the assault rifle is the default and the battle rifle is less effective at suppression but longer range and better lethality) so we shall be treating them as generic in the lists.
For people interested in points values, we’ll be covering that in the final part when we start building forces.
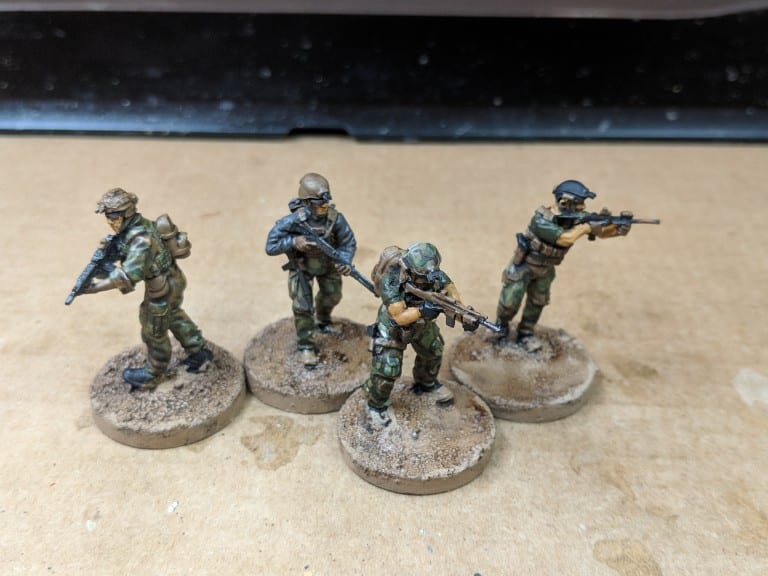
1. Basic Fireteam
Task: General Purpose – Provide a good mix of firepower at various ranges.
- Team Leader: Service Rifle
- Grenadier: Service Rifle + UGL
- Gunner: LMG
- Assistant: Service Rifle
Notes:
- A common variation is to swap out the Service rifle on number 4 for a DMR or sniper rifle. This reduces your number of shots but does help you when engaging an enemy at long range.
- This is a core building block – applying minor tweaks (such as those listed in the Basic Advice section) can massively improve the effectiveness of it
2. Assault Team
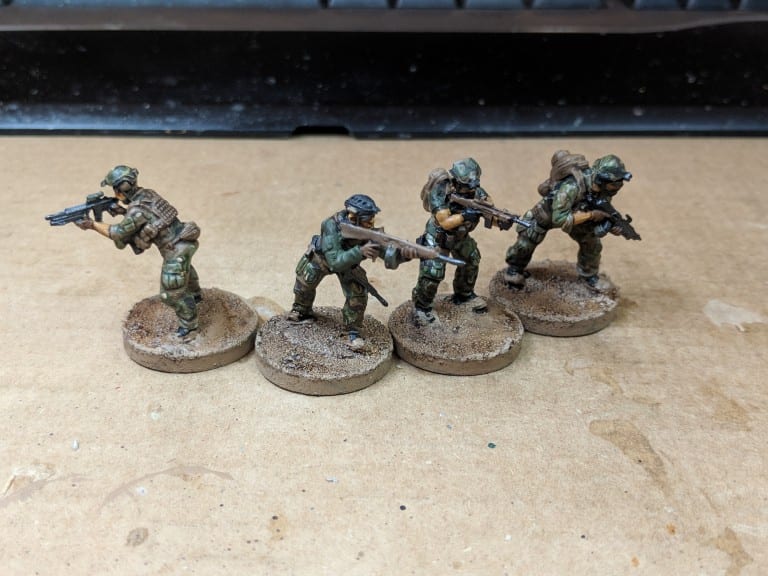
Task: Advancing and clearing a fixed position
- Team Leader: Service Rifle + UGL
- Pointman: Service Rifle + Combat Shotgun
- Breacher: Service Rifle + Breaching Gear
- Gunner: LMG
Notes:
- The idea with this is a Basic Fireteam but more focused on the “Manoeuvre” part of the Fire and Manoeuvre Idea.
- Pair these guys with a Base of Fire Team – it’s less flexible than two of the Standard Fireteams but more effective at their chosen job.
- Close with the enemy to get to within RI1 and gain the most bonuses
- The Pointman and Breacher are perfect to work together when assaulting a position – one can perform the breach allowing the other to enter and clear using the advantage of the shotgun in the same turn.
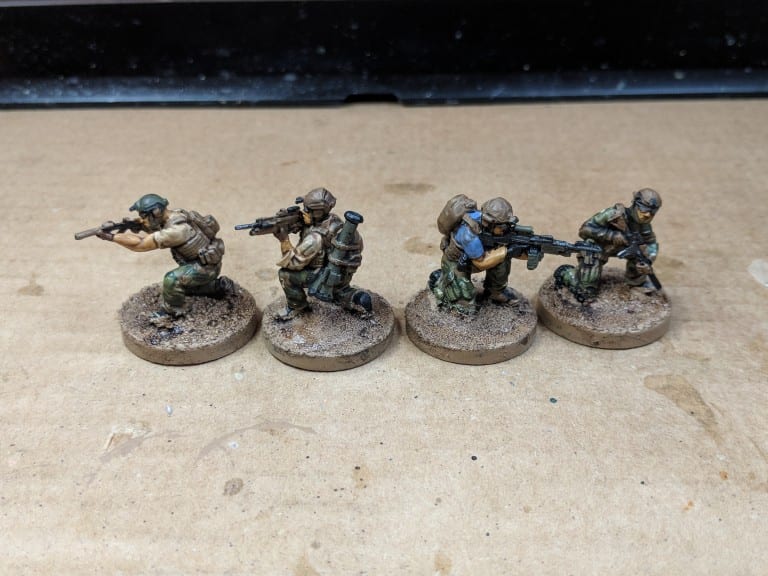
3. Base of Fire Team
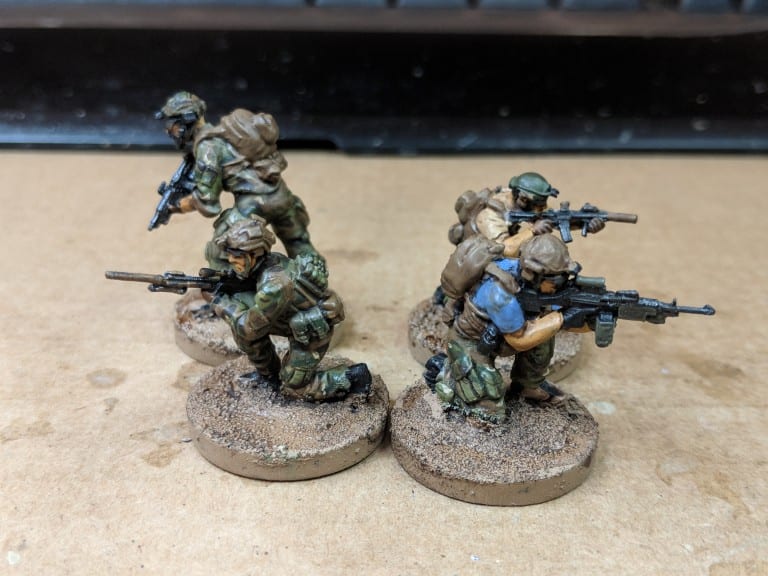
Task: Providing suppressing fire on a position/covering the advance of another team.
- Gunner: MMG
- Assistant: Service Rifle
- Marksman: DMR
- Gunner: LMG
Notes:
- The idea with this is a Basic Fireteam but more focused on the “Fire” part of the Fire and Manoeuvre Idea.
- If you hadn’t guessed, pair these guys with an Assault team. See the assault team for more details
- This team should find a good piece of cover with good line of sight across the place you intend to assault and then sit there
- The Gunner and their MMG is the main focus of this team. That needs to keep up and running, putting suppression on enemy forces moving against your assault team.
- The Assistant should be helping out the MMG gunner unless the enemy start to get too close to the Base of Fire team.
- While the Gunners spread the suppression around, the Marksman lets you focus in on specific characters such as enemy weapon teams.
- The LMG gunner’s main job is extra suppression but is also useful for close protection on your Base of Fireteam. Alternatively, this trooper’s gear could be enhanced with an explosive weapon if you want to add that capability to your force.
4. Scout Team
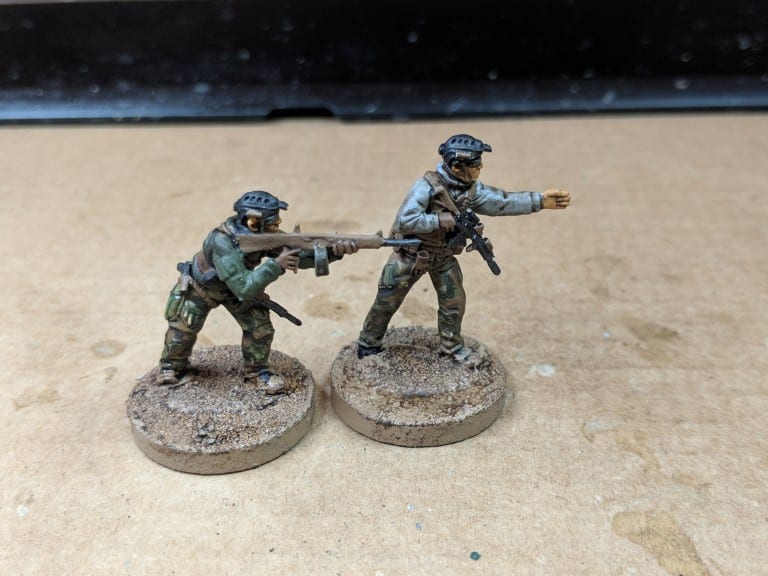
Task: Find and engage the enemy
- Lead Scout: Service Rifle
- Scout: Service Rifle and Combat Shotgun
Notes:
- The inspiration for the scouting pair comes from the American WW2 squad.
- Number 1 could alternatively equipped with a SMG alongside his service rifle for additional close quarters firepower.
- This team would do especially well if equipped with suppressors and subsonic ammo. The idea with this squad is to close with the enemy and so benefits from avoiding detection.
- Additionally, equipping this team with Ghille Suits would let them sniper stalk and reduce their chance of being detected even more
5. Command Team
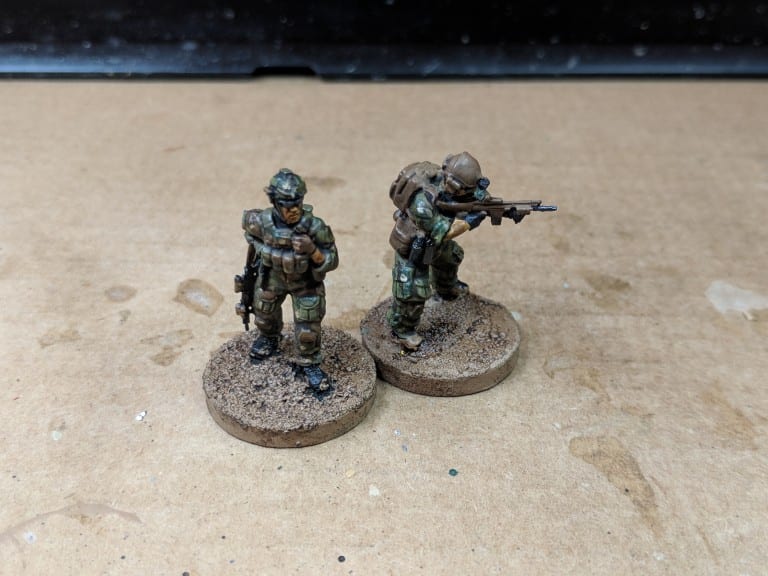
Task: Command and provide support to the other teams
- Squad Leader/Commander: Service Rifle
- Medic: Service Rifle and Trauma Kit (Optional)
Notes:
- Depending on your nationality and service branch, you might want to upgrade a team leader in one of your fireteams to be a squad leader rather than having a separate team.
- In addition to two characters listed here, you could add another squad leader to act as a Forward Air Controller for an OTAs you may have access to.
6. CQB Team
Task: Clearing hostile area at extremely close range.
- Pointman: SMG
- Rifleman: Carbine
- Breacher: Carbine + Combat Shotgun + breaching gear
- Gunner: Compact LMG
Notes:
- You’ll notice I explicitly mention carbines rather than Service Rifles. This is due to the Compact rule, something which gives you a real edge when inside range interval 1
- To extend the above point, combining Compact weapons with Red Dots and Lasers gives you a +3 bonus in total which engaging targets inside RI1. This is perfect when combined with Rapid Fire or Automatic weapons as it removes the modifier for multiple shots
- The Pointman and Breacher are designed to give you the edge in close quarters – in particular,
- The Rifleman and Gunner will provide some longer range firepower which
- For an additional edge, the Rifleman could be equipped with a Multi-Role dog. This is good for both detection and restraining enemy combatants. Also take a look at the various upgrade packages for your four legged friends
7. Anti-Tank team
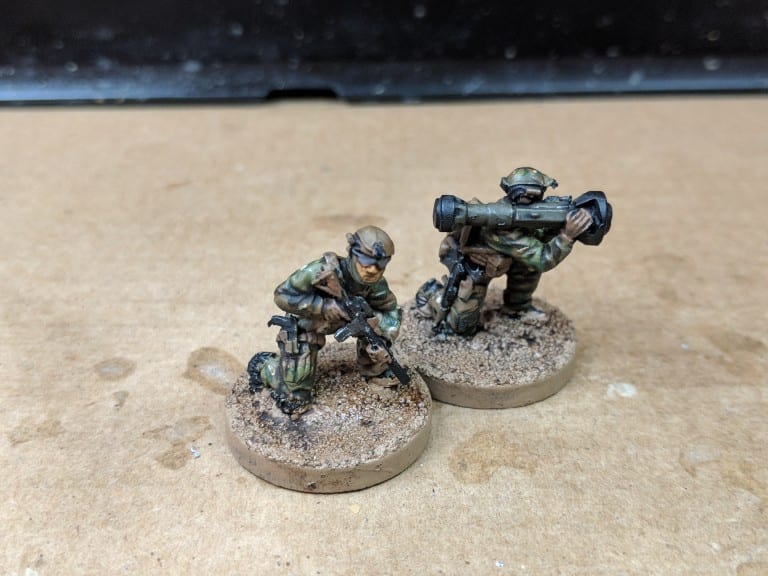
Task: Destruction of enemy armoured assets
- Gunner: Service Rifle and AT weapon
- Assistant: Service rifle
Notes:
- The AT weapon is generic – depending on your force and models it could be an RPG (with a variety of warheads), Light Anti-Tank weapon, Light Recoilless Rifle or a Guided Missile Launcher.
- The Assistant, like in some of the other teams is going to either be providing security for the team or (if the weapon is crew served) providing the backup to the anti-tank weapon. They are also required by the Guided Missile Launcher in order to carry it.
- The team has a lot of firepower but will need some
8. Sniper Team
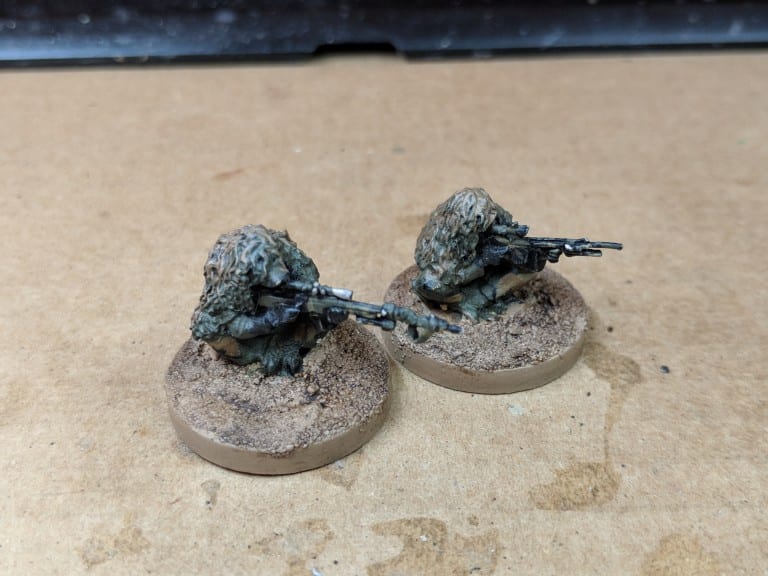
Task: Long range precision elimination
- Sniper: Sniper Rifle (Light, Medium, Anti-Material)
- Spotter: DMR or Service Rifle
Notes:
- Classic sniper team setup – one of the pair is the gun while the other is the eyes.
- A worthwhile upgrade for this pair is some Ghillie suits, letting your avoid detection and sniper stalk. It also gives you cover bonuses.
- If acting stealthily, suppressors are recommended for both. In addition, the spotter may want to consider subsonic ammo but the limitation to 2 range intervals of effectiveness may blunt the Sniper’s primary weapon. Alternatively, take a secondary such as a SMG.
- Unless massed firepower is needed, the spotter should be crew serving in order to give your sniper the best chance of kill their target.
9. Heavy Weapon Team
Sadly I’m missing a photo for my heavy weapons – all of them belonging to the conventional forces are still in the painting queue
Task: Fire Support from a heavy platform
- Commander: Service Rifle
- Gunner: Service Rifle and Heavy Weapon
- Loader: Service Rifle
Notes:
- One of simplest teams – long ranged firepower is your only mission
- The heavy weapon could be any from the list but the most common will be either the Heavy Machine Gun, the Automatic Grenade Launcher or the Guided Missile Launcher.
- Two men are needed to move a heavy weapon so including a third (or alternatively adding a few more) gives you a larger security element.
- In an ideal world, a heavy weapon team should begin the game in a piece of cover with excellent sight lines. If that isn’t an option, your first priority should be to get this team into a position where it can cover the advance of the rest of your force. Until it’s setup, this team is not doing it’s job
With that we end Part 1 of Building a Force. The next few weeks are already planned out so there will not be any additional parts until the new year. However, once we are back I’ll be hammering through the other sections:
- Task Orientated Teams – Building the Core of a National Force
- Mobility and Firepower – Vehicles for a National Force
- “TBA” – Building The Core of an Irregular Forces
- “TBA” – Vehicles for Irregular Forces
- “TBA” – OTAs
- Problem to Solution – Assembling your force ready for the mission