So I have a slight embarrassing confession to make – before last weekend, I hadn’t actually managed to get Chain of Command 2 (released in May last year) onto the board to play despite the fact I was genuinely excited for. The reason for this is pretty simple – last year was a poor one for getting games on the table, especially games that didn’t have “Necromunda” or “Old World” in the name. However, with the Christmas season upon us, and a hankering for some WW2 action amongst our group, we decided to get a game in.
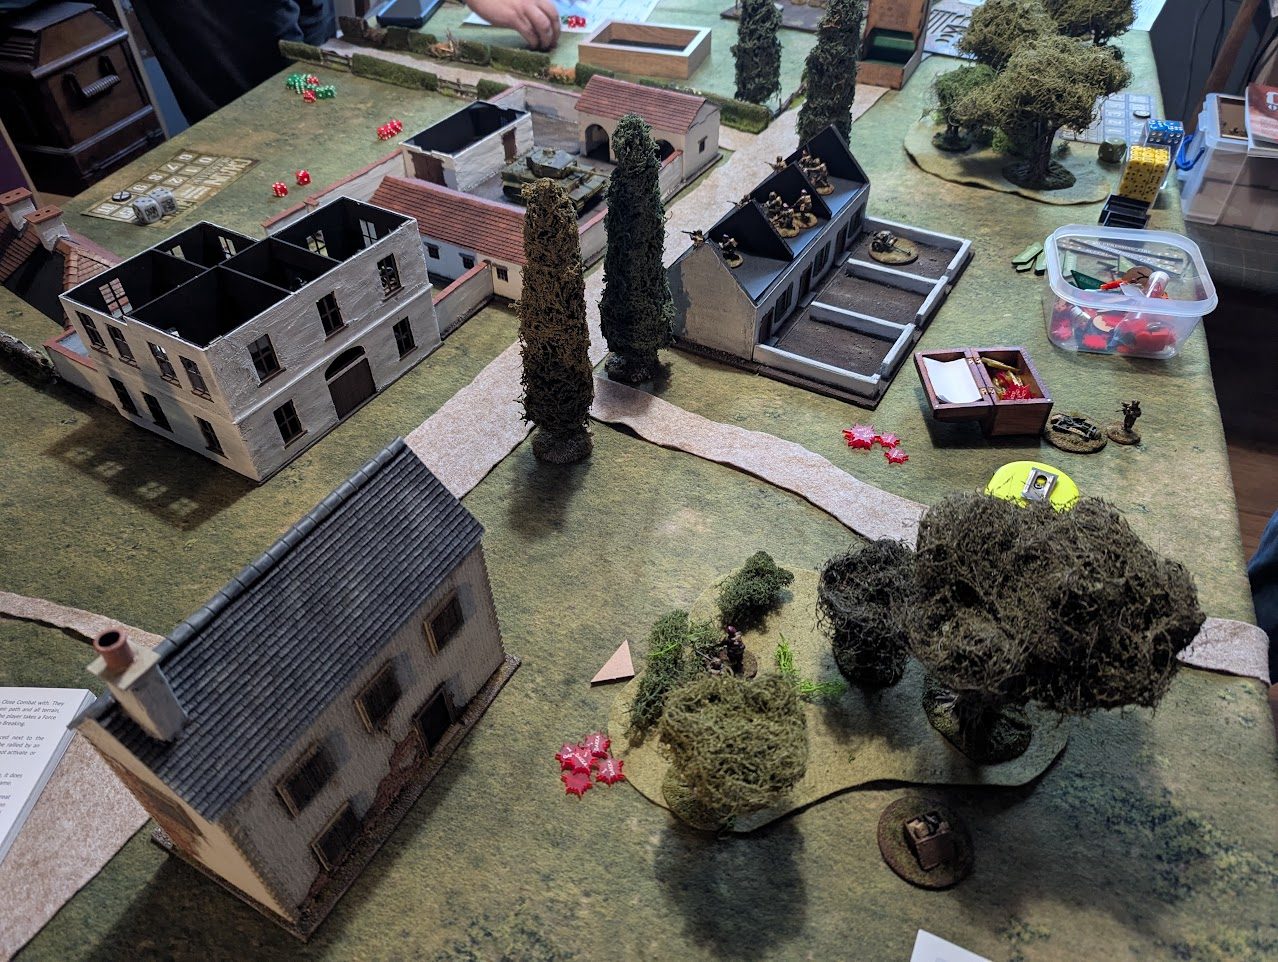
As this was a learning game, I volunteered to be the rulebook reader/quick reference man while the two Regular Opponents would provide and, in turn, command the forces on the field. On the Allied side, the Dastardly Regular Opponent’s British Paras would be on the offensive, the return of his very nicely painted Warlord Games figures. Across the table, the defenders would be the Creative Regular Opponent’s Panzer Grenadiers, a platoon made from the new Victrix boxes and painted up in less than a week thanks to the wonders of Contrast. The terrain was all done by The Dastardly Regular Opponent, with his farm complex and surrounding buildings something he has been working on in between his various other projects. Frankly, I think he’s done an excellent job, although he is already planning the finishing touches (such as vegetable patches for the back of houses). It was also impressive to be presented with when I turned up – something that has been nice with these home games is that we’ve been slowly building up a terrain collection that is starting to look pretty damn good (although I do need to start work on upping my own game on this front).

The Dastardly Regular Opponent’s helper assisted in rolling off how the assault would go, and in this case, we ended up with a playing across the short side of the board, allowing for an assault along a wide front. The good news was that the British wouldn’t get stuck in the open fields at either end, but the bad news was that instead, they would just be within close range of almost every weapon in the German arsenal.
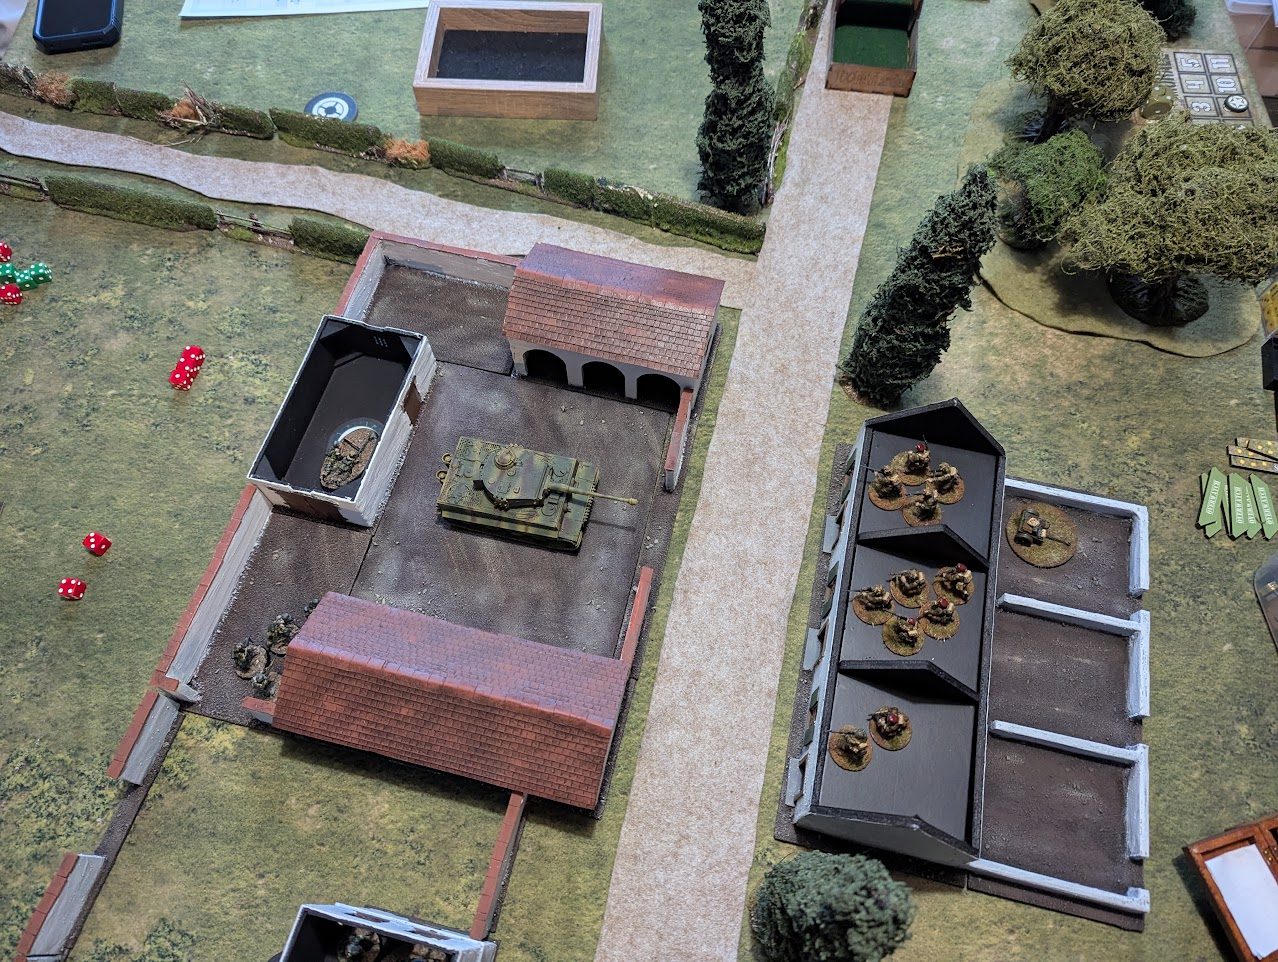
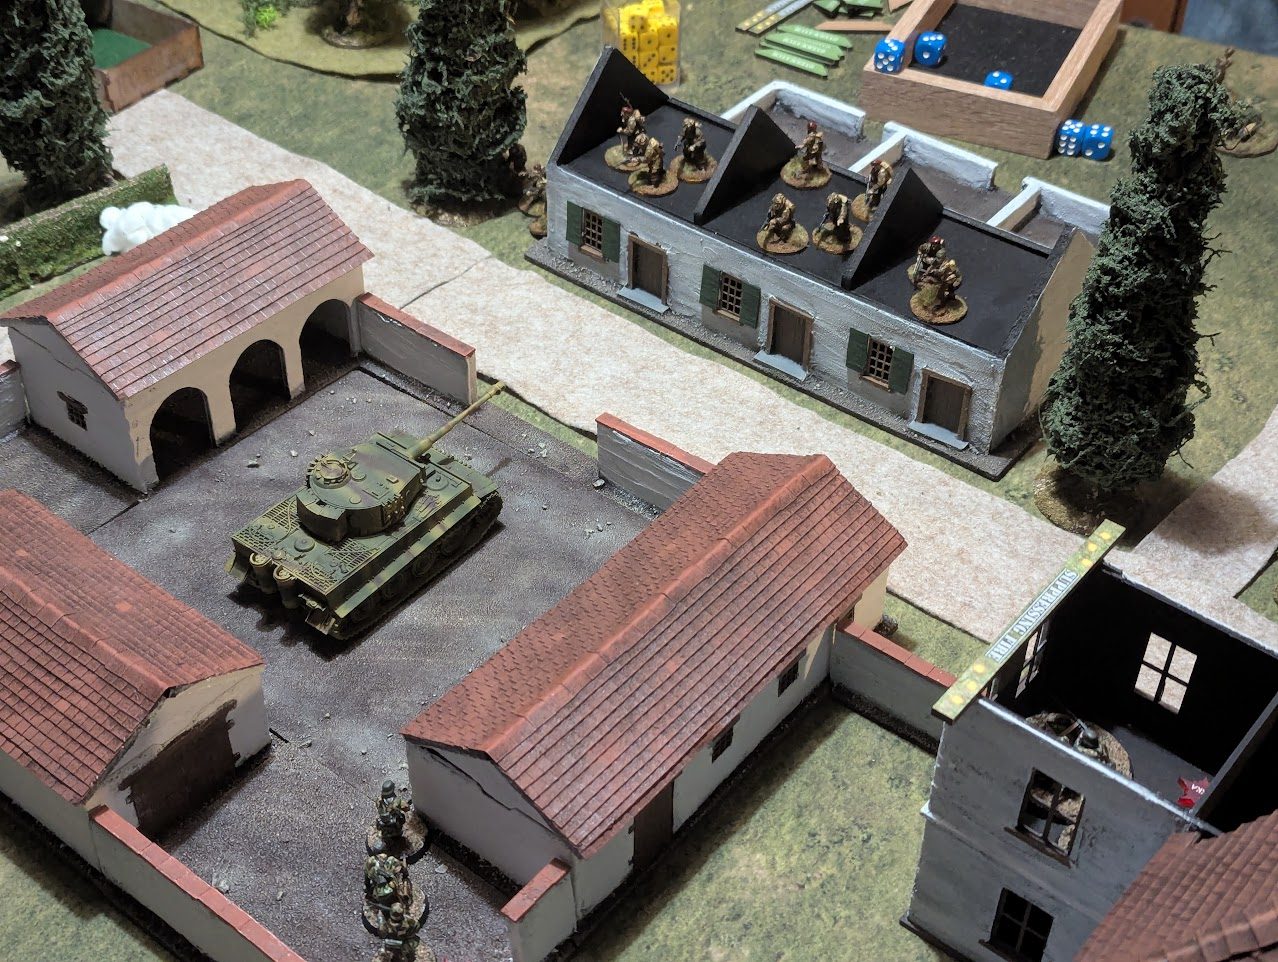
The two objectives would end up being the back bedroom of the large house (obviously, the war room of Herr General) and the workshop behind the (thankfully) inactive Tiger tank. The patrol phase was a pretty brutal affair, the sides locking in relatively quickly with the British centred on the row houses while the Germans were around the main farm complex. Both sides did have an outlier to assist in flexibility – the Paras managed to get in close at the woods at the bottom of the map, while the Germans seemed to have been camping out in the large field at the top. However, thanks to equal force morale at the start of the game, the attacking British would be able to make the first move.
Support-wise, the British managed to take advantage of the new toys in Chain of Command V2. The British Airborne has lost the integrated PIAT and 2-inch mortar in their list but has gained the ability to upgrade their sections in two ways (although only one section per platoon can get each upgrade) – this includes a marksman that increases the section’s chance of injuring leaders, and pulling a Bren gun from the arms room to create a double MG section. The Dastardly Regular Opponent decided to build a Weapons Section, combining both upgrades into a single section (obviously that Corporal is very popular or veteran enough to know what works). His other three options were all about keeping the assault going: an Adjutant to keep the reserves coming with both Senior Leaders on the field, an additional Para section to take over and keep the pressure up, and a set of WP Grenades (either for its intended purpose of popping smoke or for burning its way through the structures thanks to a pretty nasty set of rules).
Across the board, the German support was a classic combination for the limited points they had – a second Senior Leader (useful as most German platoons only come with a single one) and an entrenched MG42 on a tripod.
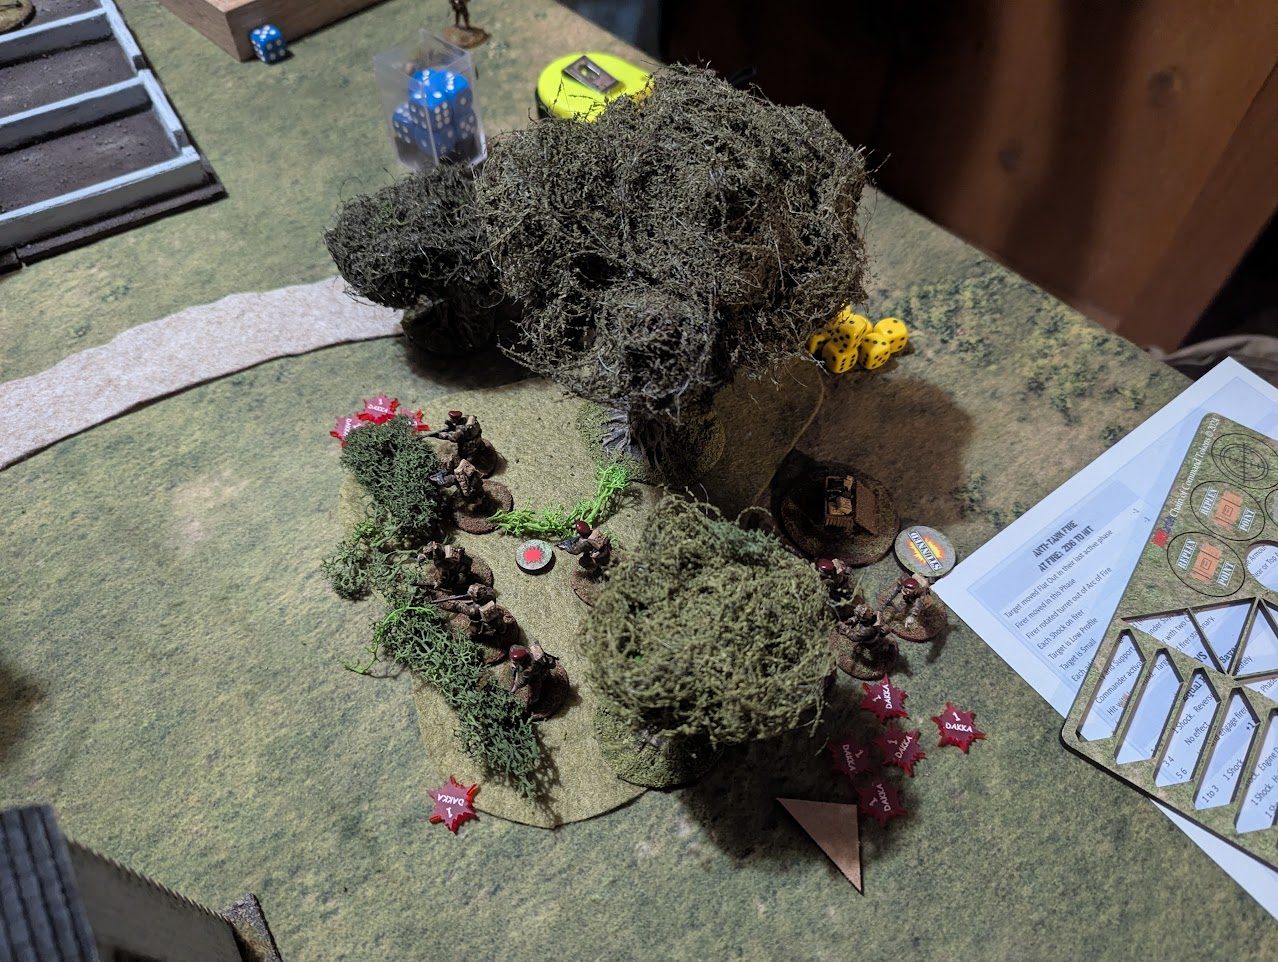
The opening of the game was incredibly brutal. While the British support section and sniper setup in the windows of the attic overlooking the farmyard (and praying the Tiger didn’t suddenly gun its engine), the first section deployed into the copse by the old house. The problem was that before they could actually get moving, and despite sitting tactically among the trees, the tripod-mounted MG42 in the first-floor bedroom opened up, helped out by the German Senior Leader and the Maschinengewehr dropping Storm of Steel like it was going out of fashion. To make things even worse, the German player received a grand total of four consecutive phases of activation, the multiple 6s rolled by the German player causing great concern to the British. Unable to activate or reposition and already hugging the ground, the Paras found themselves whittled down, made worse by the Junior Leader being stunned and rendered incapable of command just as a new turn started. Truly, the nightmare of any soldier – under a machine gun’s fire, leadership unable to command, pinned in place.
(The good side of the turn ending was that the objective in the building was discarded as per the rules for the mission, saving a close-quarters bloodbath through the structure.)
One reason why the Paras were unable to reposition was the use of the new Command points to React Fire to the Germans seeking to move into position around the Tiger. As you might expect, two Bren guns are nothing to sniff at, and the burst managed to put suppression and kills down on the Panzer Grenadiers moving into position. The smaller of the teams in the exposed unit would eventually be taken out while trying to rake the attic with MG fire chipping away at German morale.
At this point, we got into a little bit of a two-way firing range across the board. With the Paras in the woods being shot up to the point of being combat ineffective, the MG shifted fire to put suppressing fire down on the Paras in the attic. However, this fire wasn’t continually maintained, leading to a little bit of back and forth as the Brits attempted to gain fire superiority (something that’s hard to do against belt feds). However, the position did manage to keep the fire on the Germans in the yard, slowly whittling them down as they popped in and out of cover.
A double phase for the Brits allowed for a pile of admin work and deployments to prepare the Paras for an actual assault, rather than getting shot up. The two other sections entered the board, with one forming up alongside the Weapons Section on edge of the building while the other… entered into the copse. In what must be a pretty grim scene, the newly arrived Paras would see their comrades reposition to the back of the woods (thanks Command Points) before taking up position among the positions their friends had just occupied. Unfortunately, they were about to suffer a similar fate, as the MG directed by the German Senior Leader opened up and started dropping bodies, as well as suppression. This copse was obviously a bad place to be, but occupying it was causing the German player to hold a section back, just in case an assault came from that direction.
The other section also found itself mauled by the machine gun, its Bren team reduced to a single soldier within moments of deploying. However, the focus of the MG on firing for effect (rather than suppression) meant that the weapons section in the attic could whittle the defending Germans inside the yard down to just the Junior Leader, wounded from a Bren gun hit and now alone.
The Junior Leader rearranged his damaged section, bringing the lone Bren gunner into the rifle team. Joined by the Platoon Leader, we then saw some of the most balls-to-the-wall action I’ve seen in Chain of Command.
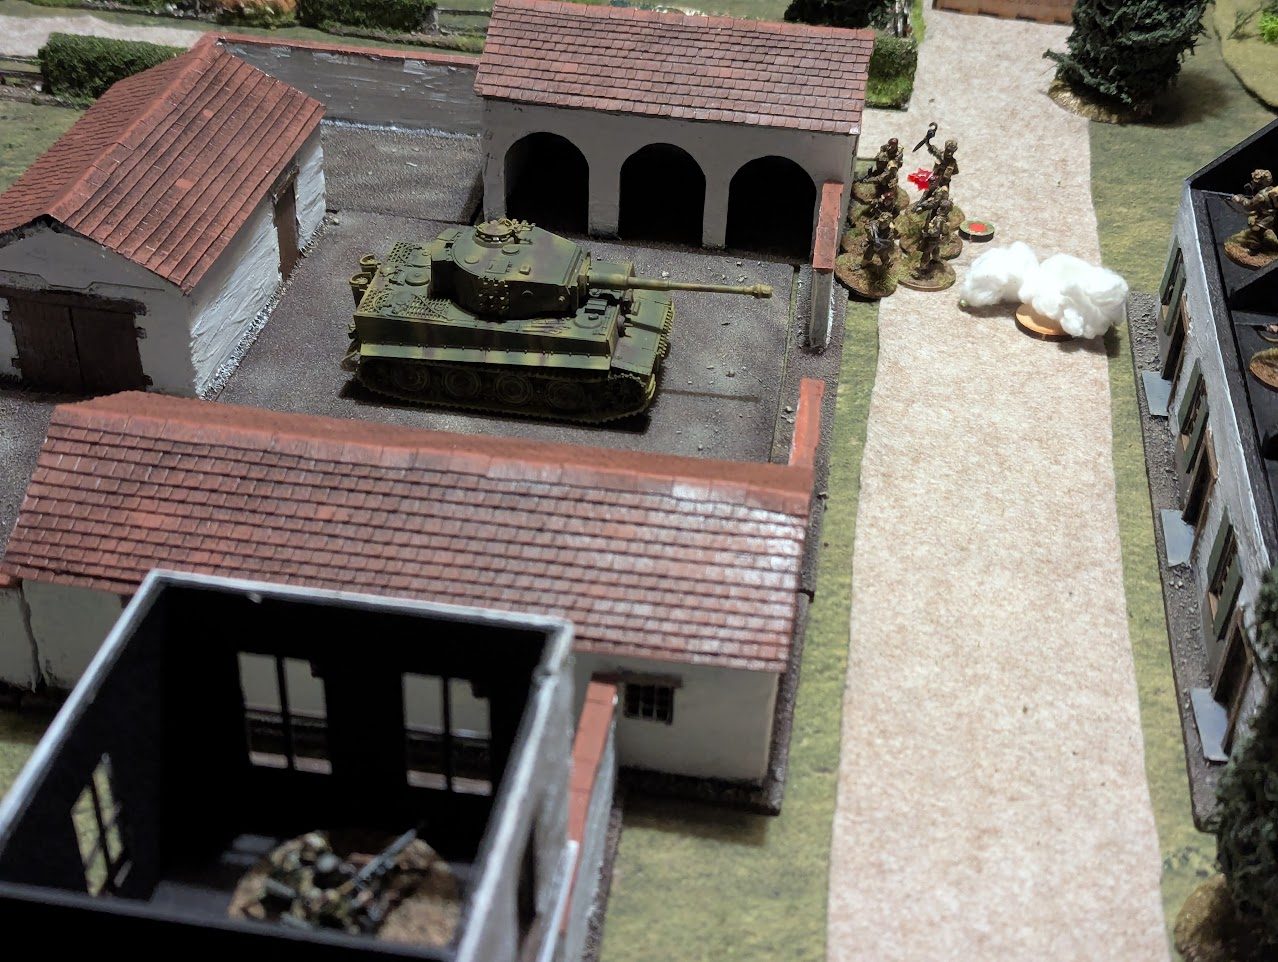
The pop of a white phosphorus grenade put up enough of a smoke cloud to let this assault team (with two Sten guns, a Bren and two leaders packed full of initiatives) push across the street. MG fire ripped out, but the only hit was to the Junior Leader. Seeing as it caused no Force Morale change, I can only imagine the Platoon Commander kept him upright with a stiff upper lip response before getting into the defilade caused by the roof of the yard buildings. After clearing suppression and with covering fire from the pair of Bren guns above them, the assault team was then given an order that was specifically to “take up position in the yard”. Now, anyone who knows Too Fat Lardies movement will understand the specificity of wording when it comes to movement – many an infantry command has declared they are advancing, rolled up their movement, overshot the nice solid wall and found themselves in the field beyond. In this case, a truly colossal amount of movement allowed the assault team to round the corner, get into cover behind the Tiger, keep going across the small gap behind it and then burst through the door into the objective (and presumably a shed full of terrified mechanics, surprised tank crew and various spare parts). Not even German React Fire could halt them, putting the assault team on the objective and sat in a defensible position.
Now, at this point, we had (for the first time in my Chain of Command career) actually had a unit fulfilling the objective of the mission (as opposed to simply giving the enemy a hard enough kicking that they leave). This also meant that, if the Brits gained one more Command point, they could begin the Final Countdown. The Germans had actually been getting a kicking on the morale side, with injured leaders being the biggest blows (thanks mostly to the sniper and the Weapons Section hammering anything they could see with Concentrated Fire and its Storm of Steel) and had now reached two on the force morale chart. This meant that once the Brits started the final Countdown by spending the Command Points, we’d have two phases before the game ended with an objective win. The German player saw this and decided to join in the shennighans. Using the German Handgranaten special rules with one of his Gruppe (accompanied by the surviving Junior Leader to provide SMG support), the group attacked the shed. A grenade landing short was a bad start, but then came the close combat dice.
The British ended up with such an overwhelming number of dice to roll in combat (16 to 3) thanks to their LMG, Stens and two leaders, that the Germans bottled the assault and broke – presumably the collection of pissed off Paras firing from the hip like it was a Commando comic made them realise getting into that barn was going to be a bad idea. This caused another Bad Things Happen roll that put the Germans to 0, ending the battle with a very bloody British victory.
This was truly one of our favourite games so far, and not the ending we expected a few phases in. The Dastardly Regular Opponent was even considering calling off the assault when it bogged down (planning to come back once the Shermans turned up). However, in the end, it was incredibly exciting to play and shows how the right moves at the right time can carry the day. The creation of an assault section in the final few phases was something out of the history books, a senior leader pulling a shattered section together to do something heroic. The downside of this, especially if we turned this into the first mission of a campaign, is that this force of Paras had been absolutely shattered – 19 figures across the four sections removed as casualties means it’s above the values that the Post Game Casualties table in At The Sharp End covers and while the CO would be happy with the progress, the Men’s Opinion is already in the toilet.
The Germans also had some great moments – the MG was perfectly positioned and accounted for the bulk of casualties in the game, helped by a Senior Leader literally sat behind hit pointing out targets until he took a shot from the Para’s sniper team that, put politely, reduced his effectiveness. Additionally, with a few more phases, the Gruppe in the field would have managed to vault the wall and joined in the fray which would have brought an almost intact unit into an area filled with the under-strength. It was also impressive how well they managed to lock down sectors of the map, really pushing the British to expend men and smoke grenades to get the job done.
The best sign was what happened afterwards – as we packed up, we discussed how things could have gone differently. Maybe the Paras should have brought a Sherman, using it’s HE and smokes to cover the advance, at the loss of the extra section. That would have forced the German player back a little bit, although the pile of Panzerfausts would have given the tank crew pause for thought. We left the game day already thinking about the next one, as well as possibilities for our big game in February – turns out someone else (me) might need to paint up some Red Devils for an operation.
How about the rules? Well, V2 of Chain of Command isn’t a complete revolution, and frankly, I wouldn’t want it to be – Chain of Command was already in a pretty good place. It’s great to see a lot of the changes from 12 years of supplements making its way back into the main rules (such as the Red Dice, the Leader variants and limited ammo rules), while the simplification and removal of major sticking blocks (Elite/Green ratings have much more focused effects than lots of little small ones, while mortar barages are far less a “fuck you, I win” button) means that a lot of the house rules people have come up with are gone. Command Points are also a fantastic addition, giving you more to do during your enemy’s phases, while being easy enough to gain that you use them, while also not being an infinite resource. Storm of Steel was another rule that we really liked – it’s basically adding the concept of exploding 6s when rolling to hit, usually linked to special rules such as the National Characteristics. The British player especially found himself using it, helping to turn the Bren guns into more of a damage dealer.
I also like how the force lists have been changed up – Panzer Grenadiers are still a nightmare with two MGs per Gruppe but they now don’t also have a pile of rifles chipping in, while the Paras being able to get more machine guns and removing the odd additional sniper in Section 3 (as well dropping them back to Regular rather than Elite) makes them feel like the more aggressive alternative to the regular Infantry. The book is also far easier to use, with a clear index at the back and a layout that makes finding specific rules far quicker.
You can expect to see plenty more Chain of Command V2 over the next year as all three of us have things planned for it. It’s also a chance for me to finish off some of my other projects, as well as giving my Winter Brits (who I truly love) some Germans to fight – the Volksgrenadier list seems especially interesting…


Leave a Reply