Last month saw Vapnartak and the first run of Operation Dragon’s Hoard for 2018. As you can see from my last post, there were one or two things I wanted to tweak after that run. Originally the plan was to spend the rest of February prepping the game ready for its run at Hammerhead and then have a full day giving a different crowd a chance to play it.
Well that didn’t happen. So instead, here is the update on what I managed to tweak coming into March.
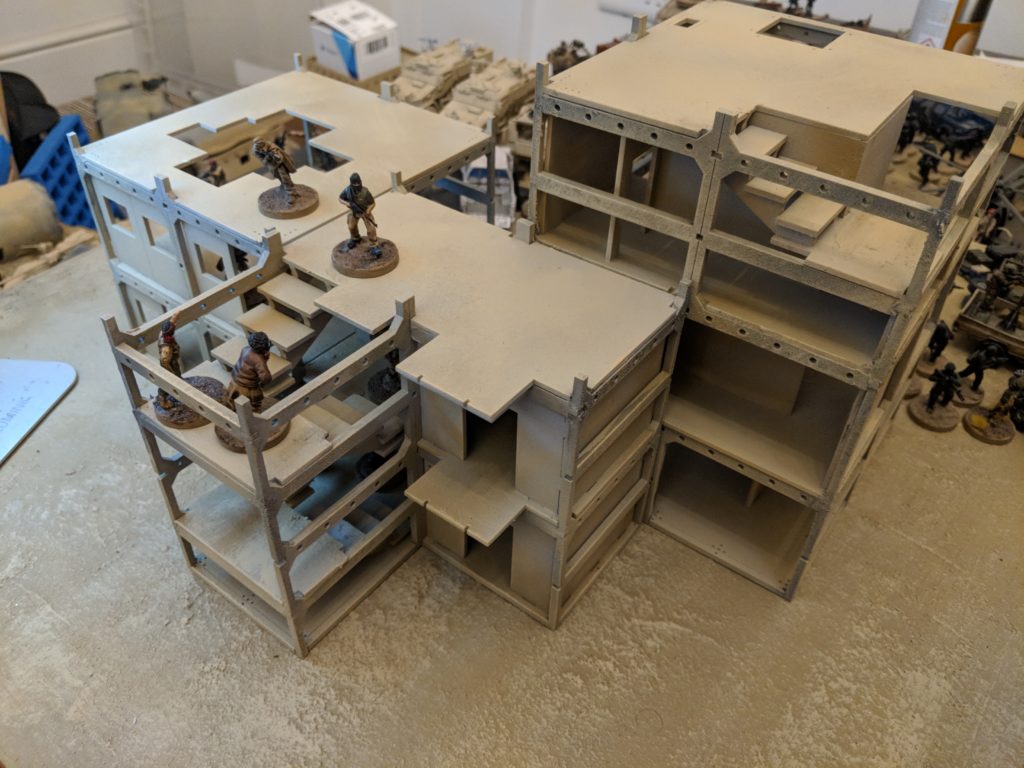
You’ve already seen most of the detail on these buildings in my impressions piece. As much as I like the adobes, they are a little bit generic. These new building should help to give the OPFOR a bonus by giving them a height advantage. To fit the buildings in to the setting, I shifted the location slightly from random village in the desert to the outskirts of an abandoned oil facility. Much like the rest of the board, there was a lot of tan spray paint applied to give it the “dusted in constant sandstorm” look.
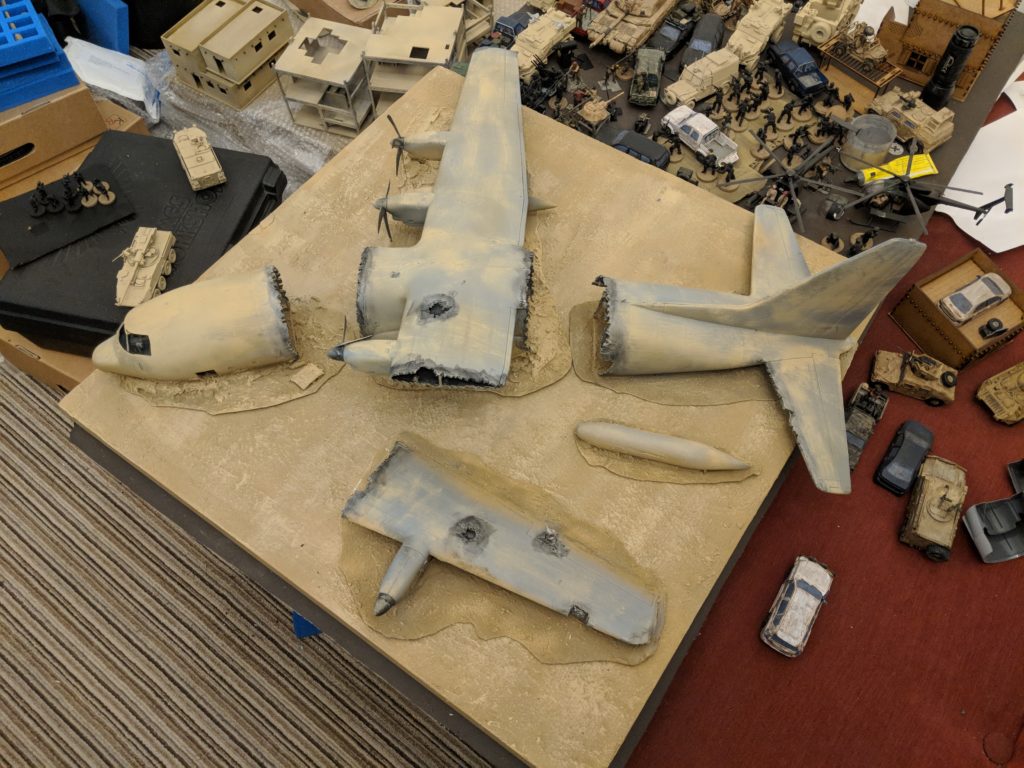
The bigger change was working on the plane. Up until this point, the only structural change I had made to it was the initial cuts to break it into five pieces (main body, nose, tail, wing, fuel tank). This was effective for gameplay purposes but it did give it the look of having just applied a hacksaw to it rather than ripped apart in flight. I’ll admit, battle damage is something that I always worry about – from my airfix days, it can be quite easy to go over the top and ruin it. Seeing as this had already been an expensive process already, the idea of having to redo the plane didn’t appeal. So, the plane was to go minimal – show off the impressions of lots of damage without completely shredding the plane.
Before applying dremel to plane, the first task was roughly working out the planned destruction I was going to cause. The background to the mission was that the plane went down in a storm. However, I decided to tweak it to make the downed plane a little more interesting. The new idea was to have it go down to a burst of cannon first stitching its way along the wing (possibly from the ZPU I have sat on my desk). The action plan was to rough up the broken edges of the plane with semi-random cuts, rough up the wing tips, expand the break on the wing to include a shell hole and then add additional damage to the right wing and right tail.
This was my first time using the dremel so took me a little while to get 100% comfortable with it, especially getting used to the safety concerns (always wear eye pro) and making sure not to run it late into the evening. However, it did make the job ridiculously easy. I managed to get all the cutting done really quickly. I would definitely recommend picking up a dremel for hobby projects – I’m going to be looking at some other cutting surfaces and tools to assist with it..
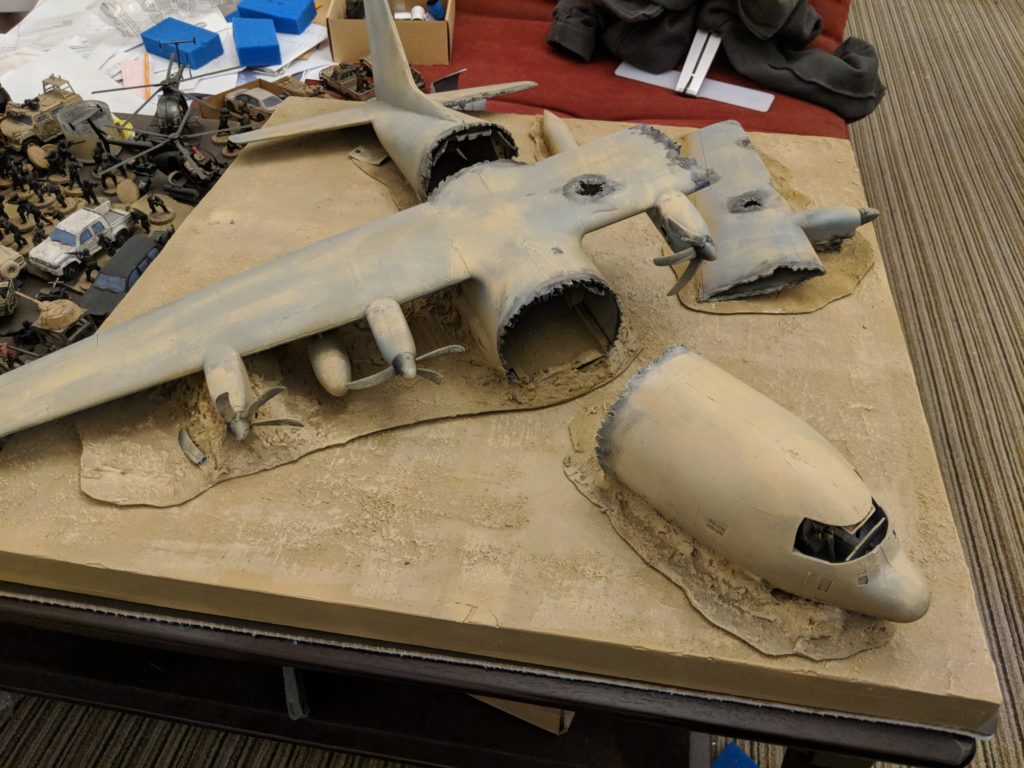
So key bits of cutting are:
- Rough cuts at various angles along the hacksaw cuts – This was freehanded with only a limited amount of planning to give a semi-random look to it.
- Deeper cuts on the wing tips and right hand tail plane – Designed to show ground damage and debris
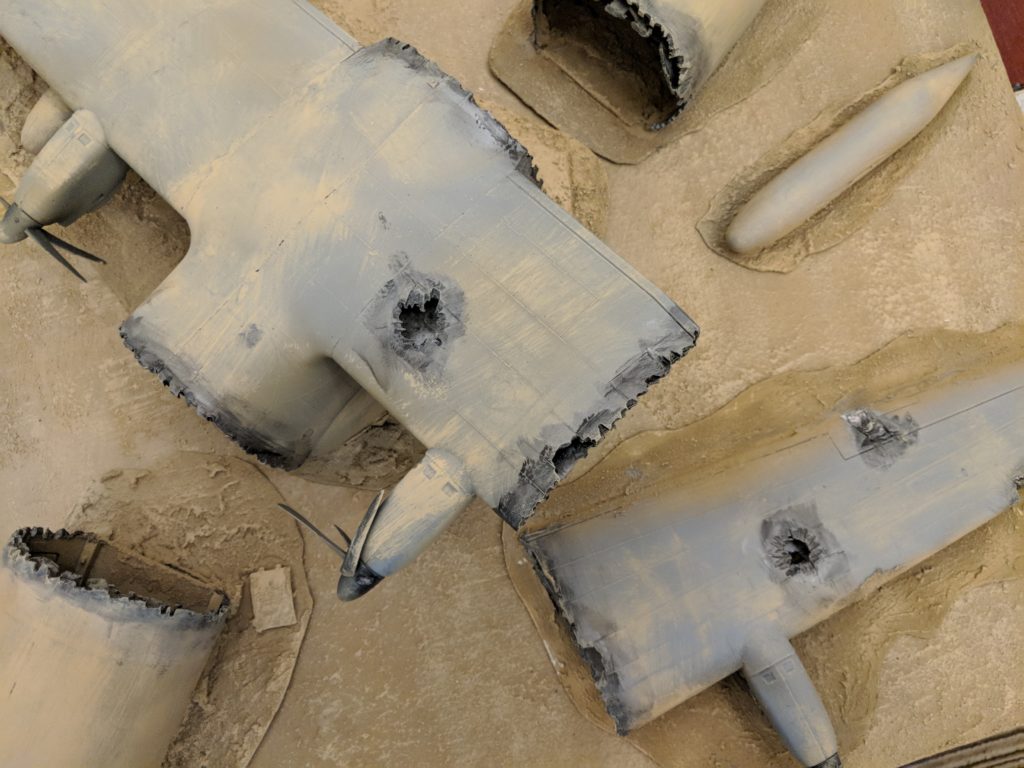
- Expanding damage on the wing break – So that it tied into the new story, I created an entry and exit point of an AA shell.
- Additional damage – I took a chunks out of the broken wing to show additional damage. Some of this gap was then filled in with tin foil to show crumpled metal rather than just a void.
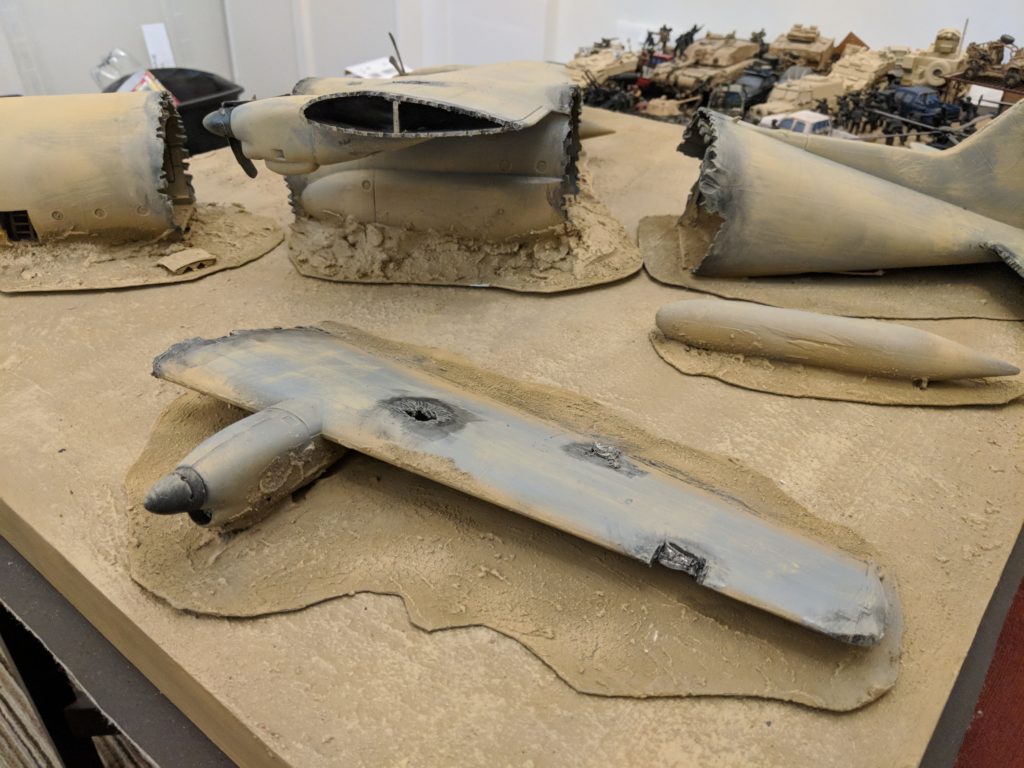
- Shell holes – to add detail, I sunk a drill bit in a straight line through various points around the right wing. I then extended the exit hole for dramatic by putting the dremel in and then cutting out slots in a radial pattern to give the impression of an explosion. The cutting left some unevenly sized bits of plastic, giving the impression shredded metal and broken structural elements.
Once the cutting was done, it was painting time. Two different metallic paints were roughly applied, in slightly different quantities. The second coat was applied relatively watered down and then dabbed away to give a little bit of a less defined edge to it. To finish off, the usual drybrush of Iraqi Sand as my hobby sensei taught me.
Seeing as there is no show to recap, we’ll jump ahead to future plans. Although I’d be happy to run the game as-is, I think there are still a few tweaks to do to the plane. The big thing is building up the internal structure of the wings. This will be done in two parts. First up is adding new bulkheads of plasticard to prevent vision straight down the entire wing section. The next will be adding plasticard sections into the shell holes, giving the impression of bracing structs. I’ll also be adding some thin wire to represent the cabling. I’m also planning to do something to add more junk to the cargo bay. There will also be another round of painting, with the aim to neaten up the blast marks as well as adding some oil smears and other effects. Finally, some general maintenance to fix up any chipped paint and make sure it looks the best it can be.
Next update will be after Hammerhead. Expect some minor tweaks before it but honestly, I’m pretty happy with how the board is going to look. Once Hammerhead has been run, I think I can call this demo game a success.
…. and then start planning the next one with a year and a bit to do it in.


Leave a Reply