
The last time I talked about my BPRE 28mm box, I made the comment “I’m really looking forward to getting this painted up. Shouldn’t take me very long” or words to that effect.
Well, 3 months later I actually realised that I suddenly had a week to paint up the remaining Shurta, all the Hongbin operators and even the Scorch operators in order to take the fight to my Former Housemate (and more importantly get him into BPRE 28mm). That meant it was time to break out the paints and get to work.
This article has a video version avaliable over on Youtube – if you would prefer to watch this article rather than reading through it!
Painting Notes
Something to mention before going into my paint schemes is that I have a particular way of painting. No matter the scheme, I work up from a black undercoat – on the open areas, it’s easy to spot pieces I’ve missed while if there are small spots on the underside that I fail to paint over, it doesn’t ruin the overall effect when it finally hits the table. After doing the base colours (usually in a particular order before doing a final check at the end to touch up), I’ll then hit the entire model with GW’s Agrax Earthshade. This ties the colours together, flattening down the edges of the different parts of the model, adding some shadows in the bargain as well; It really is “skill in a bottle”. However, while the wash handles the depth, using a makeup brush to apply the base colours and a drybrush of Iraqi as the final step helps to pick out the details. This style is very much that of someone who just wants to get the collection painted – it’s relatively quick but it does provide a good final look and I’m pretty happy with how the figures from it look.

There are also some other common elements on all the models in the set. For a long time, my method of painting black was to let the basecoat do the work and then drybrush basalt grey over the top. Now however, I’ve moved across to using a grey colour and then applying Black contrast over the top, giving me a black that actually has some depth to it. Yes, it does mean I spend my time repainting a black undercoat to be black again but I’m really happy with the end result. I also do something similar for my weapons – Leadblecher as a metallic colour to get the effect, and then a layer of black contrast over the top for the colour and dampen down the shine a little bit.
With that out of the way, let’s take a look at the specific figures in the box.
Shurta
The Shurta are the biggest number of models in the box and I might have made a mistake by starting off with them – too many veggies before the meal. As mentioned in the last article, there are four copies of each of the three different sculpts to play with, giving you all the bodies that the Aayari Guard need when your tactics involve cannon fodder. Despite being the unwashed horde, the figures are pretty iconic designs for BPRE, with plenty of nice touches that make them stand out from the usual Insurgents/Terrorist figures.
In terms of painting, the scheme is pretty simple. The Gorka suit, an all weather set of Jacket and Trousers, was really fun to paint up, looking distinctive with the two tone colours, the tan English Uniform for most of the material before painting over with Olive Drab on the reinforced sections. I had planned to do a selection of Gorkas but time constraints meant I ended up going with one pattern for everyone.
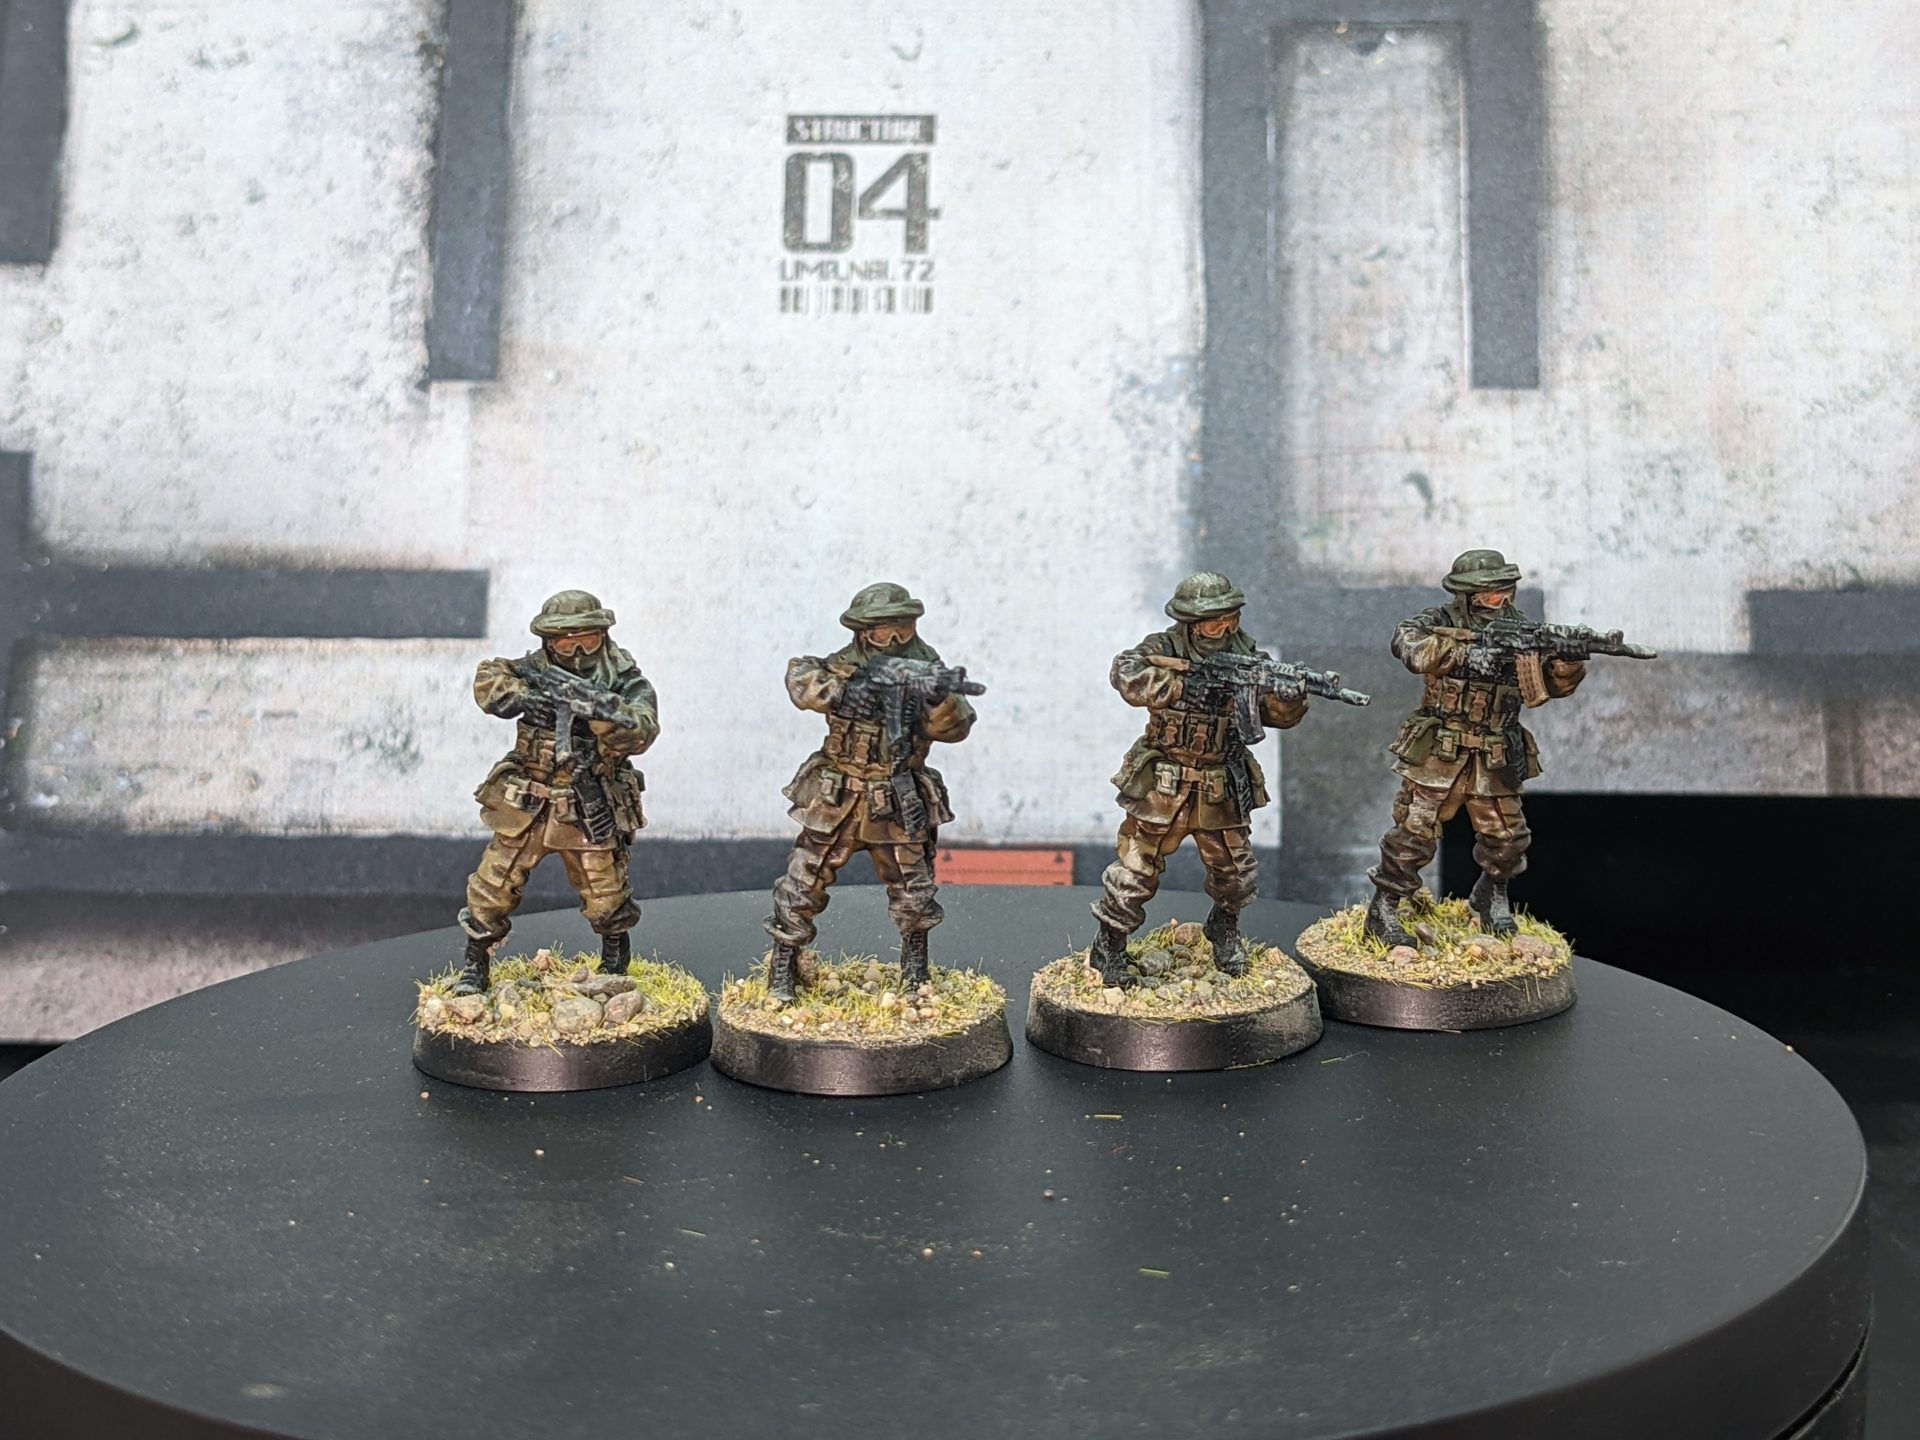
On top of that, I then painted the Webbing. Technically the webbing rig and the pouches should be the same colour but going for light webbing and green pouches does add some contrast to a pretty dark looking model. Similarly the flesh helps to bring out some interesting tone. In the past I have just used Vallejo’s Medium fleshtone which explains why a lot of my older figures have a little bit of a yellow look to them. I actually worked through a selection of ideas for how to paint flesh while going through these models but ended settling on Iraqi Sand with the Agrax wash over the top. This is because although it’s only a small area, there is lots of space for a wash to really settle into the cracks, giving it a flesh tone.
- Vallejo English Uniform/Vallejo Olive Drab – Gorka
- Vallejo Russian Uniform Green – Pouches
- Vallejo US Field Drab – webbing
- GW Eshin Grey + Contrast Black – Black elements (boots/radios)
- GW Leadbelcher + GW Contrast Black – Gunmetal
- Vallejo Iraqi sand + wash – Flesh
- GW Agrax Earthshade + drybrush Vallejo Iraqi sand
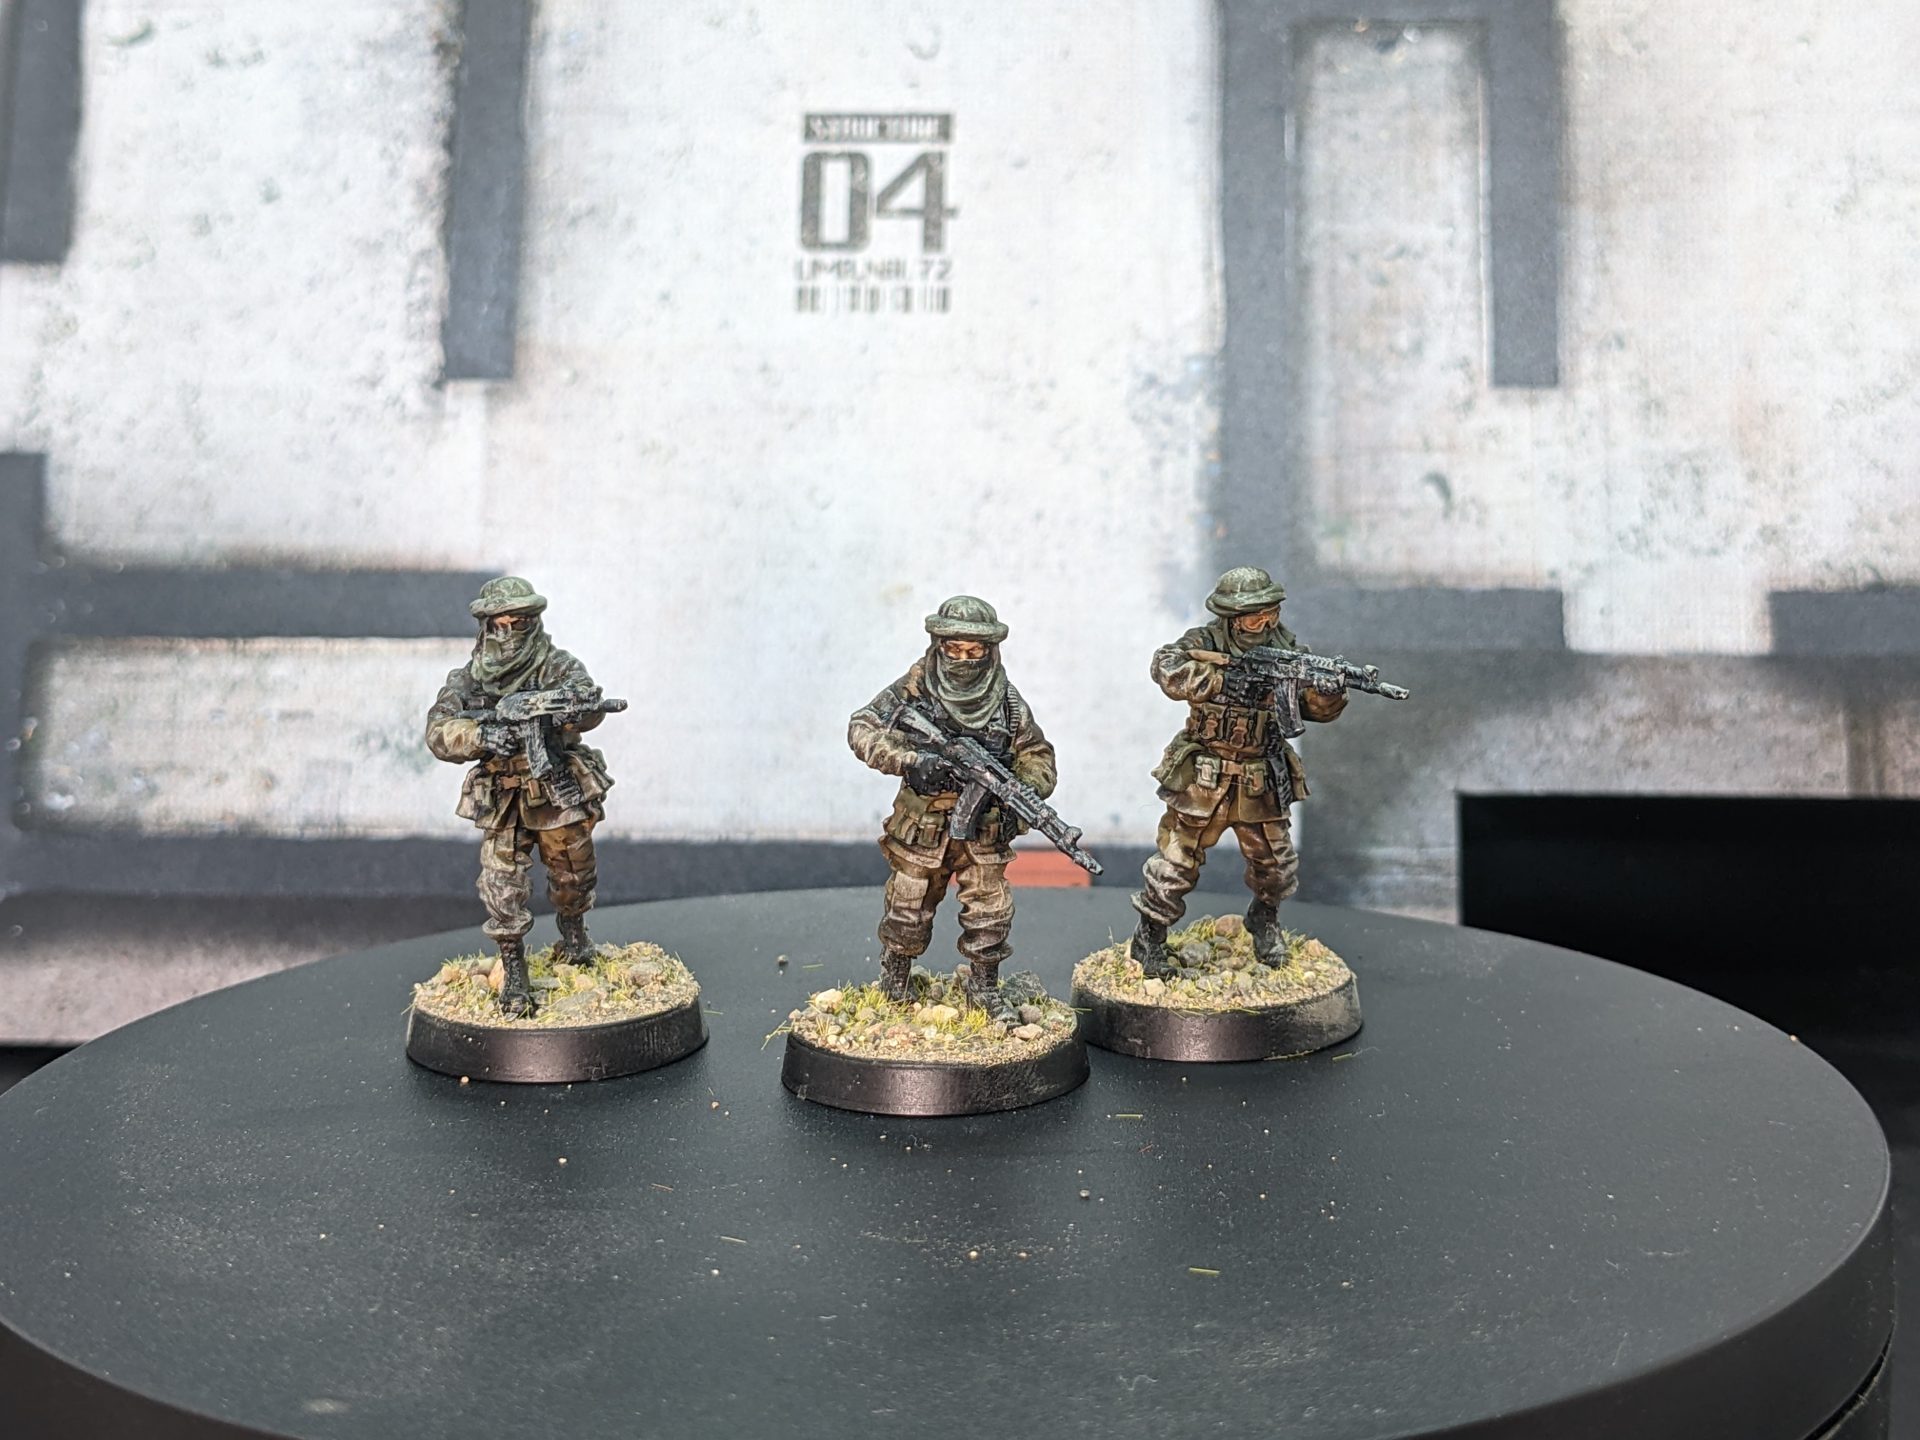
Mutasib
Of course, once the Shurta was painted, the next step was to get their squad leaders painted up. The Mutasib are wearing the same gear as their charges, except for gear such as the NVGs and attachments on their AKs. For this reason, the bulk of the paint list is going to look rather familar. The new elements however required some little tweaks. Both the balaclava and NVG set that pick these models out are black and I was definitely worried about painting the head of the model in the same colour; it’s the focus point of the model and you want it to stand out. For this reason, I used two different shades of grey under the constrast, the lighter Dawnstone head covering sitting under the NVGs. This then gives a touch more depth to the models, letting you pick up the different between the headstraps and what’s underneath.
Having finished the box, I have to say I REALLY like these models. It’s such a unique look that you only get from BPRE series, especially with using the skullcrusher mount for the NVGs rather than a helmet. You can see the progression in gear from the Shurta up to the Hongbin soldiers, with Mutasib in the middle as a stepping stone. They would probably work really well as a lighter advisor force if you were playing with the more usual Militia/Insurgent forces, something I might actually try.
- Vallejo English Uniform/Vallejo Olive Drab – Gorka
- Vallejo Russian Uniform Green – Pouches
- Vallejo US Field Drab – webbing
- GW Eshin Grey/GW Dawnstone + GW Contrast Black – Black elements (boots/radios)
- GW Leadbelcher + GW Contrast Black – Gunmetal
- Vallejo Iraqi sand + wash – Flesh
- GW Agrax Earthshade + drybrush Vallejo Iraqi sand
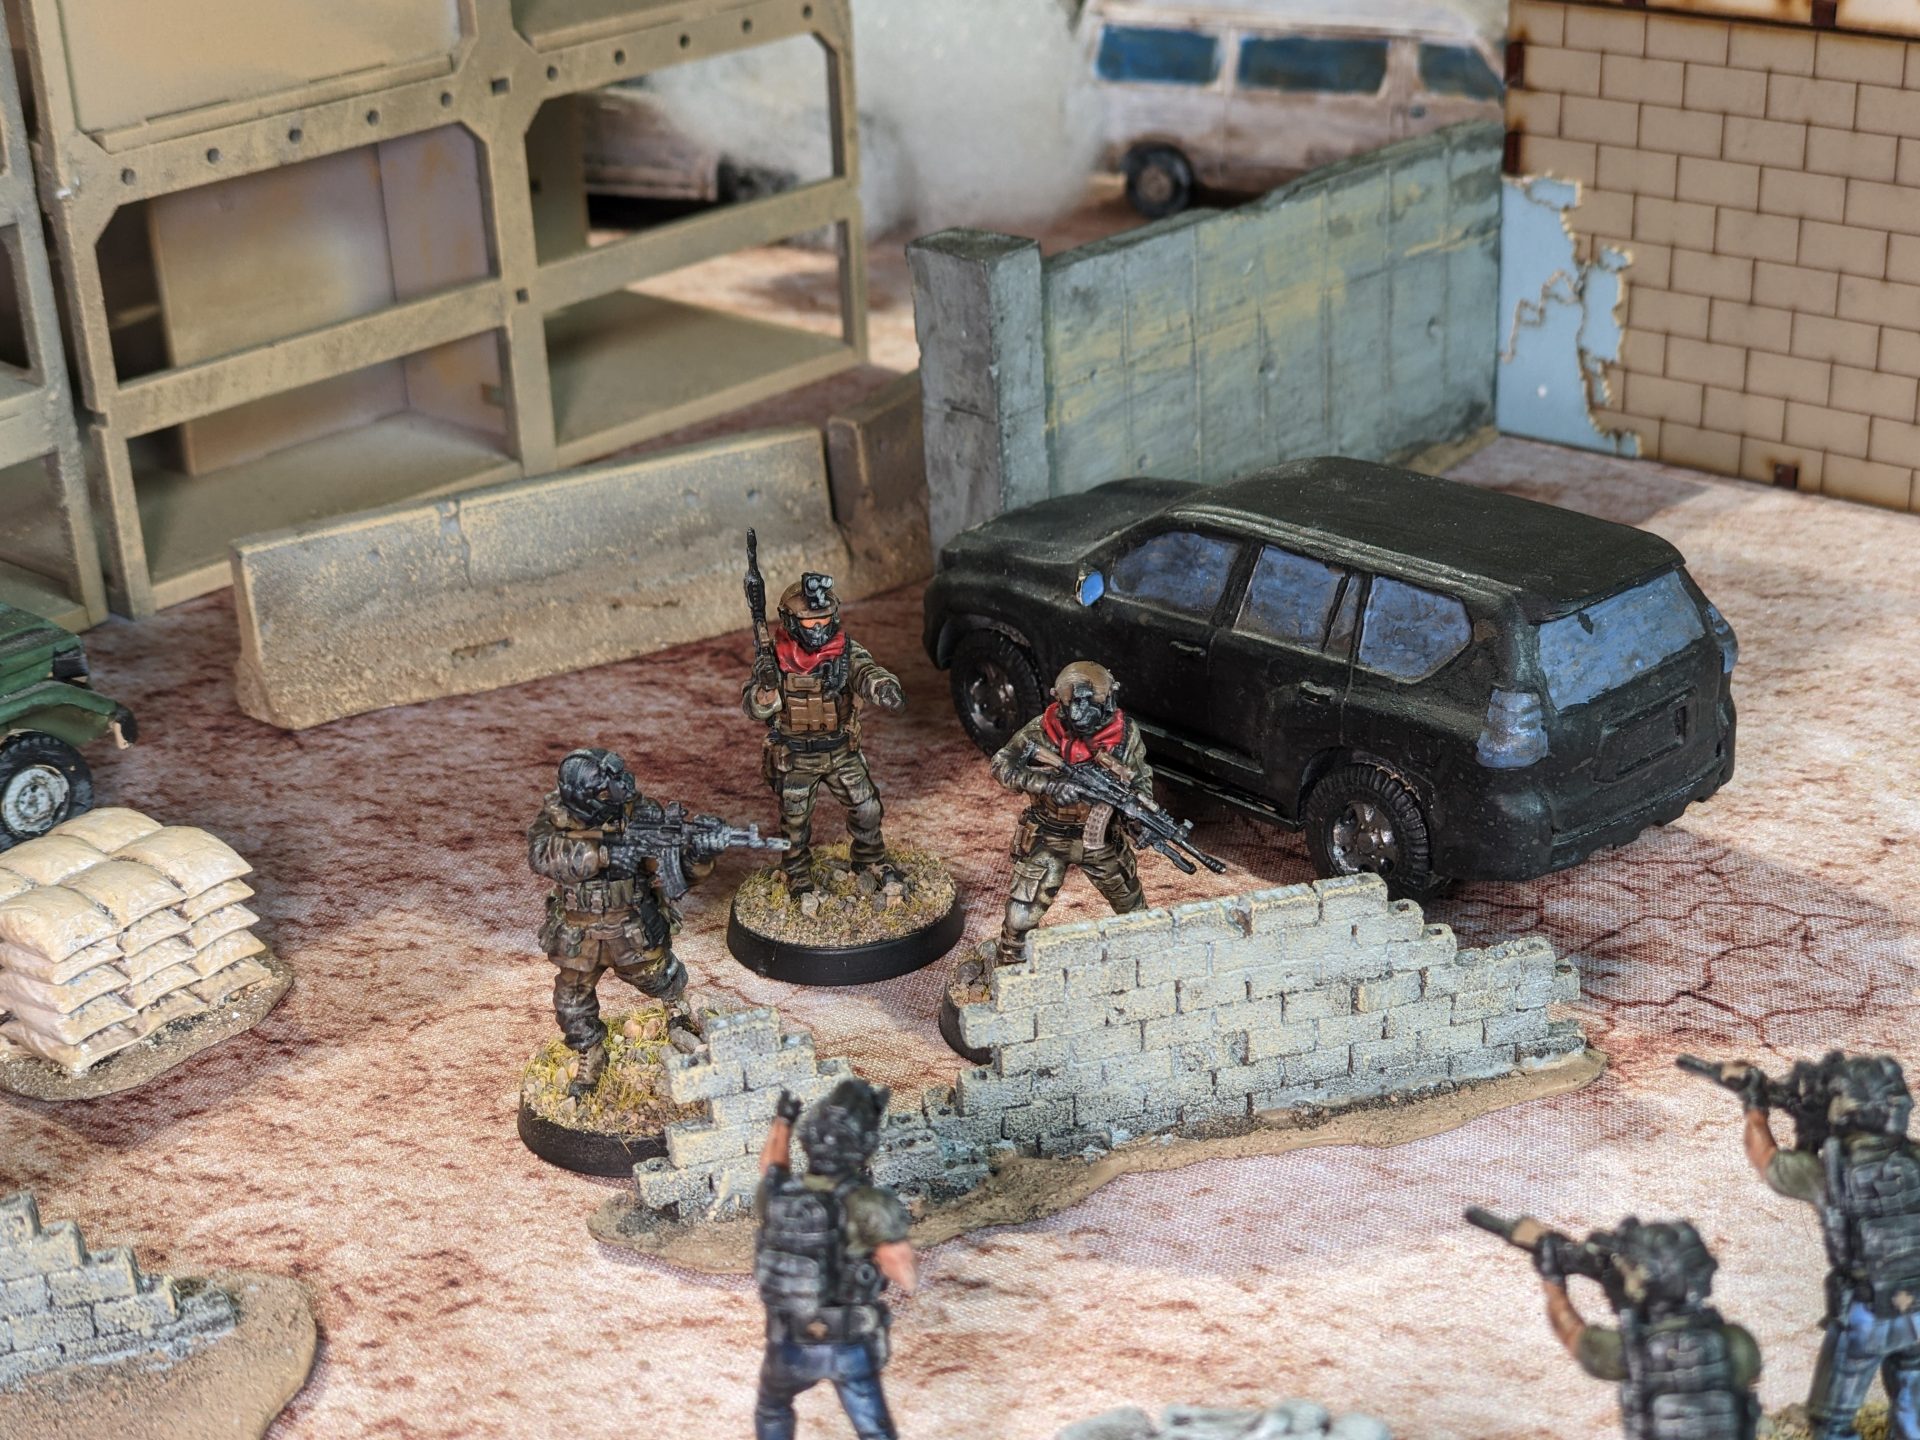
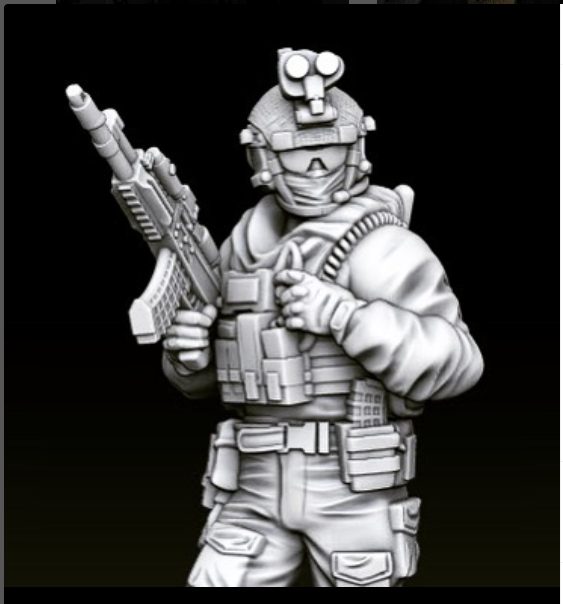
Hongbin
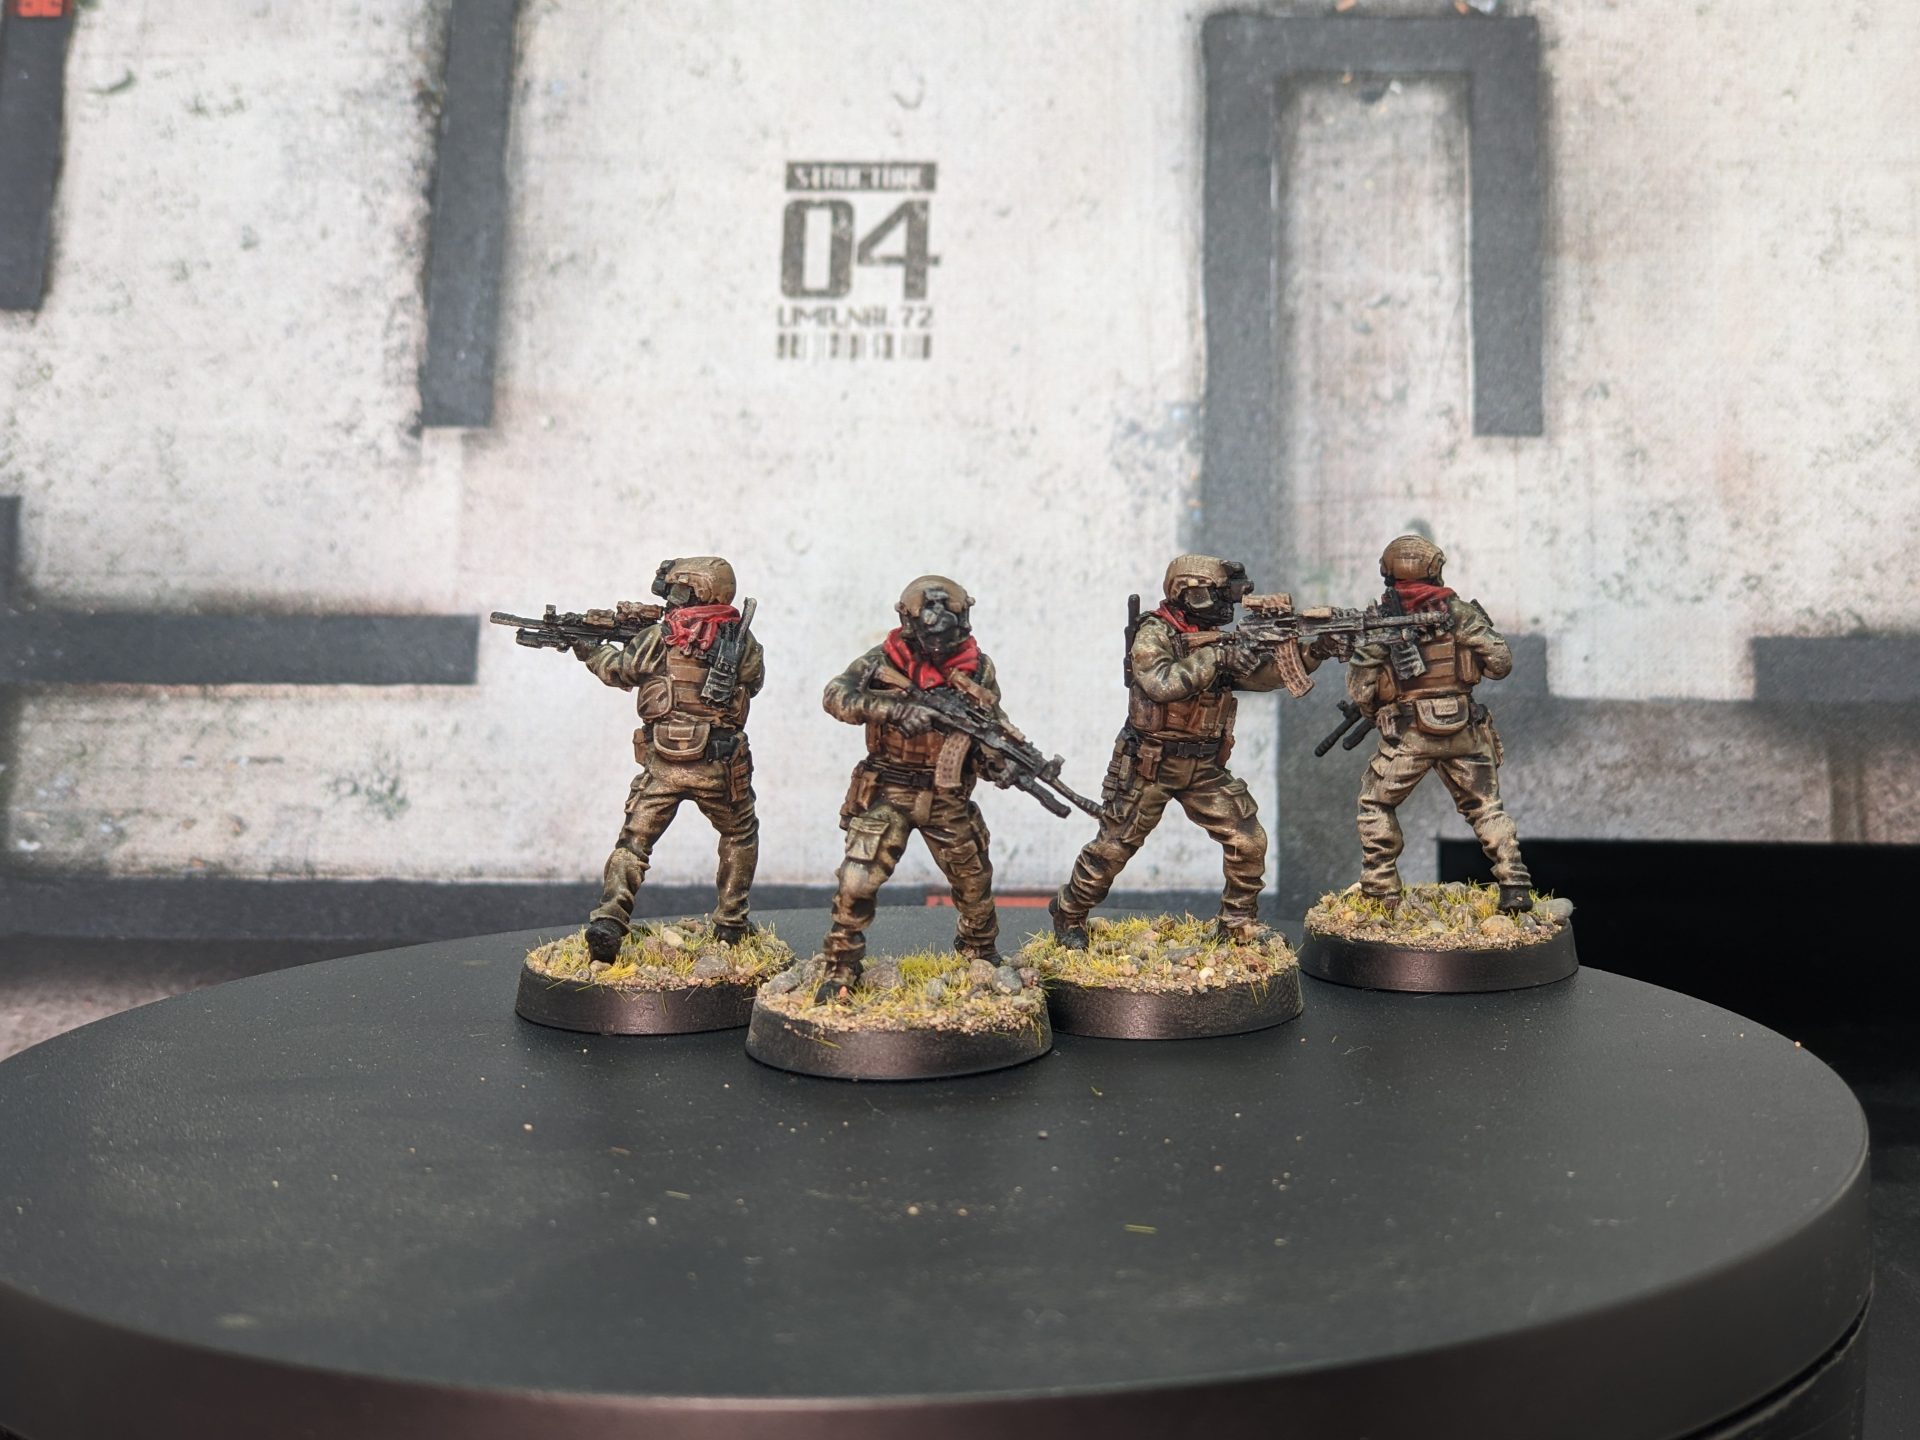
Finally, we got to the final element of the Aayari Guard force – the Hongbin Mercenaries and Enablers. Which for me was a concern – of all the forces in the box, the Hongbin is the only one wearing camo. And camo takes times.
For context, I was painting these guys first thing on a Monday morning as I was playing on Tuesday evening. With a full force of Scorch waiting for me to paint, I had to get these figures painted quickly. Luckily, the creator of BPRE had mentioned that the Hongbin guys use a selection of camo, including UCP (the old US army camo) – this is a camo scheme I know rather well having painted most of a US platoon in it. It uses the grand total of two colours and wash, with a Green Grey base and Ushanti Bone sponged on. The ever useful US Field Drab painted the tan helmet, plate carrier and belts, the solid colour giving a nice contrast to the camo. And speaking of contrast, they all reccived red scarves to help them pop a little bit on the board.
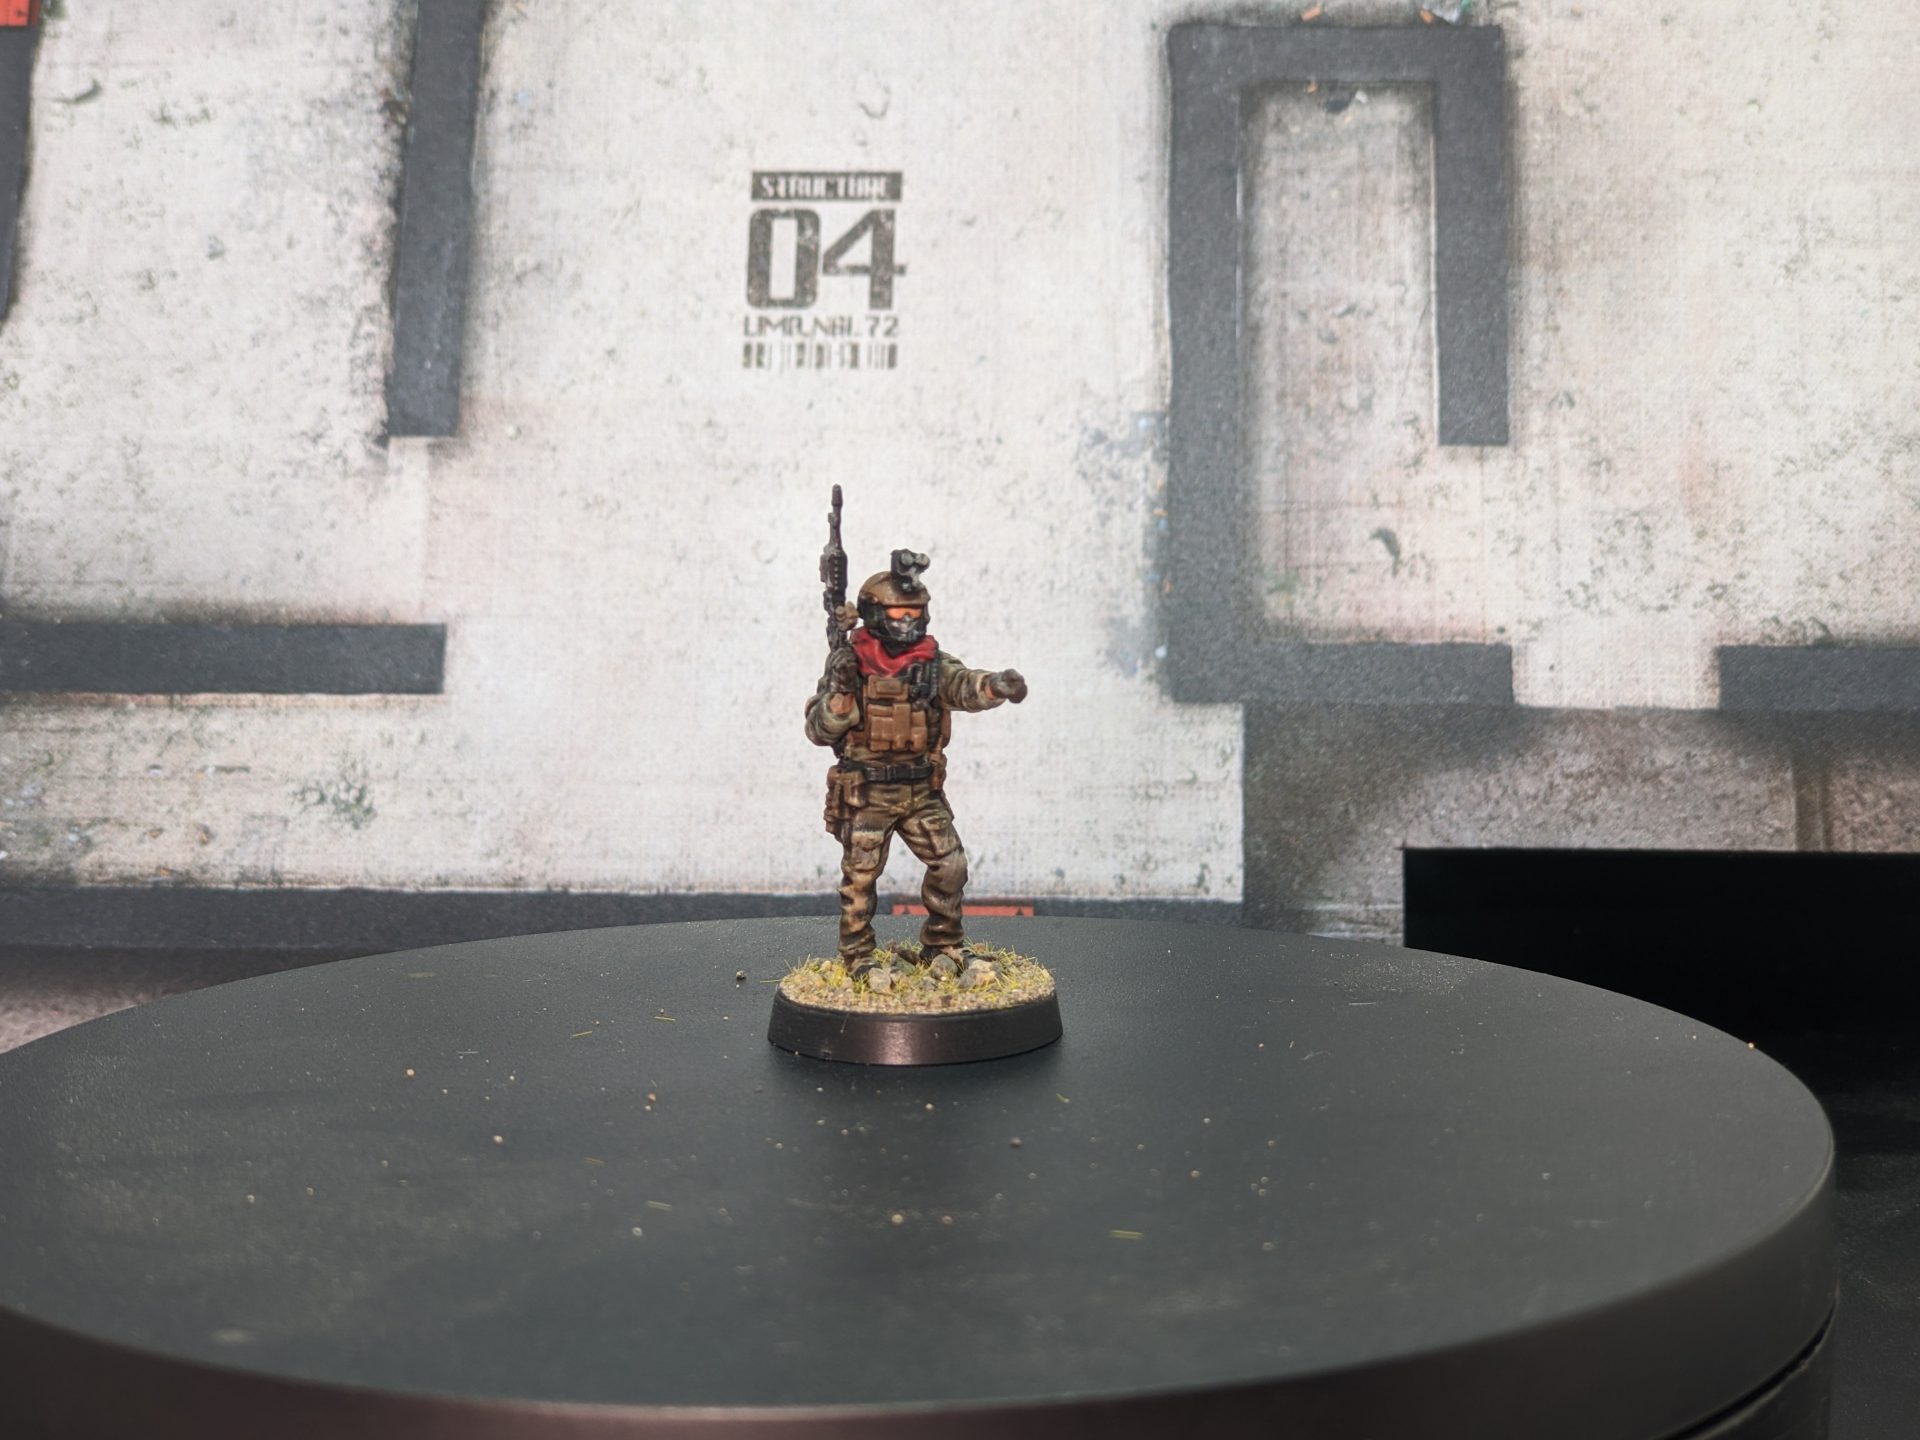
The Enabler also got some specific tweaks. The patch of flesh peaking out on his forearms was Cadian Fleshtone but more importnatly, we got to add some of the flair of the BPRE with the orange lenses on the glasses. I didn’t go too far with emulating the look of the comics, but they were just asking for that pop.
These guys felt a lot like painting up other figures I already own – the camo clothing and tan gear/helmet, picking out the weapon accresssories in tan, etc. It’s interesting how these are technically on the OPFOR side, so painting up modified AKs rather than AR15s. I also like how they look next to the Shurta and Mutashib, standing apart with all their gear and camo, making the Aayari Guard Force actually quite varied to look at once in game.
- Vallejo Green Grey + GW Ushanti Bone sponge + GW Nuln Oil – UCP
- Vallejo US Field Drab – helmet + web gear
- GW Eshin Grey + GW Contrast Black – Black elements (boots/radios)
- GW Leadbelcher + GW Contrast Black – Gunmetal
- GW Cadian Fleshtone – Flesh
- GW Fire Dragon Bright – Glasses
- GW Mephiston red – Red scarf
- GW Agrax Earthshade + drybrush Vallejo Iraqi sand
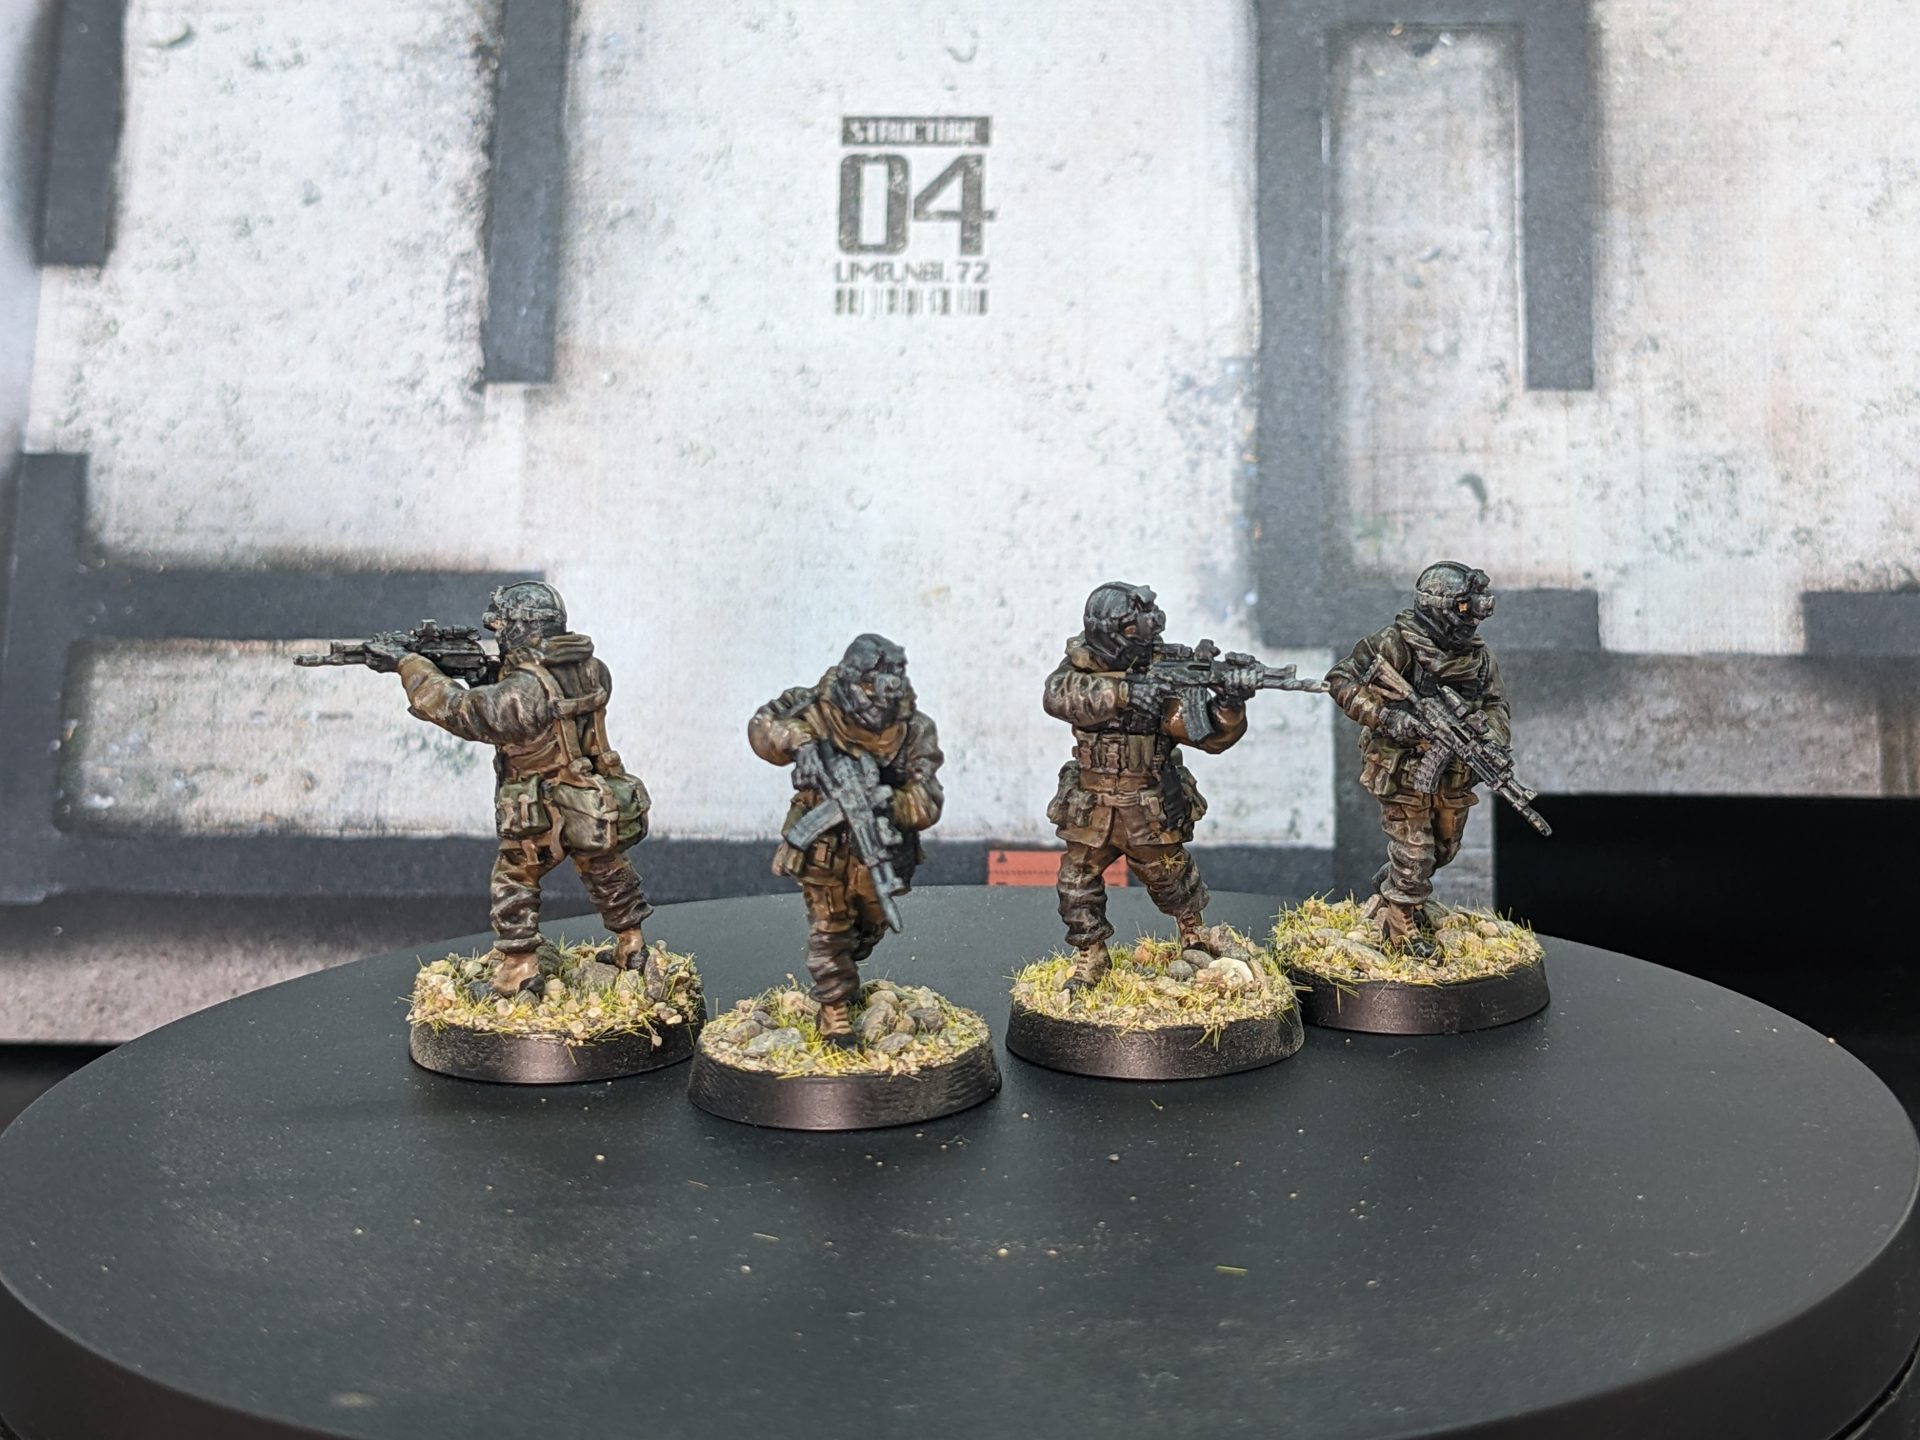
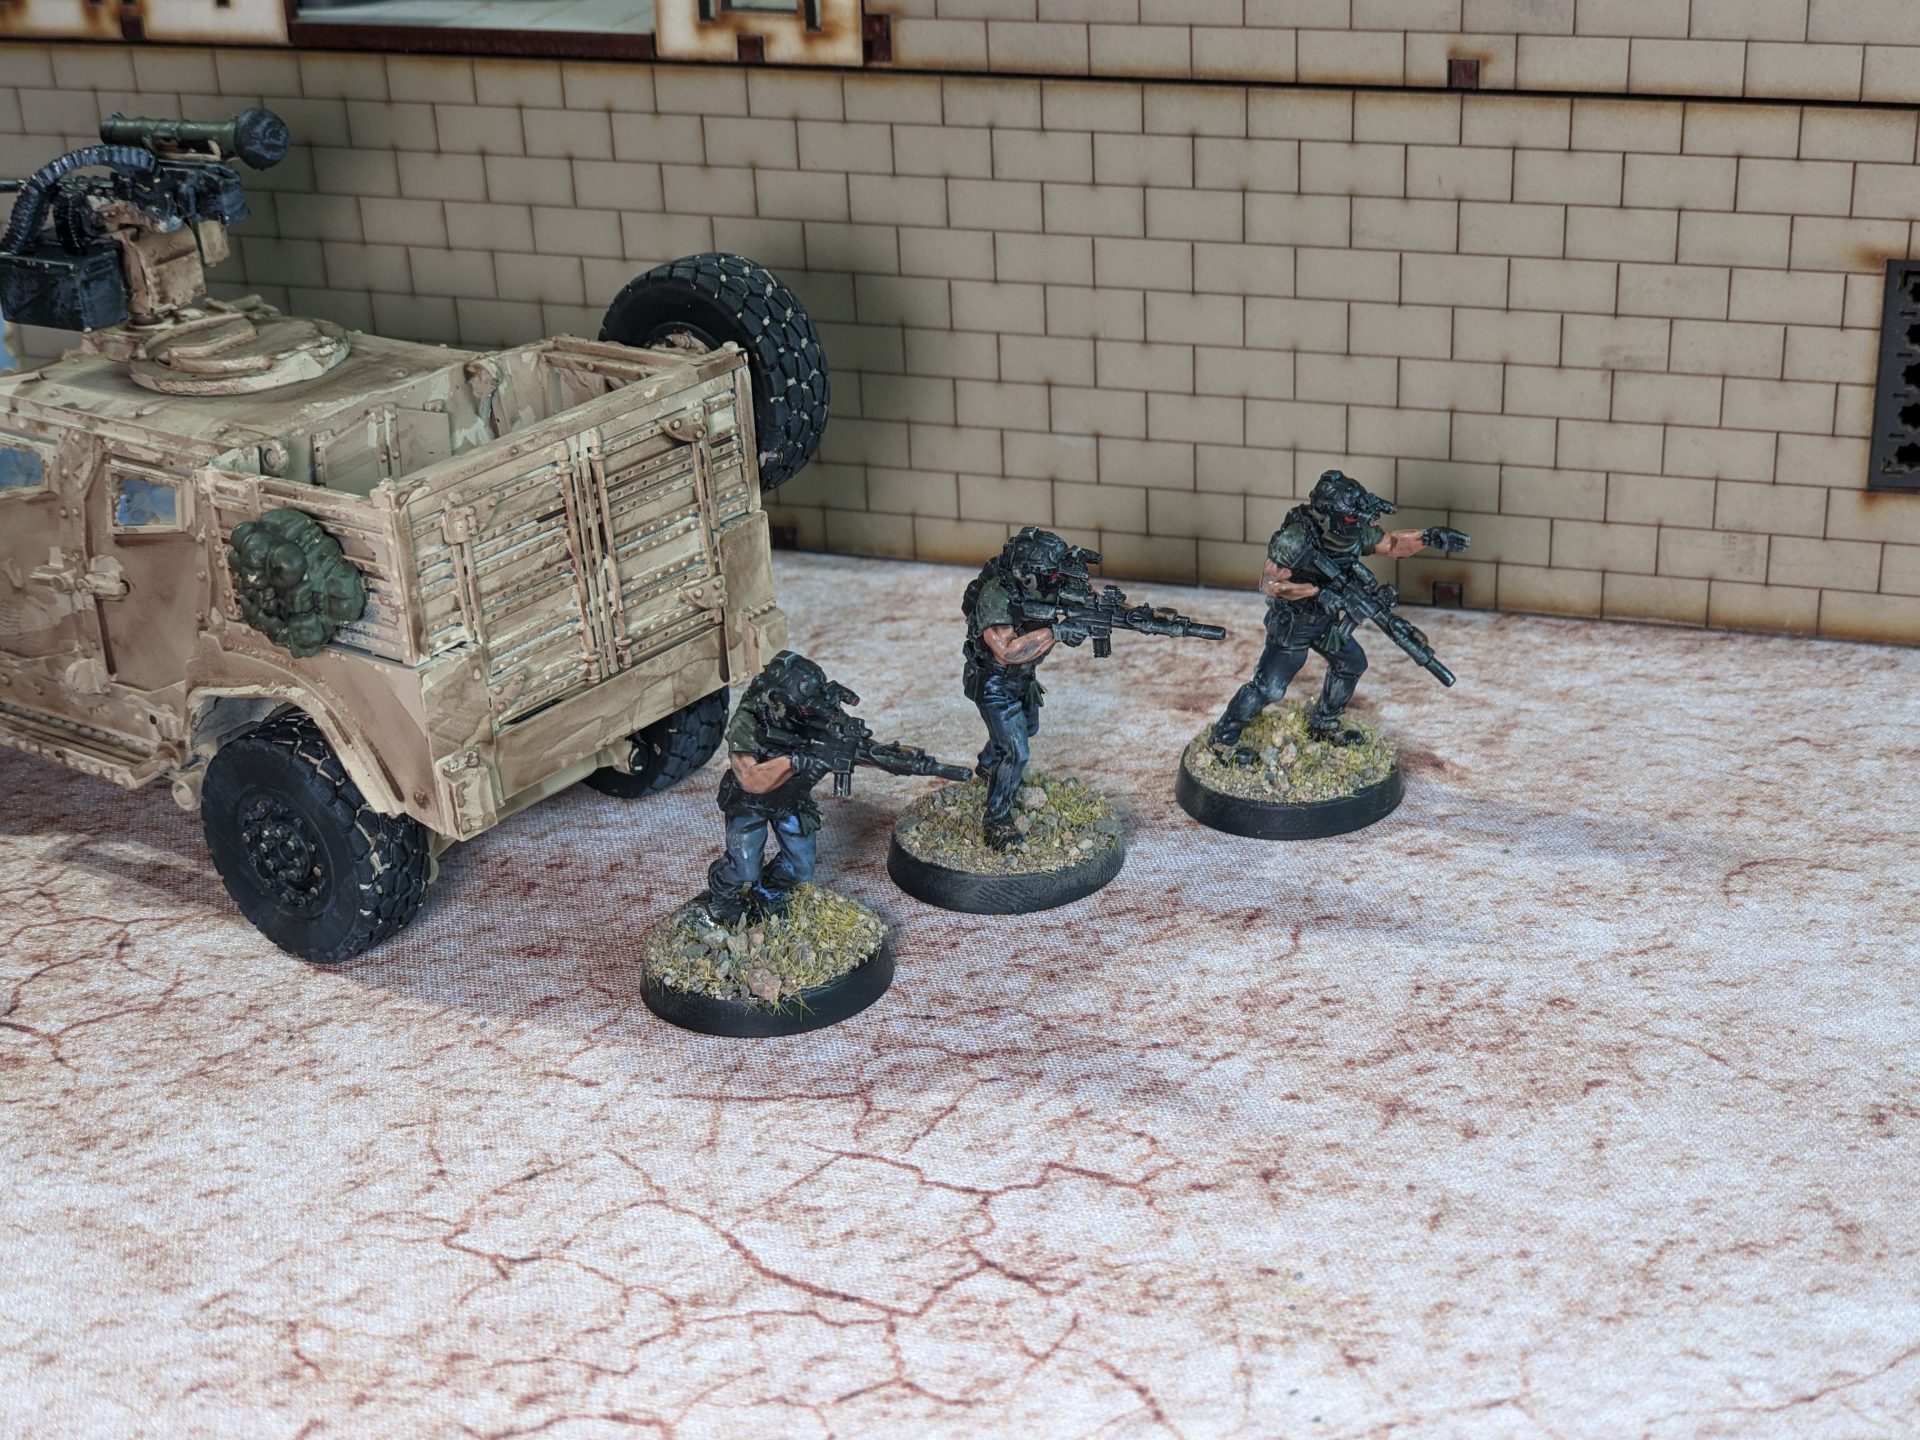
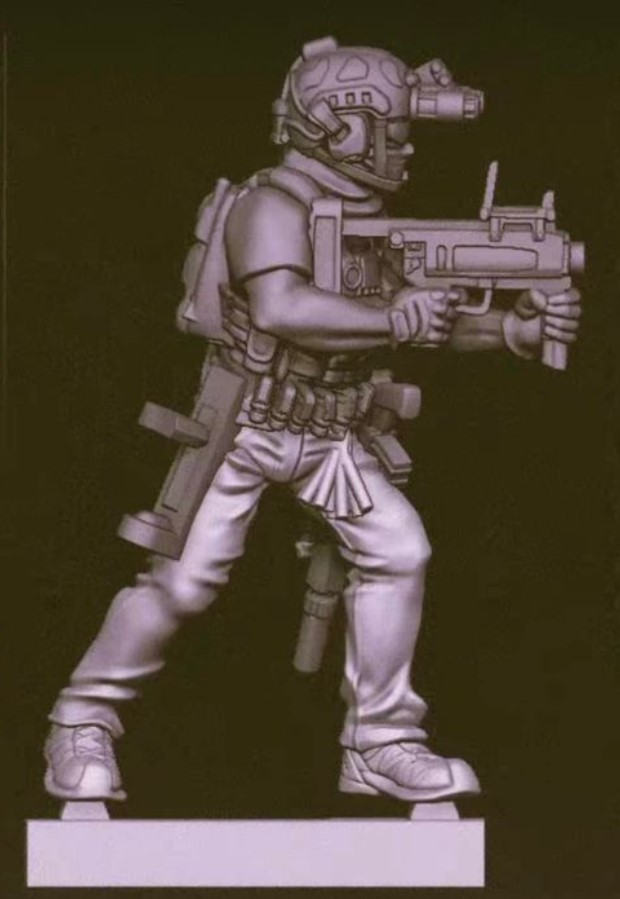
Scorch
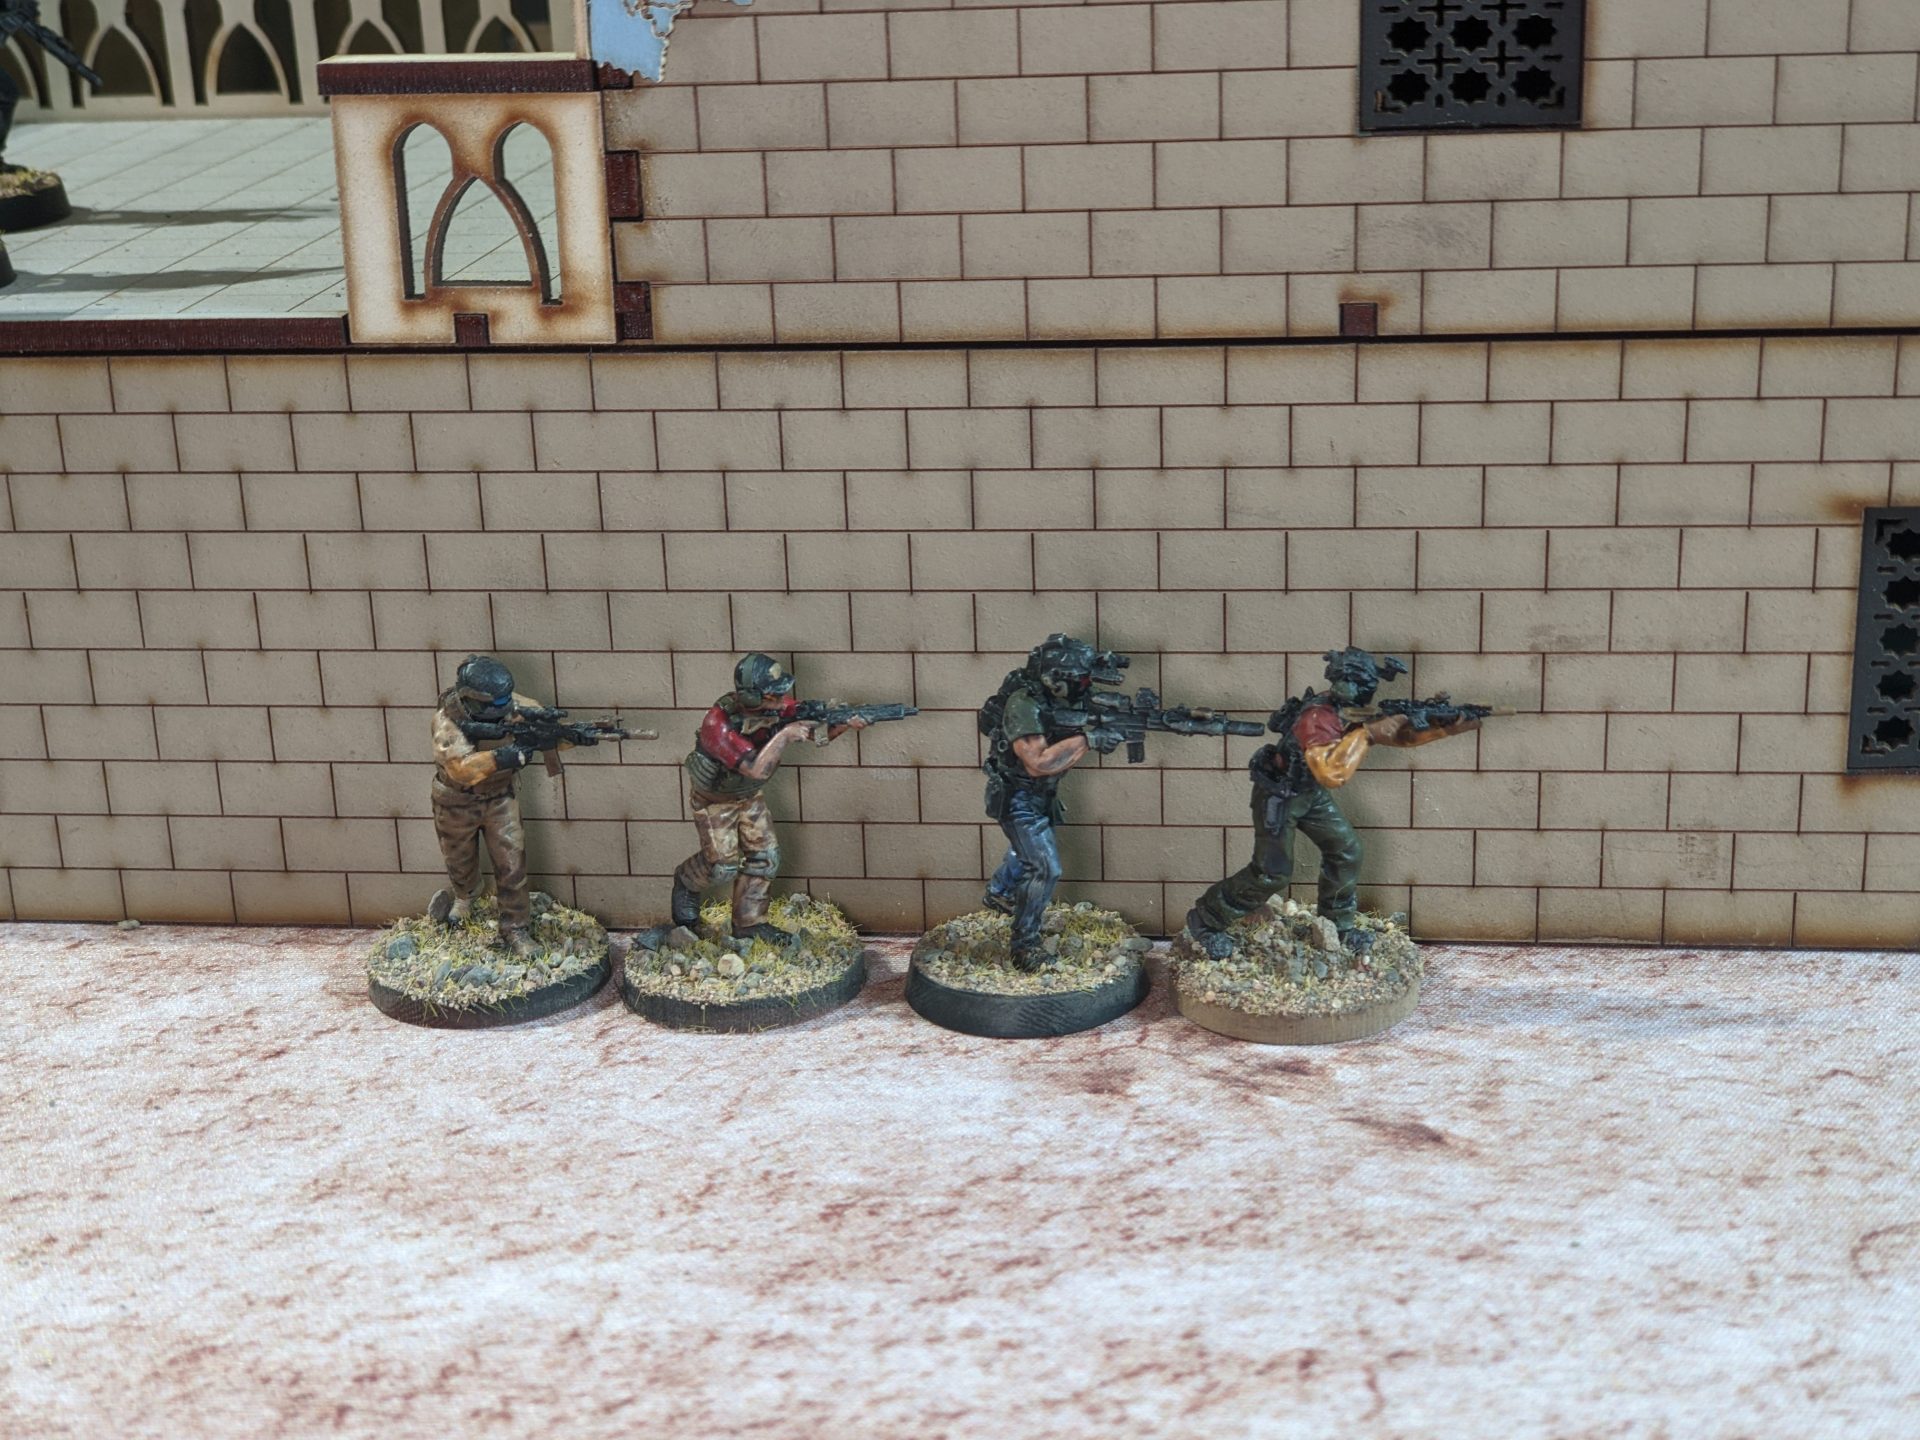
With the OPFOR done, it was time to work on Scorch. The Cold Harbour contractors are interesting as it’s a 10 figure force where all of the figures are basically the same, apart from weapons and a few specific details. Roughly you can split the figures into three sections to be painted – the jeans, the t-shirts and all the tactical gear.
For the jeans, I use either Kantor Blue or Calagar Blue over the black undercoat, I had tried Caledor Sky, but the colours just seemed slightly off and so I went over with with Calagar Blue. After this, I applied a Nuln Oil wash to tie the colours together.
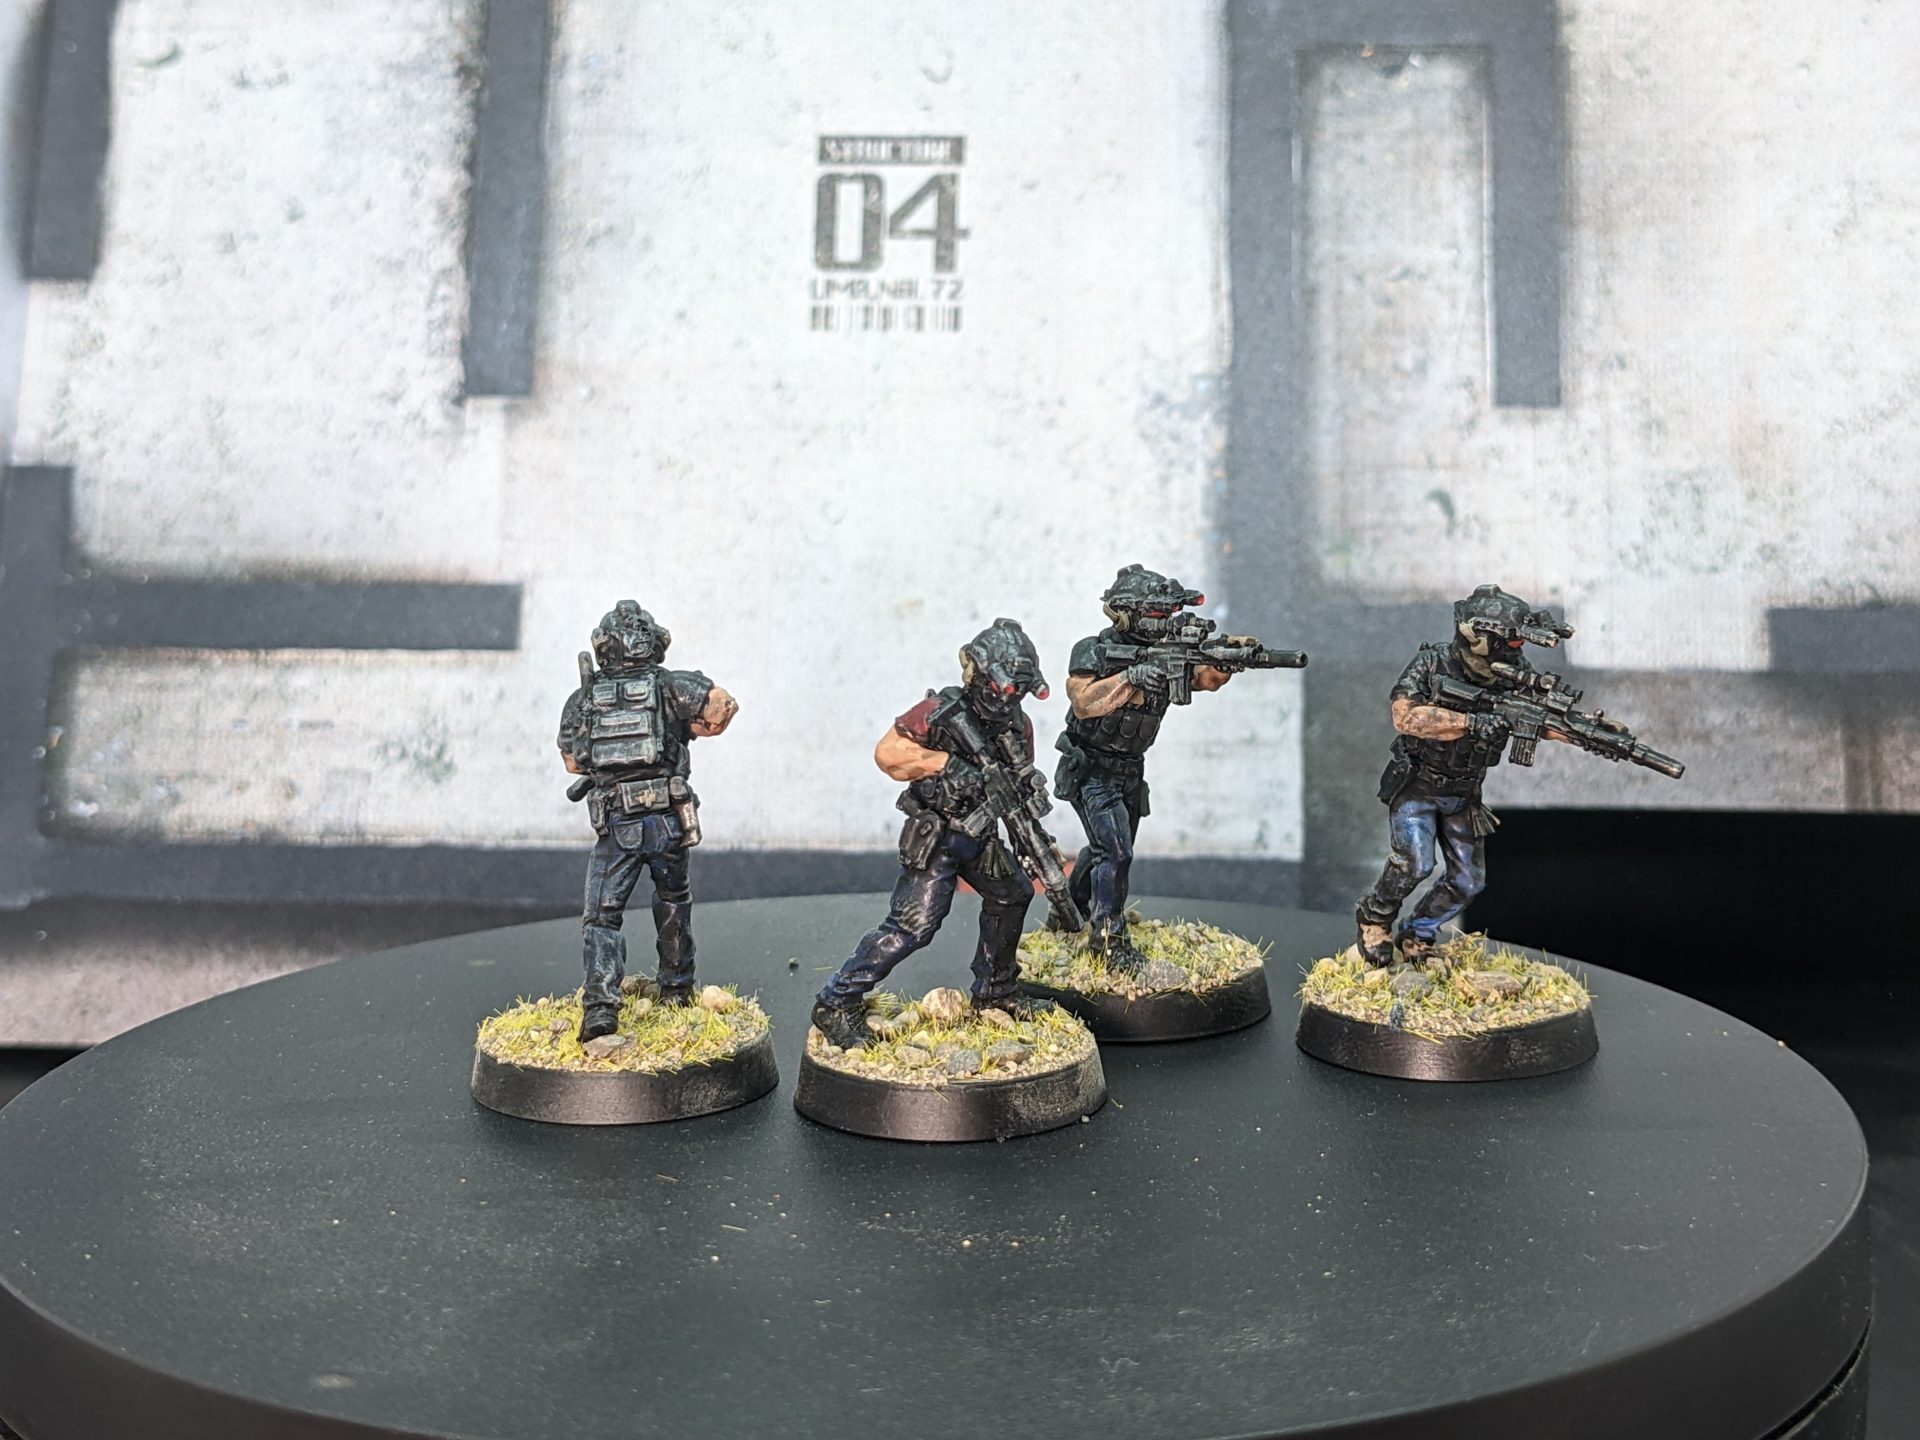
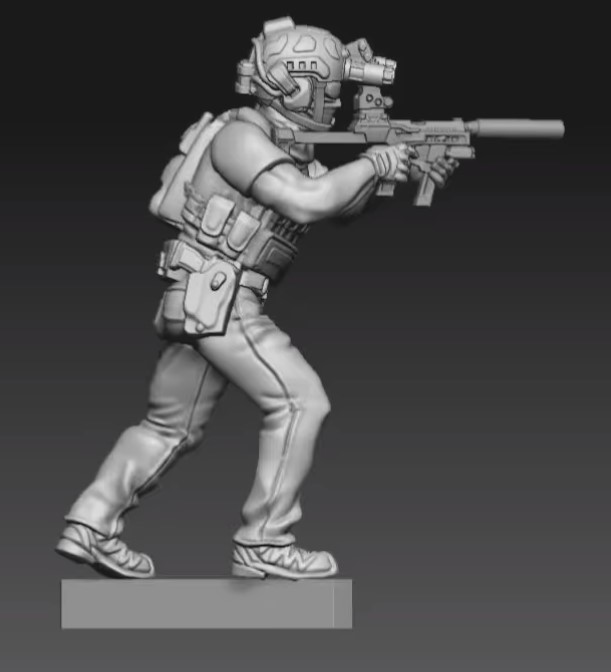
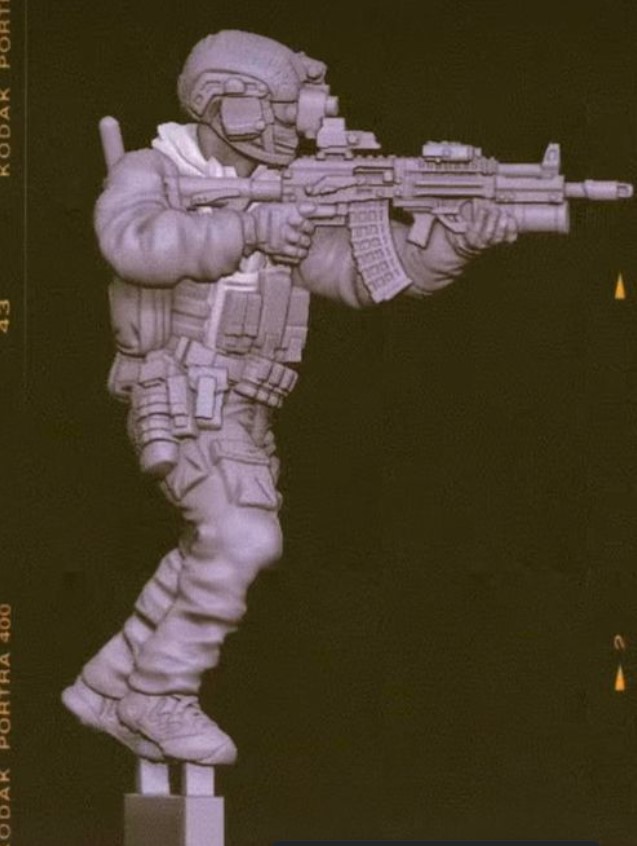
As I mentioned at the top, it can be hard to determine which Scorch team member is which due to the gear. I know that the Recce have a different pack and a Eotech/Magniger combo on the rifle, but for a new player they might struggle. Luckily, each figure is wearing a t-shirt and based on some advice from the creator of BPRE, I instead went for a variety of colours themed off the shirts Echelon has sold as merch. I’ve listed the different colours for the different classes below. The system works out rather well – you might lose the cool factor of an entire squad in the stylish red but you gain a lot in terms of readabilty.
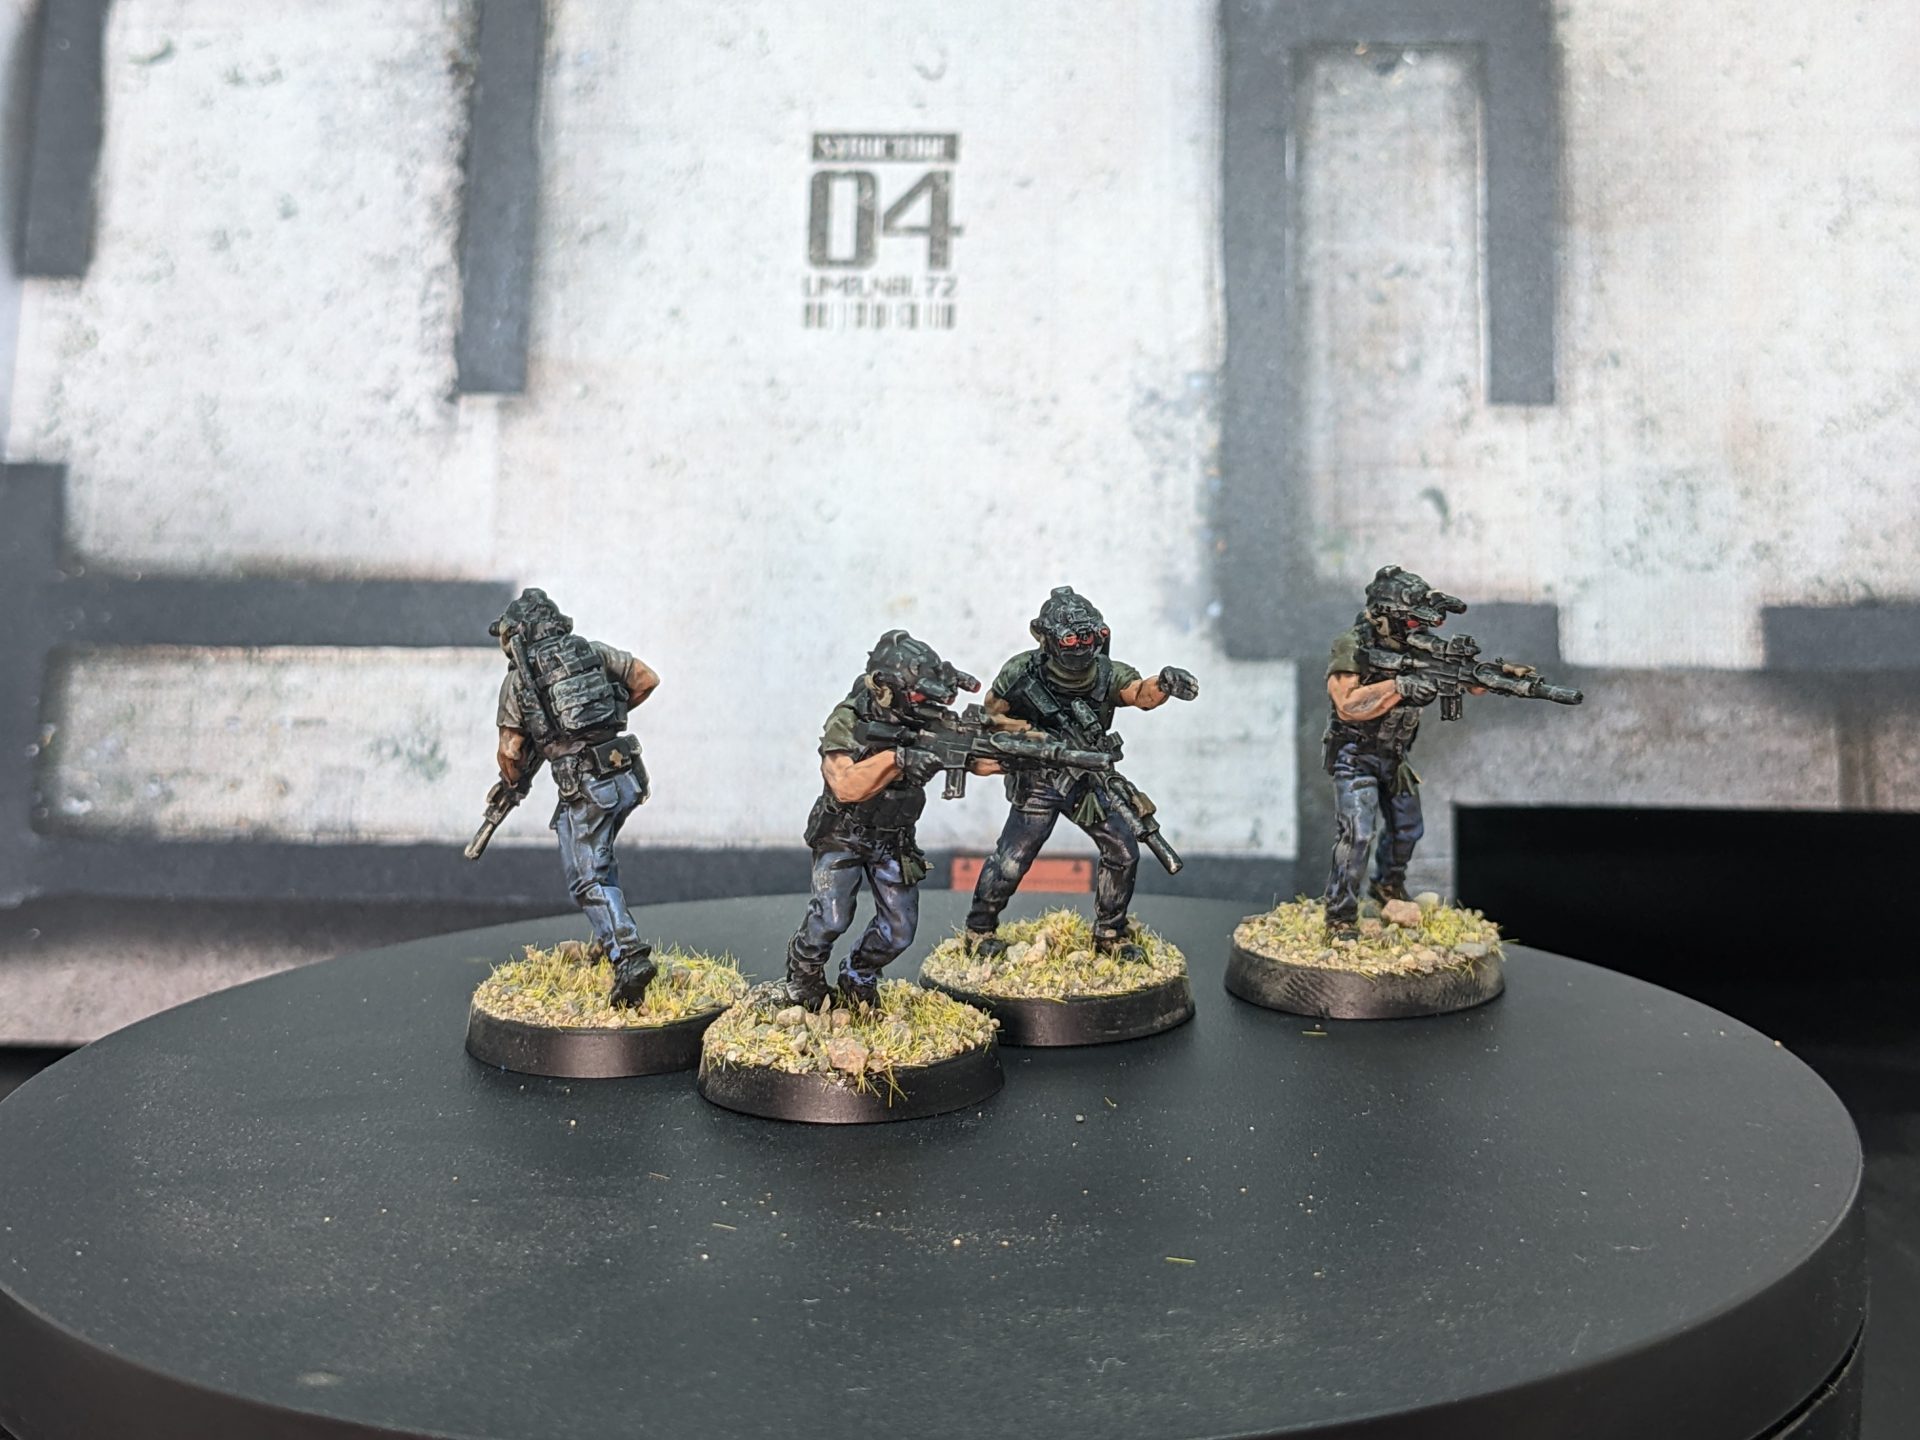
Finally the tactical gear. As you can see, for Scorch it’s black. And it covers A LOT of the body, from the belt rig to the plate carrier to the head which is bascially 99% helmet or NVGs or balaclava. I think this was actually why I spent a lot of time thinking about painting before actually getting around to it, worrying about how to make such a model look good. Luckily, there were two things to help make this section look good. First of all, I painted these models last, meaning I had all the Aayari guys to get used to my black painting technique. Second, these models are covered in details, so the black constrast (and the final drybrush) helped to pick out all the elements, helping to make it look a little bit less flat.
Finally, we have the small touches. The glow sticks at the belt should technically be pale plastic (until snapped) but the touch of green helps to make them more interesting. Similarly, a dab of Green Grey picked out the headset on the helmet while anything tan (such as the PEQ box) took the ever useful Field Drab. And because legally I can’t paint these guys without some red lenses after reading the comics, they got Evil Sunz Scarlet on the glasses and NVGs. Just because i’m not going full comic book style, doesn’t mean I’m not going to take full advantage of that glorious look.
- GW Kantor Blue/GW Calagar Blue + GW Nuln Oil – Jeans
- Tshirts
- GW Mephiston Red – Advisor
- GW Khorne Red – Automatic Rifleman
- GW Khorne Red/GW Dawnstone Grey + Contrast – Assaulter
- Vallejo Russian Uniform Green/GW Dawnstone Grey – Recce
- GW Waagh flesh – Glow sticks
- Vallejo Green Grey – Arc headphones
- Vallejo US Field Drab – tan elements
- GW Eshin Grey/GW Dawnstone + GW Black Templar Contrast – blacks
- GW Agrax Earthshade + drybrush Valejo iraqi sand
- GW Evil Sunz Scarlet – glasses/NVGs
Final Notes
After finishing painting and frantically basing them with Geek Gaming’s Scrublands basing mix, I had a fully painted Complete Target Package ready to go. What are my final thoughts?
Well, the first part is that I should have spent more time cleaning these figures up. There is a concerning level of mouldlines I only really started spotting once paint was applied (especially on the Scorch assaulters runnning down their legs) that I had to reach for the sandpaper in the midst of painting. It qould have been nice if the figure didn’t suffer from mould slip, especially when some of them are in relatively obvious palces (such as down the side of a Shurta’s face) that would be hard to fix. Maybe I’ve been ruined by 3D printing my own figures but it would be nice to see a little more QC on them.
That said, I think these figures are some of the most fun I’ve painted in the last few years. Similar to some of the Games Workshop figures I’ve worked on, there is plenty of details on display but not too much that I struggle to actually pick it out what I’m painting. With my paint style being what it is, washes and drybrushes really help to show off everything. For example, on the helmets of the Scorch team, you can see the patch locations, the wires running to the NVGs, the counter-weight hanging off the back. There are also some great posing on them, action packed but still very readable. There are a few Scorch figures balancing on one foot but the rest are sensibly designed. It might have been nice to see another Shurta pose (mostly because you can end up using so many) or to have used the modular design to allow for swapping some pieces over.
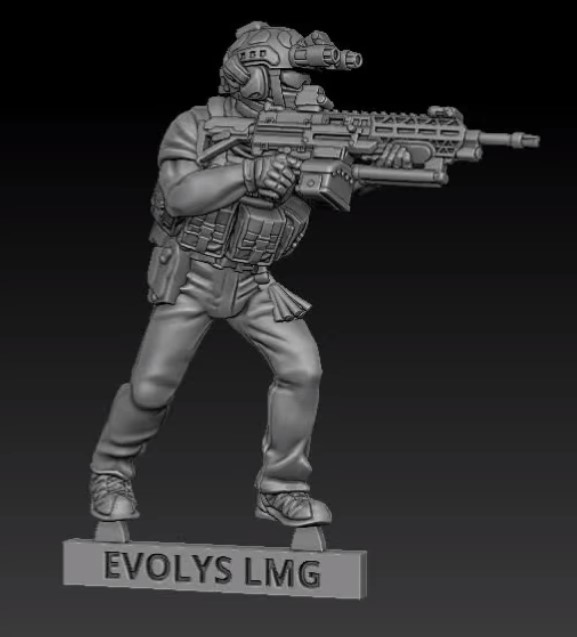
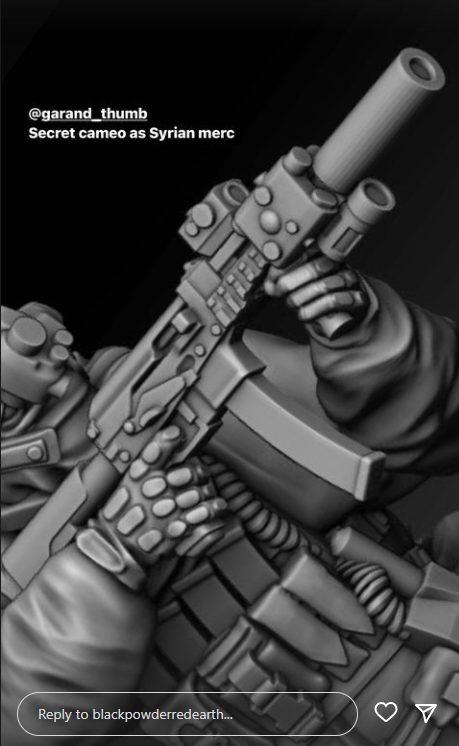
Maybe we’ll see some more Shurta poses among the next BPRE 28mm release coming in November’s release “Phase Line”. We’ve seen some of the previews on the Black Powder Red Earth instagram, treating us to the fact that both sides are going to be recciving some additional armaments, providing such force multipliers as CQB specialists, Medium Machine Guns and 40mm grenade launchers. These designs are super cool, and I am going to be rushing to pick up my box as soon as they are released. And then take less time to paint!
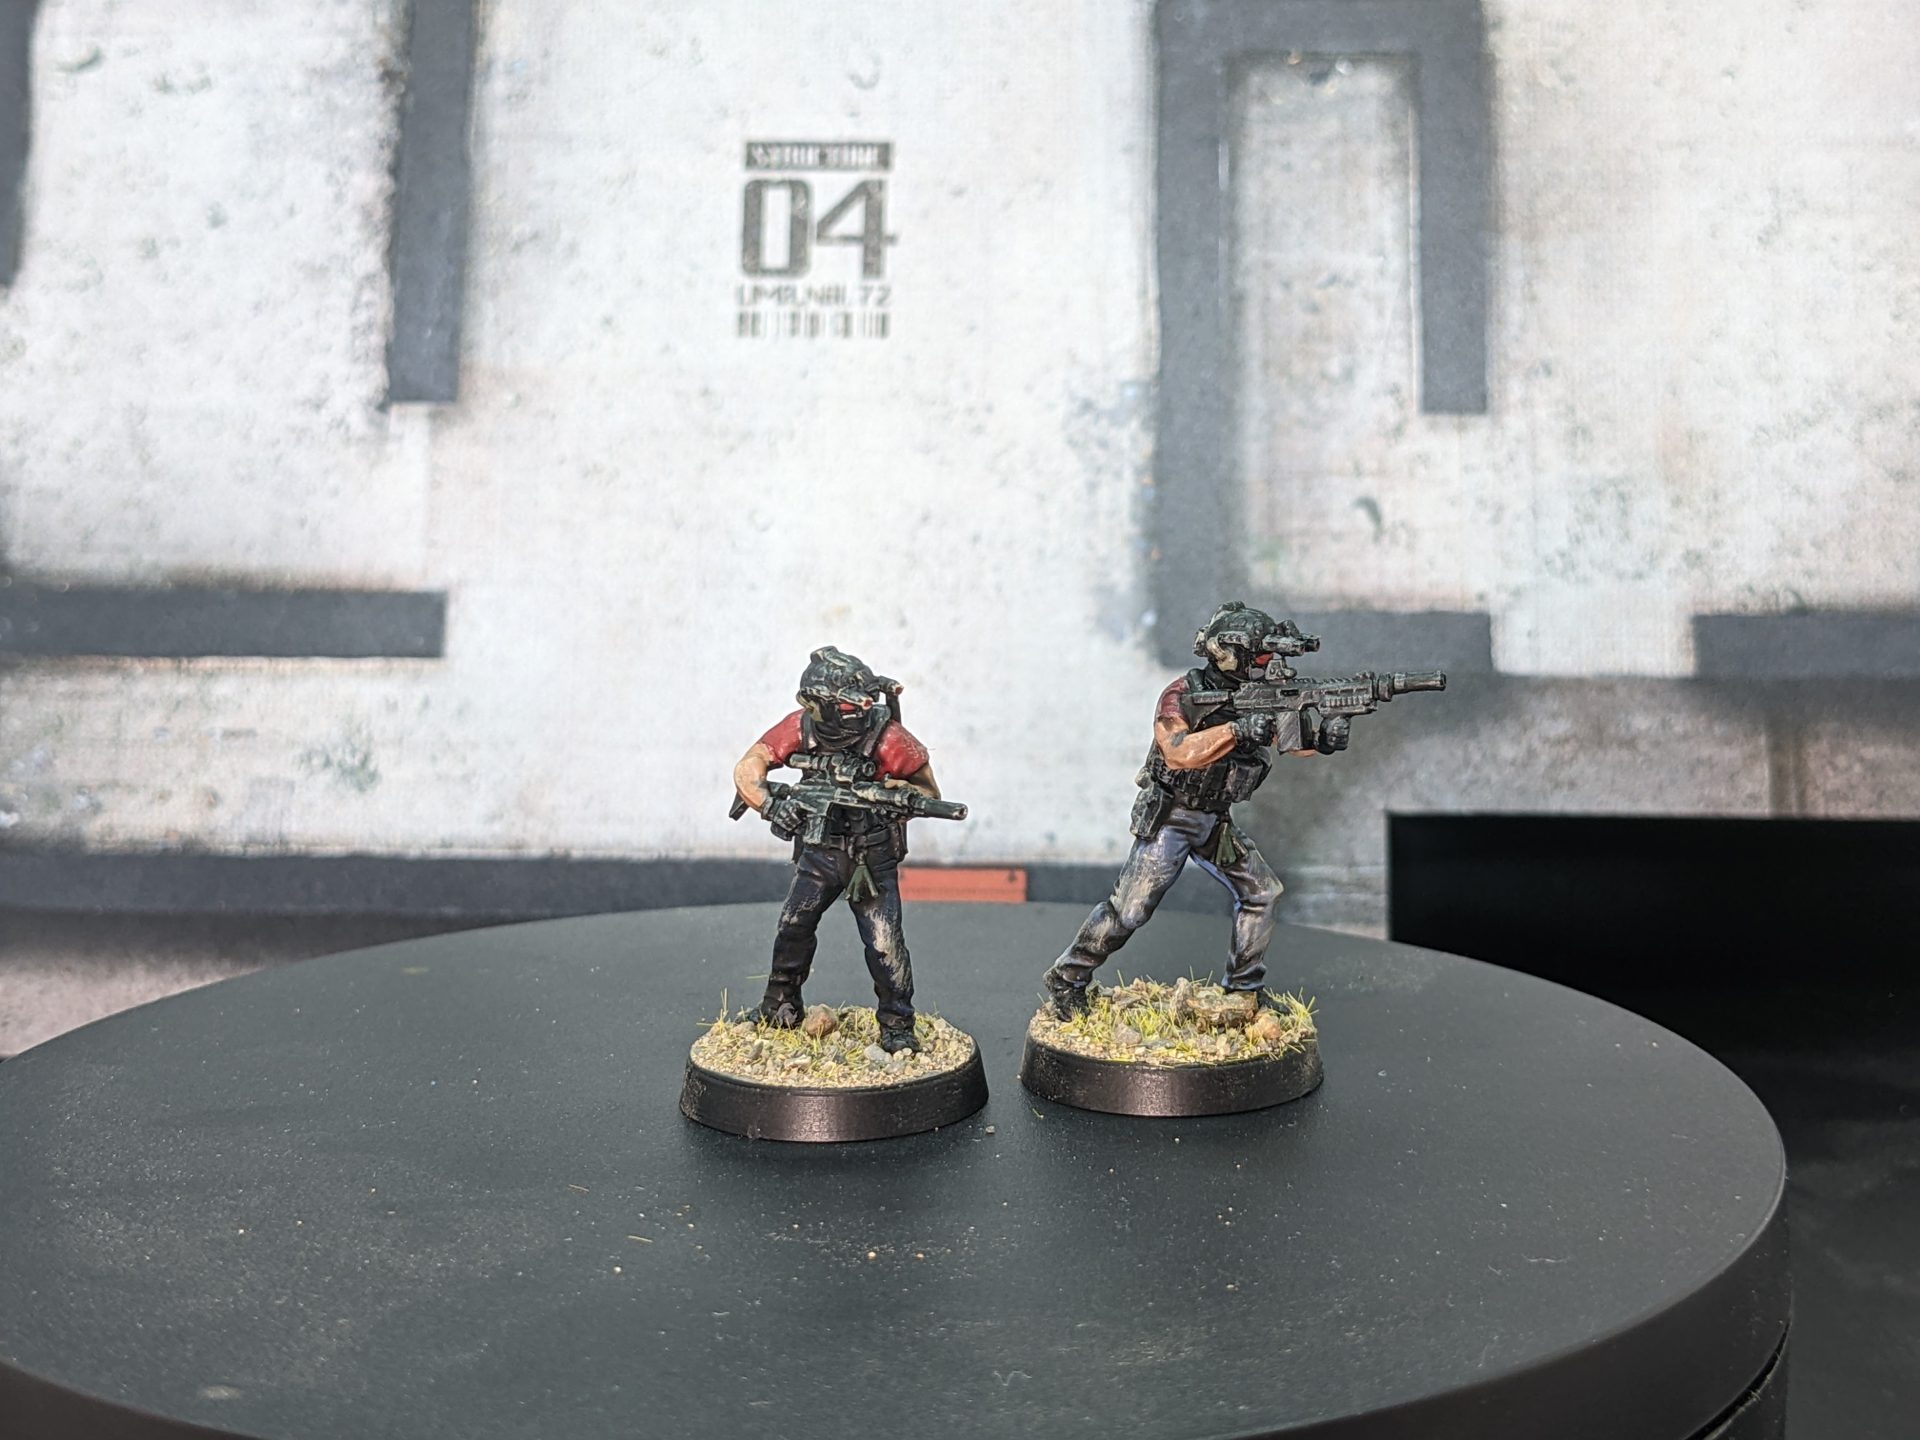
Something I failed to include last time was a size comparison between the BPRE figures and other Ultramoderns. Now painted up, you can see them alongside each other. Personally, I’d have no issues using them alongside each other – they are definitely larger than Spectre or the 3D printing options but it wouldn’t matter hugely at gaming height. More excuses to get these lovely figures out!
So, with all that done, it’s probaby time to talk about how the games actually worked out. But we’ll be covering that next time, in a future post/video. I’ve already played one evening but tomorrow, I’ll be playing a full night raid for the first time using the proper layouts. It’s going to be great!


Leave a Reply