One of the joys of ultramoderns is that almost anything can be used as the back drop. Thanks to the vast variety of terrain in the world, anything from medieval Arab buildings to pulp era Brownstones, the possibilities are endless. One thing that I haven’t seen is modern buildings under construction. The combination of steel and concrete is found everywhere, and is a frequent tool of choice for games designers creating levels for modern games. Ubiquitous yet no MDF version ready for the wargamer.
So I was very surprised when just before Christmas, Mike of Supreme Littleness Designs turned up at the local wargames club with the prototype of one of these in progress buildings. After a few months of work, these three modules are now ready to build and take a look at. To say I’m excited to get them into a game is putting it mildly.
Before we starting taking a look, a slight disclaimer – I’ve been talking back and forth with Mike while he developed these buildings, throwing a few ideas at him to help make them more useful to modern wargamers.
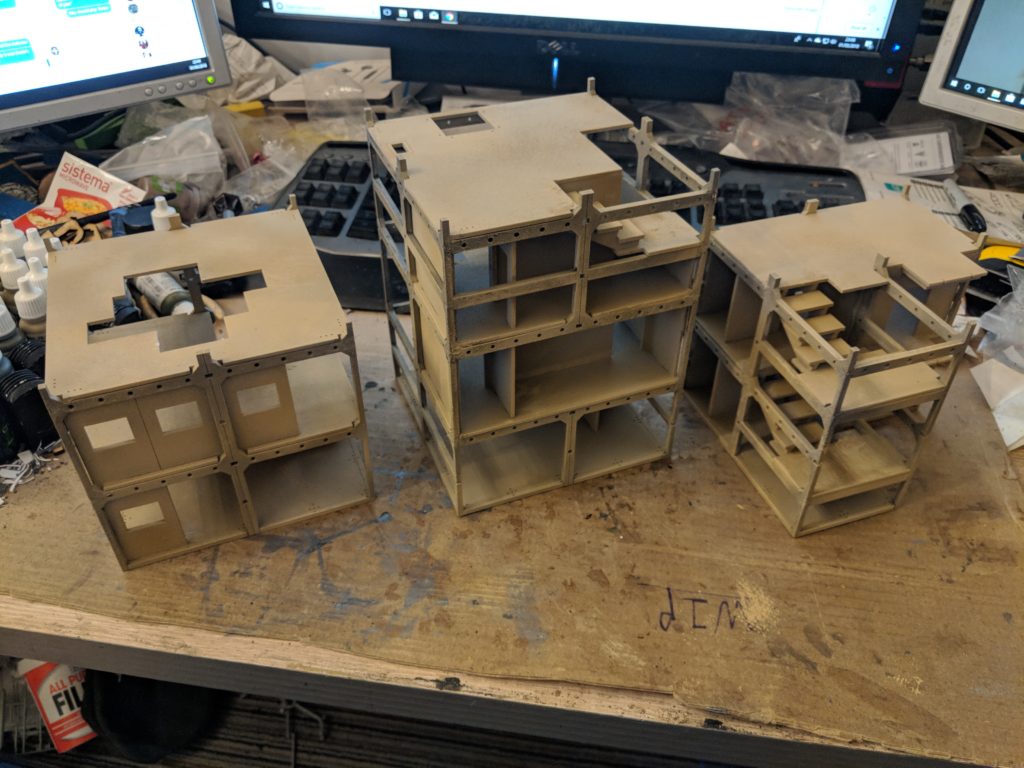
The Range
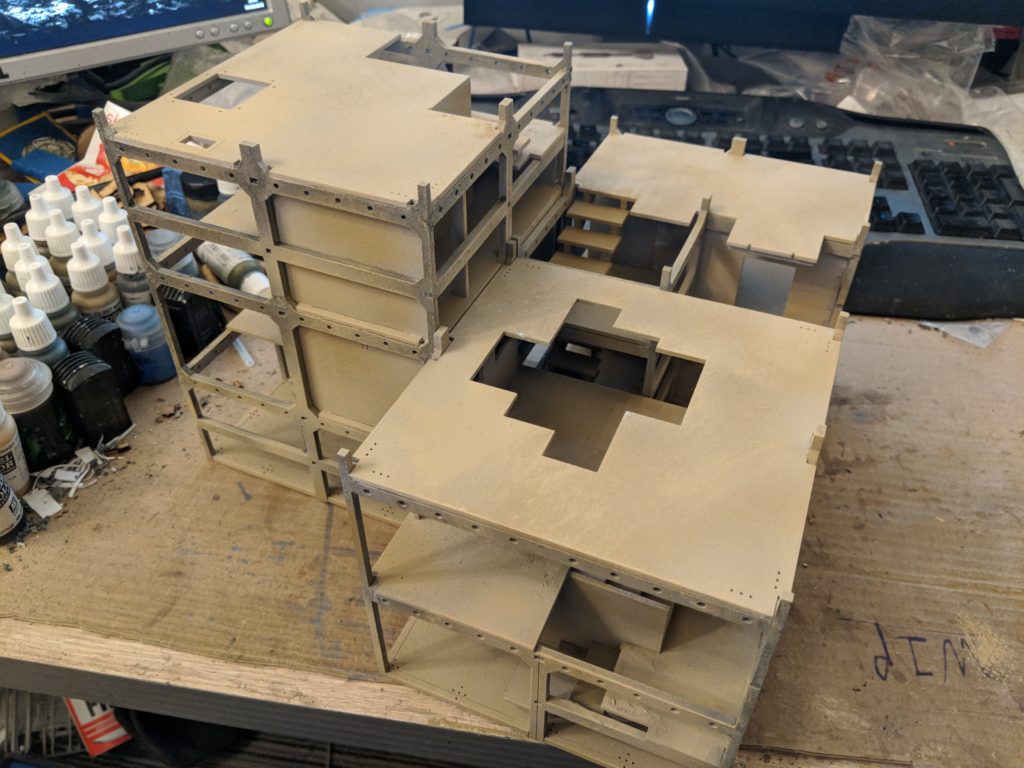
The modules all have a few things in common. The footprint for each module is at most 140mm x 140mm. In addition, the modules are all self-contained – there are no protruding parts that would prevent placing each module together. This makes them easy to lift out of an arrangement if you need to position figures inside. Alternatively, if you want to add some additional strength to the buildings, some of the circular cut outs on the beams could be used to house pegs.
All the buildings also have a similar structure, with a frame-work supporting flat panels. The pieces have laser cut details on them, designed to be facing outwards (a key thing to remember when assembling). The doorways in each building are about 20mm wide, so anyone basing for Spectre will easily be able to fit figures through them. All the modules have multiple floors – however not all of them have access to each of them, relying instead on either the addition of ladders or by placing next to another module.
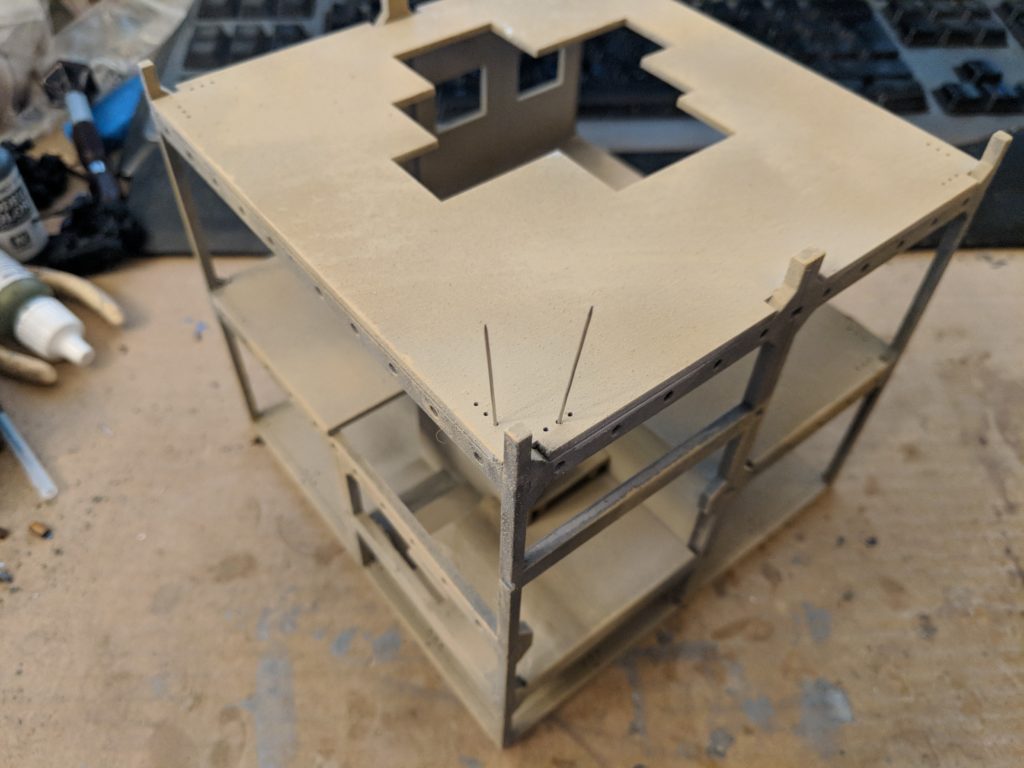
A cool feature of this design are the small holes around each of the corners. These holes are perfectly sized to let you fit pins through them to stand in for rebar. This is an extra little detail that would be handy to make these buildings really standout on the table top. Just remember to clip the ends off.
To make this article a little easier to read while still providing as much detail as possible, I’ve put some construction and painting notes in a separate post you can find at https://wp.me/pvEn5-2rY. I’d recommend having it open in another window while looking at details of the three modules so you can compare the WIP and the finished project. It also provides some additional details of each of the floors.
A few minor construction points for the range – all the pieces are nicely cut (with no alteration required) but I still recommend a dry fit to make sure. Additionally, pop out every push through (including the pin holes) before assembly in as some may be blocked once complete. Supreme Littleness Designs will be providing instructions once the kits are released – I managed to work out the build process from pictures and made only one major mistake which I was able to rectify so they are not hugely complicated to assemble.
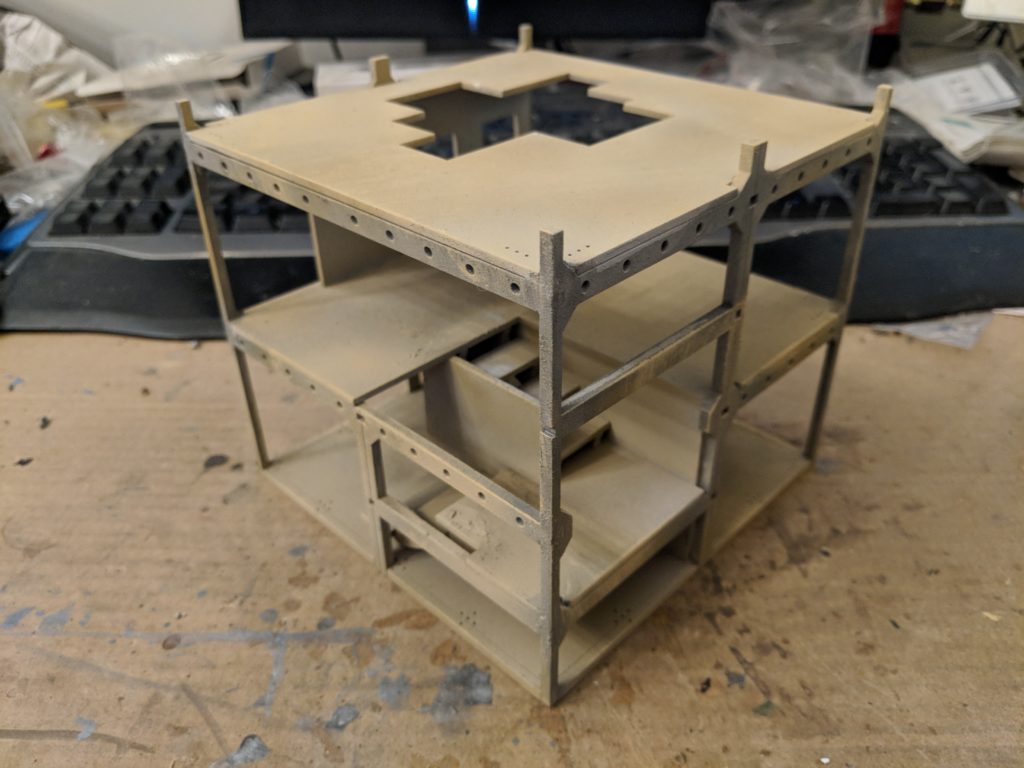
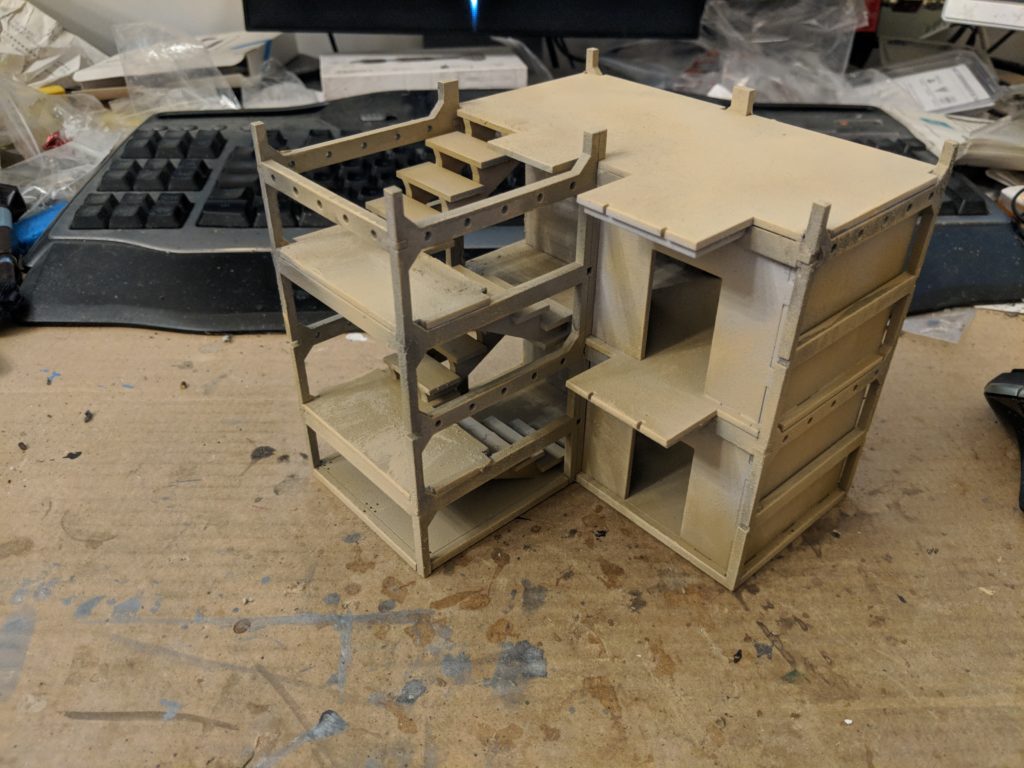
Building 1
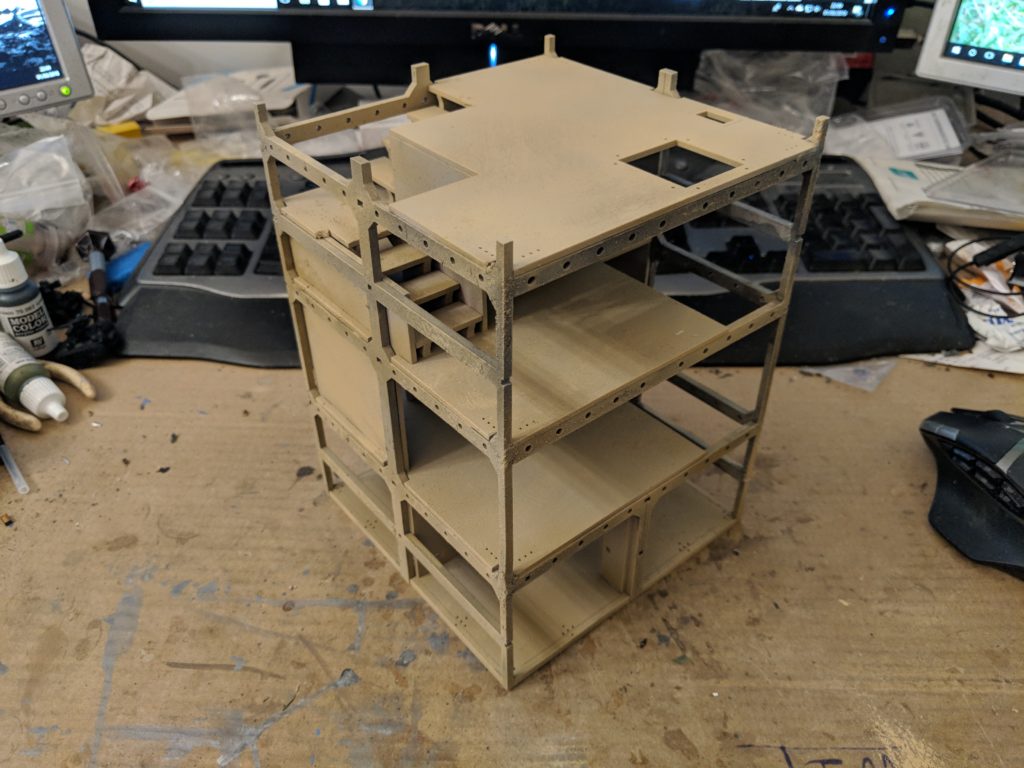
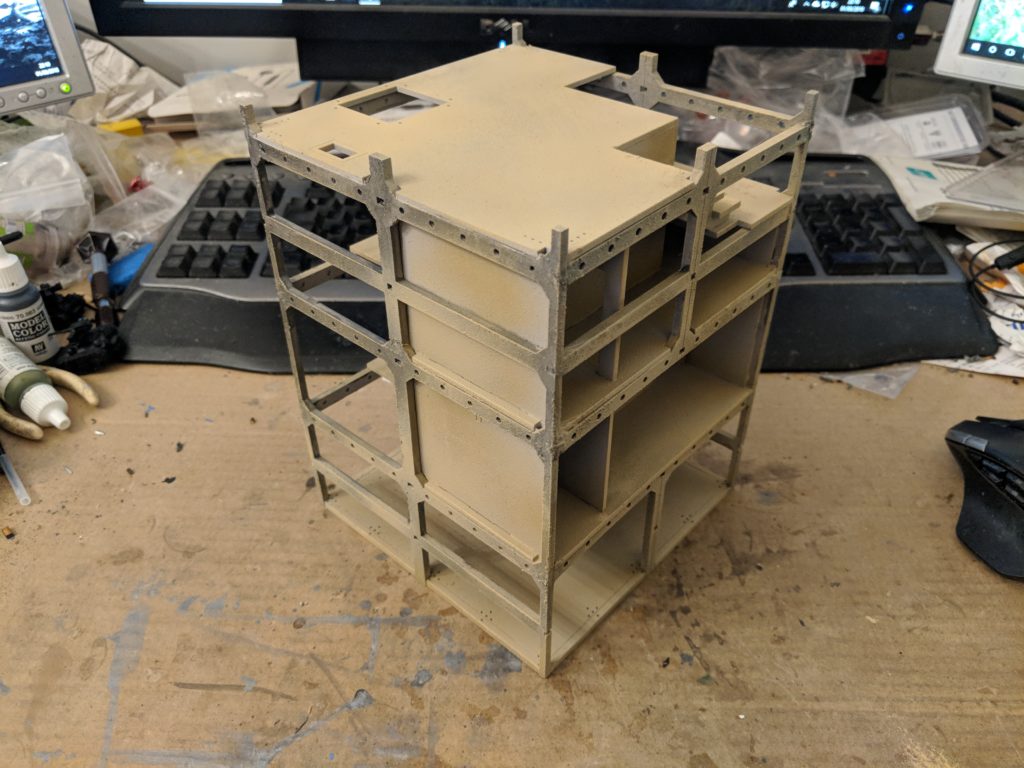
The first building is the tallest, consisting of three enclosed stories and a roof. This will be a pretty key location to secure thanks to how much it can cover the board. As for internal features, each floor has interior walls in a selection of layouts. They are all ideal for placing next to other building, easily creating small rooms.
The roof passes the essential Little Bird test (it fits a MH6 with space to disembark the passengers) with the staircase leading down to the floor below. There are no other staircases in the building but the cut away would allow the positioning of a ladder.
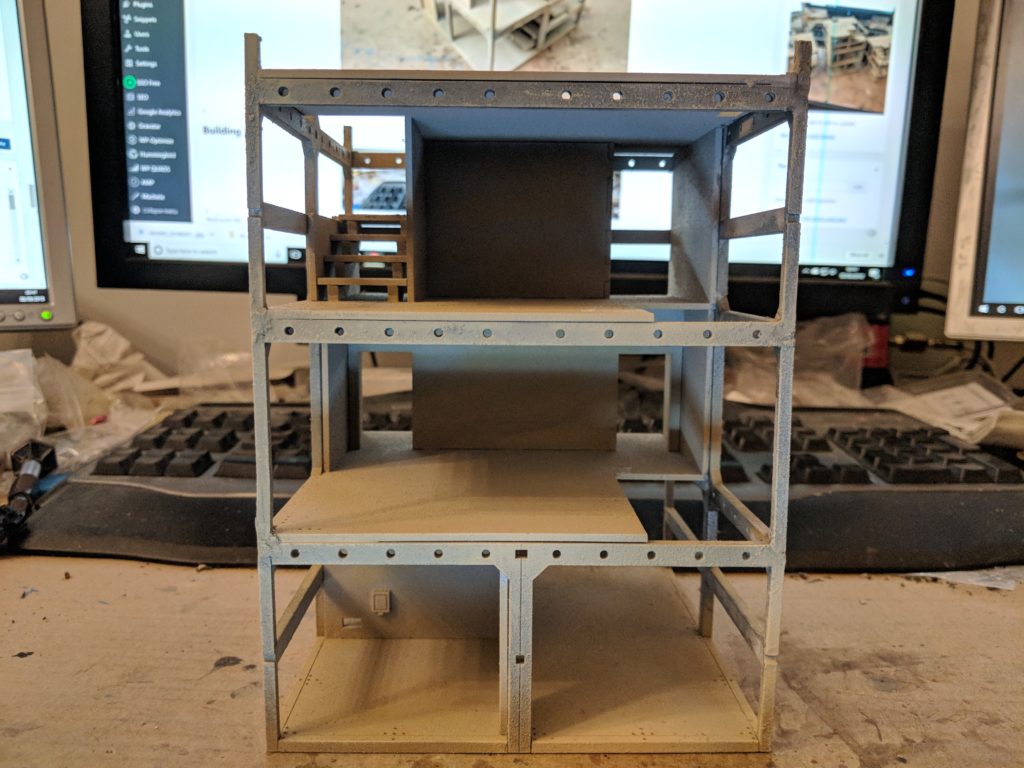
This side on view shows just how much interior real estate is available on each floor. The rooms are not empty, but I’d recommend adding additional cover if you are using this module by itself. I’m planning on adding some tarps handing off the interior edges to help break the sight-lines up.
For more details, check out the companion article at https://wp.me/pvEn5-2rY
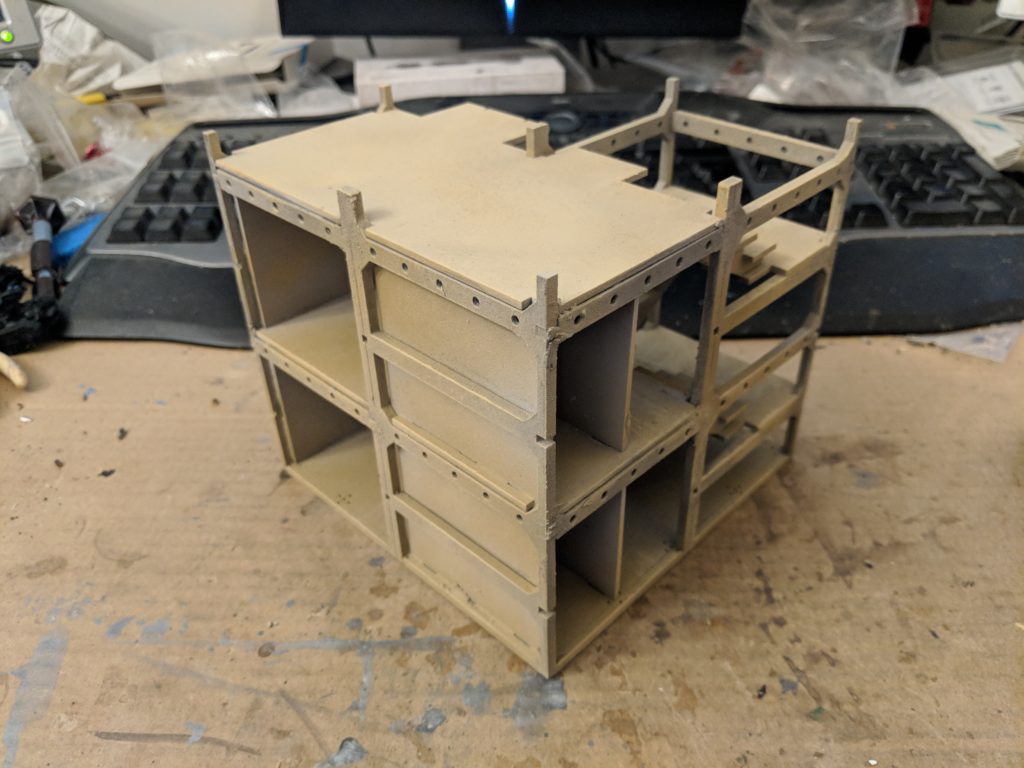
Building 2
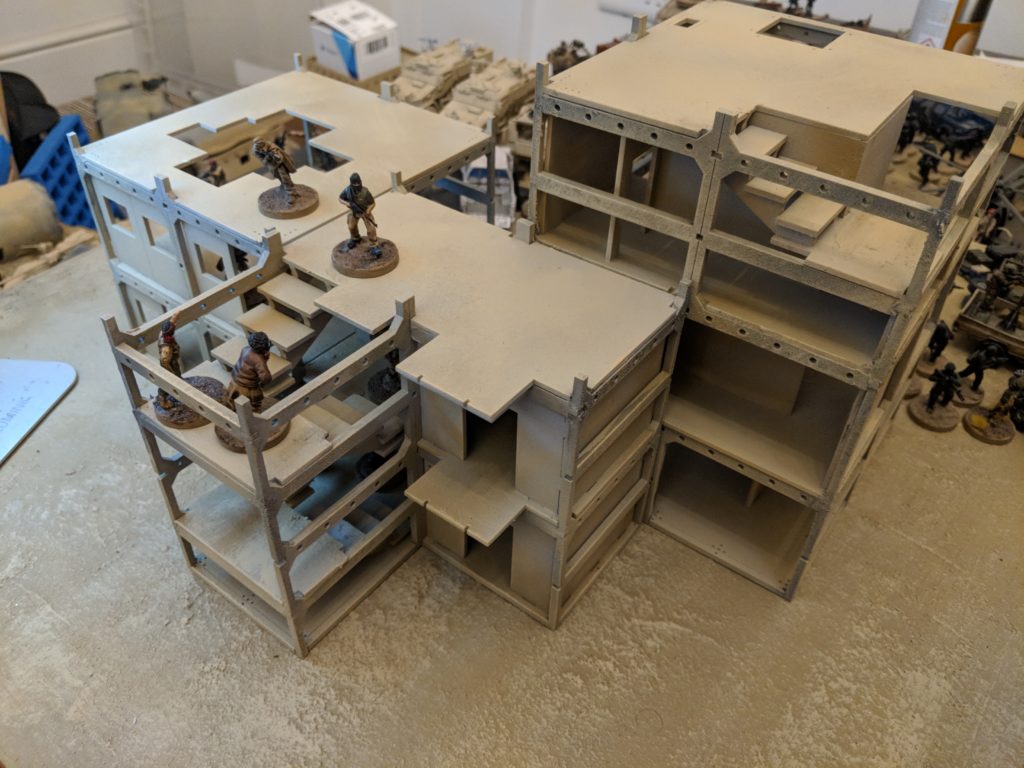
Building 2 is composed of two floors, complete with a small staircase from ground floor to first. There is also a hole in the roof, allowing climbing access or interesting sight-lines between the floors.
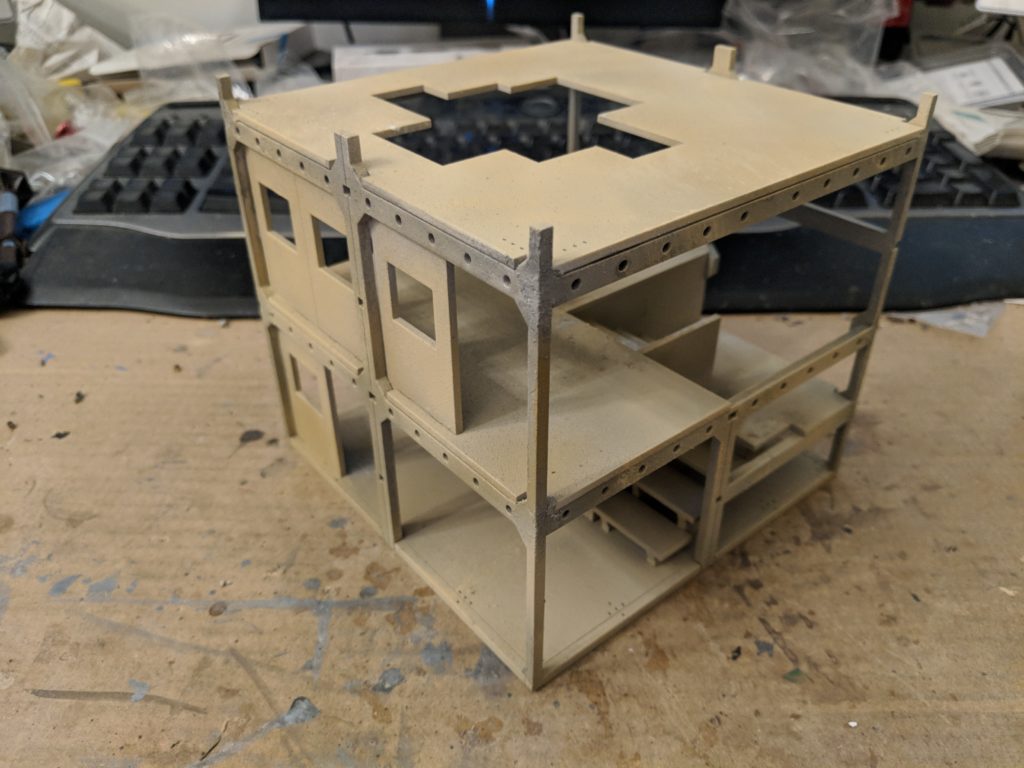
The big feature of building 2 is the interior cladding complete with windows. These work for both interior and exterior walls, letting you assemble offices and other interesting spaces rather than just empty voids.
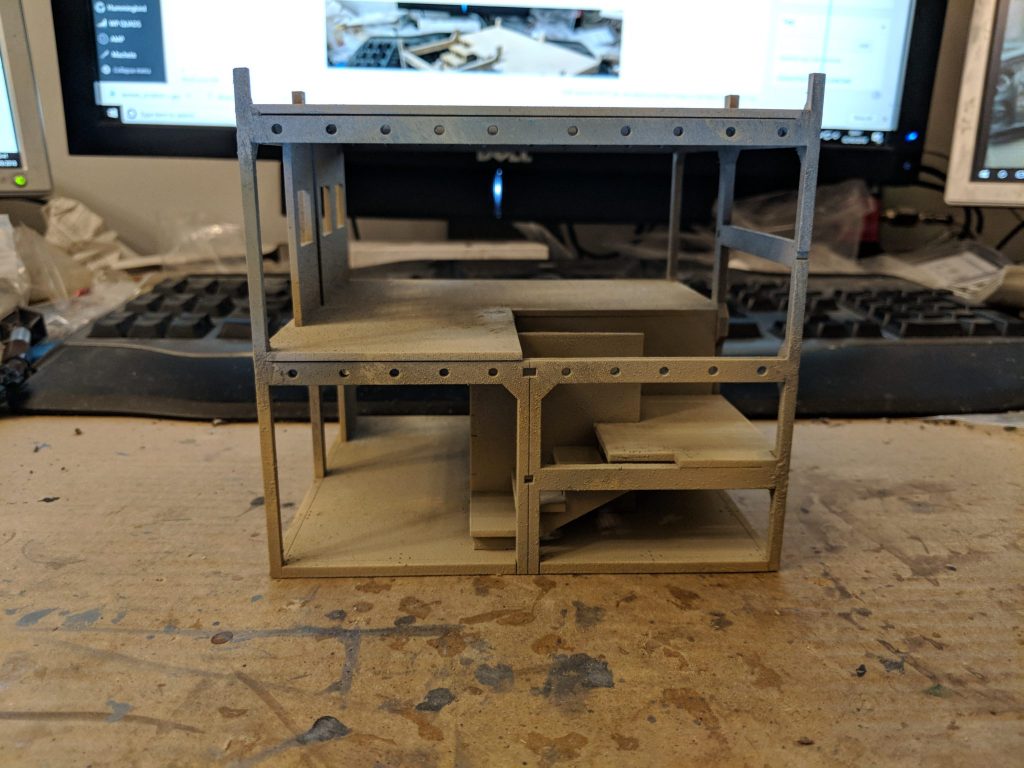
The cross-section shows off how this module could fit with the others. The wide open space would easily extend Building 1’s first floor turning it into a longer firing line. The half height of the staircase would also let figures engage from a place of relative cover.
For more details, check out the companion article at https://wp.me/pvEn5-2rY
Building 3
Building 3 is a stairwell and it’s inclusion really ties the other modules together. The staircase provides access to three levels along with a series of corridors to connect the various floors.
The corridors are probably the only fiddly space I’ve found with these complete kits, requiring some deft finger work to place figures exactly.
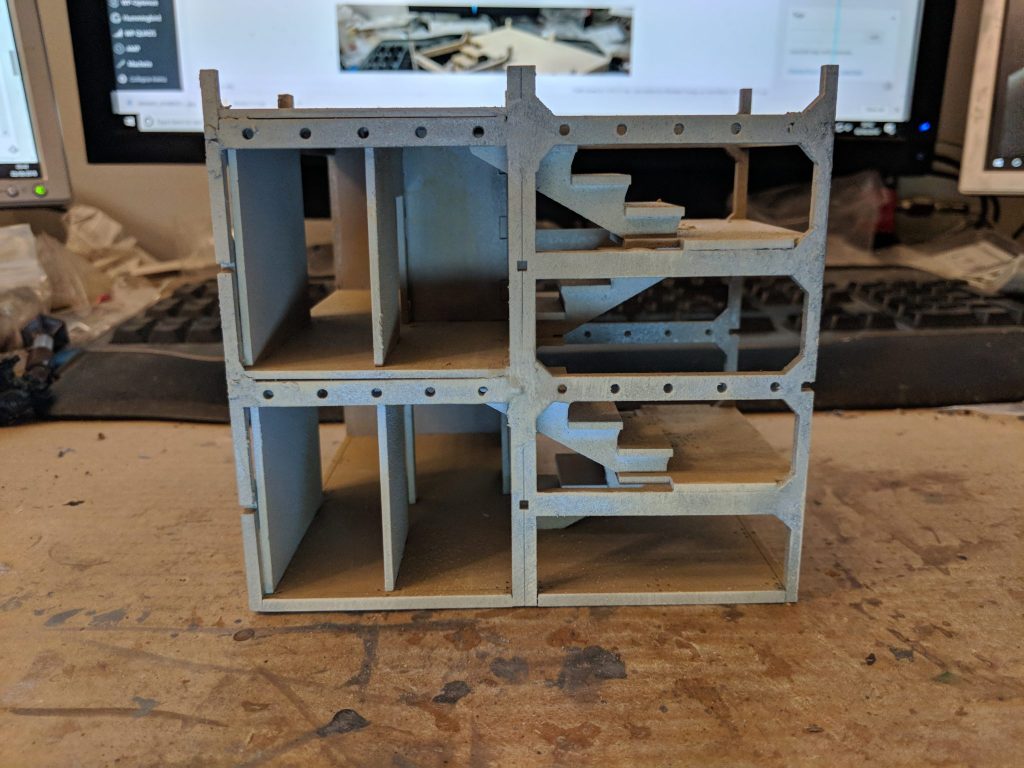
Finally the cross section, shows off the corridors along with the L shape. This module forms a great bridge between two other buildings in this release.
For more details, check out the companion article at https://wp.me/pvEn5-2rY
Layouts
The big thing about these modules is the fact they are designed to fit together in different ways. As part of construction, I threw a few layouts together to have a play.
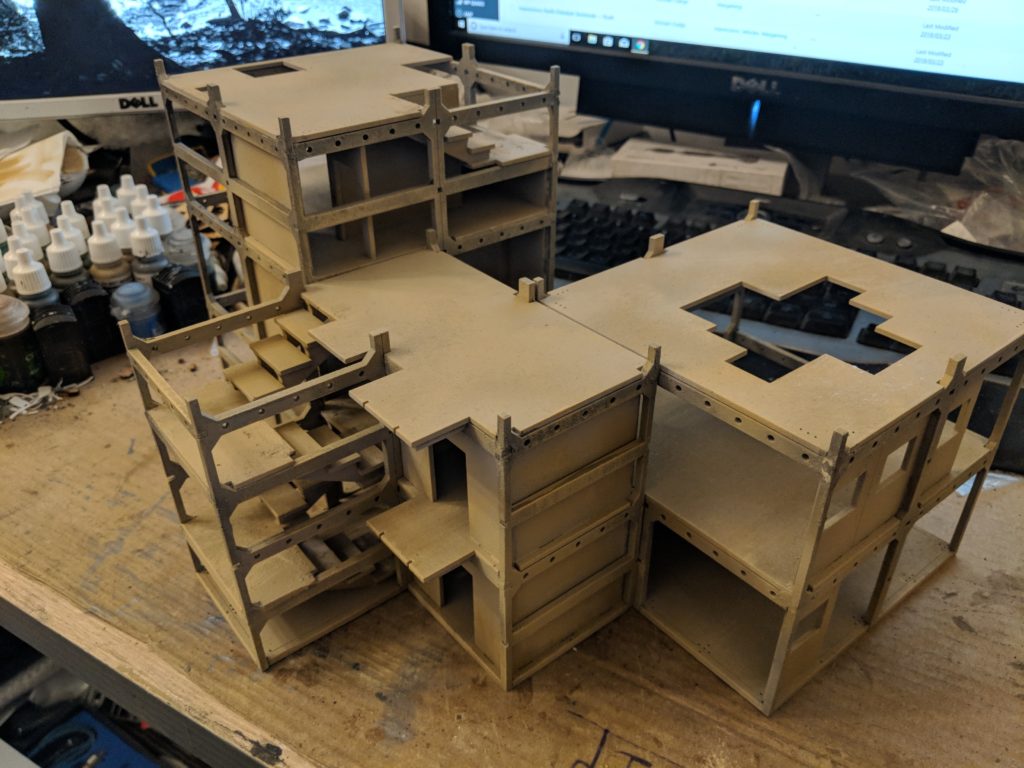


One thing to bear in mind with putting modules together is that they don’t need to line up – placing moduels together in a non-square fashion allow for much more interesting fighting spaces. With the release of more modules
Add-Ons
There are also a few other elements that Supreme Littleness Designs has cut. I’m not 100% on the distribution plan for these elements but they will help to make your buildings more detailed.
This exterior cladding helps to add the skin to the building. Attaching it does have the side effect of making the buildings hard to attach together as it attaches onto the outside beams. Getting enough of them could also make the buildings look almost complete

The smallest addition is these junction boxes. A tiny piece of MDF but added to the walls (along with a few wires) it adds a nice little bit of detail you don’t see elsewhere.
Final Thoughts
I think this range is something new and I’m looking forward to seeing how everyone receives them. They are designed to be modular and playable. Thanks to the design work behind them, they are also pretty easy to assemble and paint, meaning hammering a whole building site out won’t take very long at all.
At the moment, the buildings are not currently released. However, expect plenty of details from me once they are out. 4Ground’s website and Facebook are also well worth keep an eye on them. I’ll also update this piece once the buildings are out with direct links.
Additionally, there are other products coming in the construction site range. As well as more modules, there will be other things to detail your warzone with.


Leave a Reply