
One key symbol of the Ultramodern era has been the rise of Mine Resistant vehicles. As improvised explosive device usage increased in both Iraq and Afghanistan, the classic Humvee and Land Rover became unsafe for use by troops on patrol. The MRAP program worked to fix this, creating a selection of vehicles that able to better protect the crew from most IEDs. However, these vehicles were top heavy and less manoeuvrable than the vehicles they replaced, which especially caused issues in Afghanistan. To find a midpoint between the MRAPs and Humvee, Oshkosh developed the M-ATV. For wargamers wanting one of these vehicles on the tabletop, Empress has two versions of this kit available from their store.
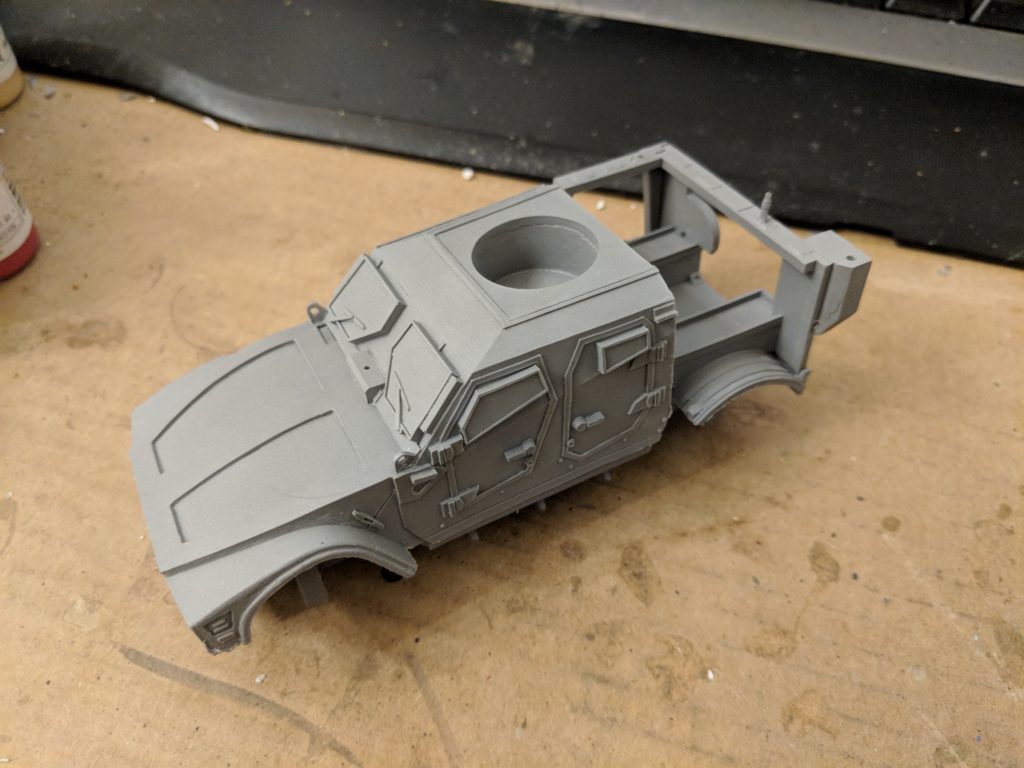
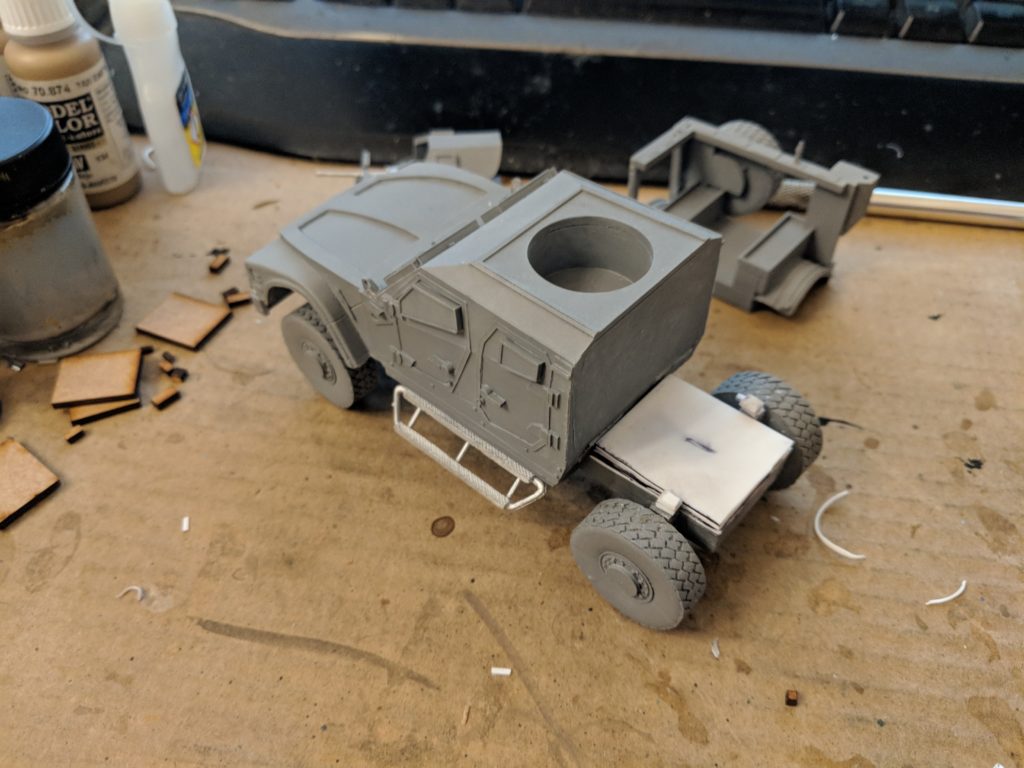
As with most Empress vehicle, the M-ATV is combination of resin and metal pieces. Most of the body is big chunks of resin such as the crew cab and chassis while finer details are made of metal. Although there are no instruction provided, assembly is easy enough. Overall the quality on the casting is really nice. I don’t recommend it for newbies though – there were a few gaps to get filled once assembled, especially on the join between the cab and the chassis.
Once all the resin is in place, it’s time to add the details. All of these details are easy to fit, with careful cut outs and placement guides to make assembly simple. This adds on everything from the cameras required for manoeuvring the vehicle to the steps needed to climb up to the doors.
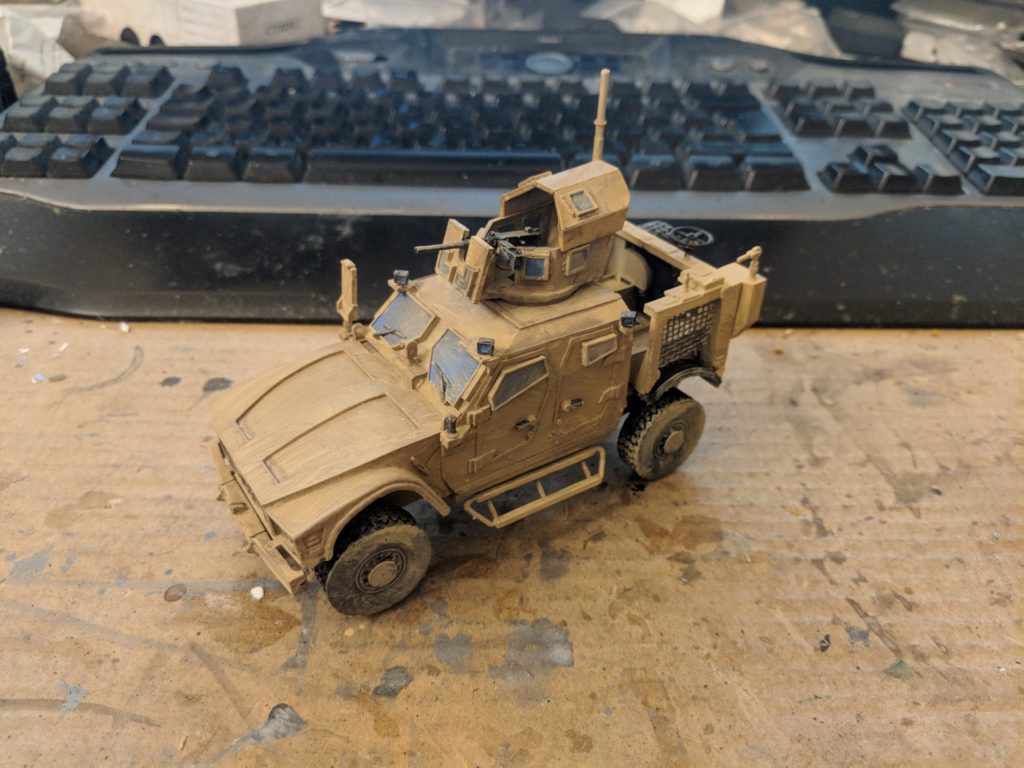
And here is the finished vehicle. Like all my vehicles, it got a desert tan spray and a wash, as well as copious amounts of drybrushing to give it the dirty look. I think my washing brush was a little bit dirty so I might re-do the paint job at some point. However, for now I’m pretty happy with it.
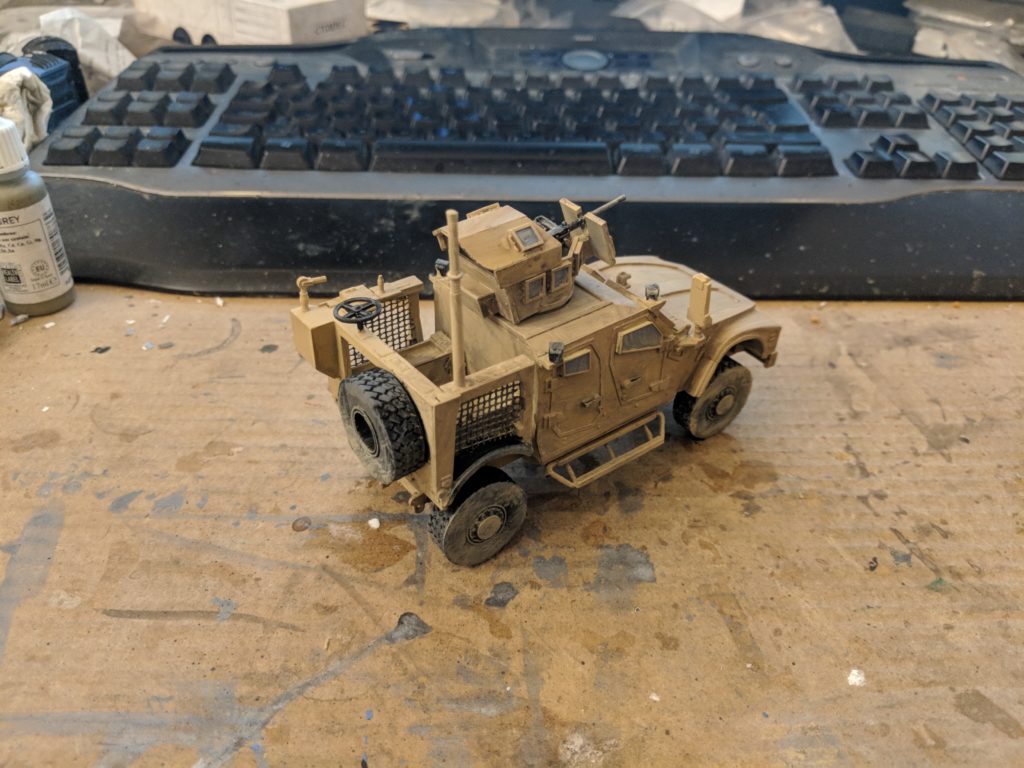
From the rear angle you can see the cargo bay (waiting for me to prepare all the stowage for it). Many of the details on back are siting positions for aerials. You could add these yourself to make the vehicle look even cooler but I think they would last the grand total of 5 seconds before I’d snap them off.
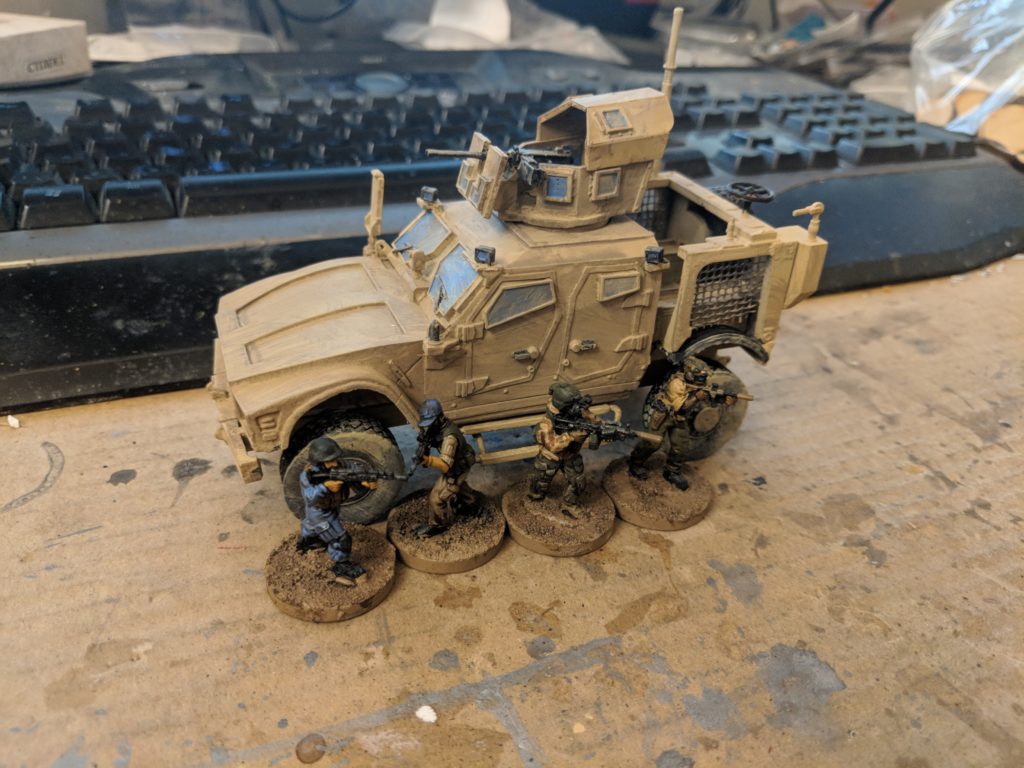
First up, lets see the vehicle against infantry. As you can see, it really towers over them, no matter what brand they are. I really don’t fancy dropping from the crew cab to the ground when disembarking.
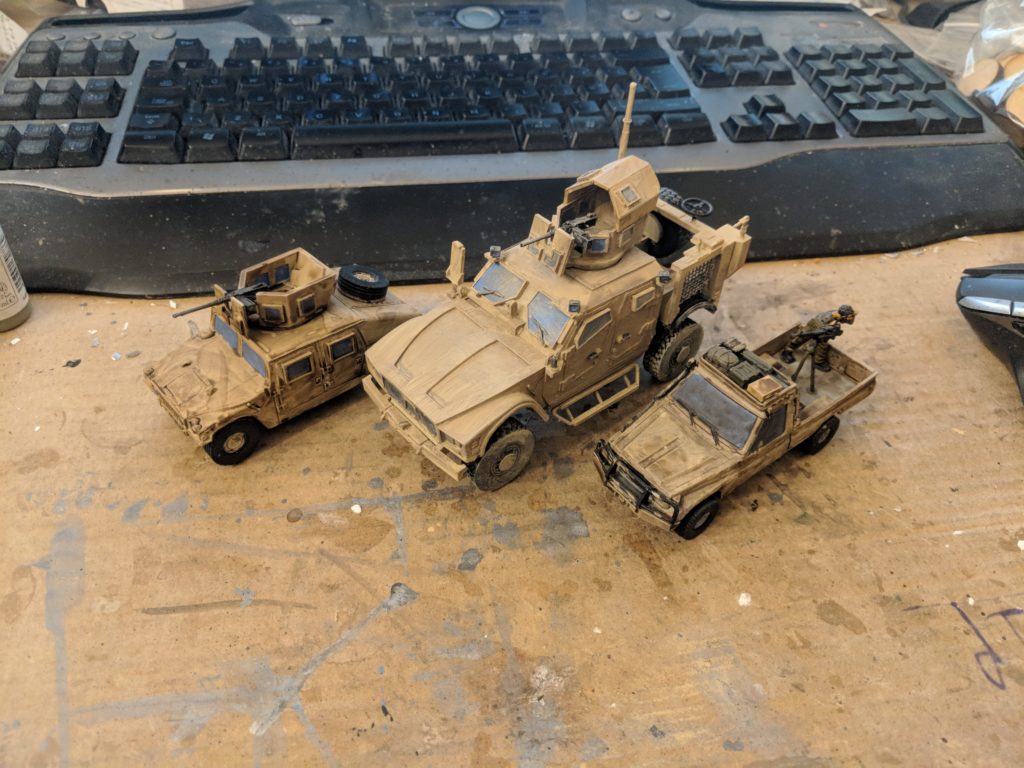
Lets take a look at some vehicles performing similar roles – vehicles designed to carry a HMG and a small number of people. As you can see, the M-ATV towers over the Empress Humvee and Technical from Spectre.
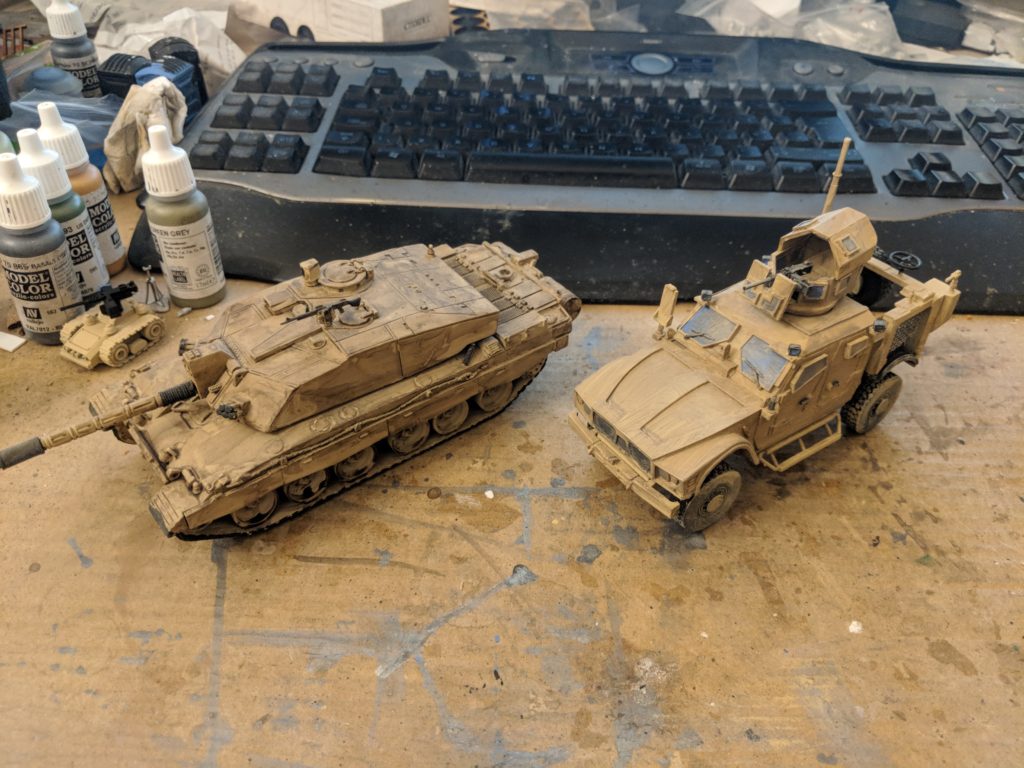
I was really surpsied just how bulky the M-ATV is compared to the Challenger 2. The MBT looks almost sleek and speedy.
If you hadn’t guessed, I really like this vehicle. It required a few little tweaks when building but the final effect is awesome. It’s also a very practical vehicle to pick up. Rather than tanks and APCs, the M-ATV and other MRAPs are a relatively common vehicles after their deployment, meaning it will get a lot of use without overpowering every game it gets into. The price is also pretty reasonable for the vehicle – it’s not quite as detailed as a model kit but it’s definitely designed to be a playable game piece like all of Empress’s stuff. One thing I would like to see is a version (or an addon) including the CROWS remote weapon system, which became very common as time moved on.
In fact I liked the kit so much I bought a second one – come back in a few weeks to see my attempt to build the M1245 SF vehicle based off the M-ATV. As for this vehicle, come back on Friday to see it in action.
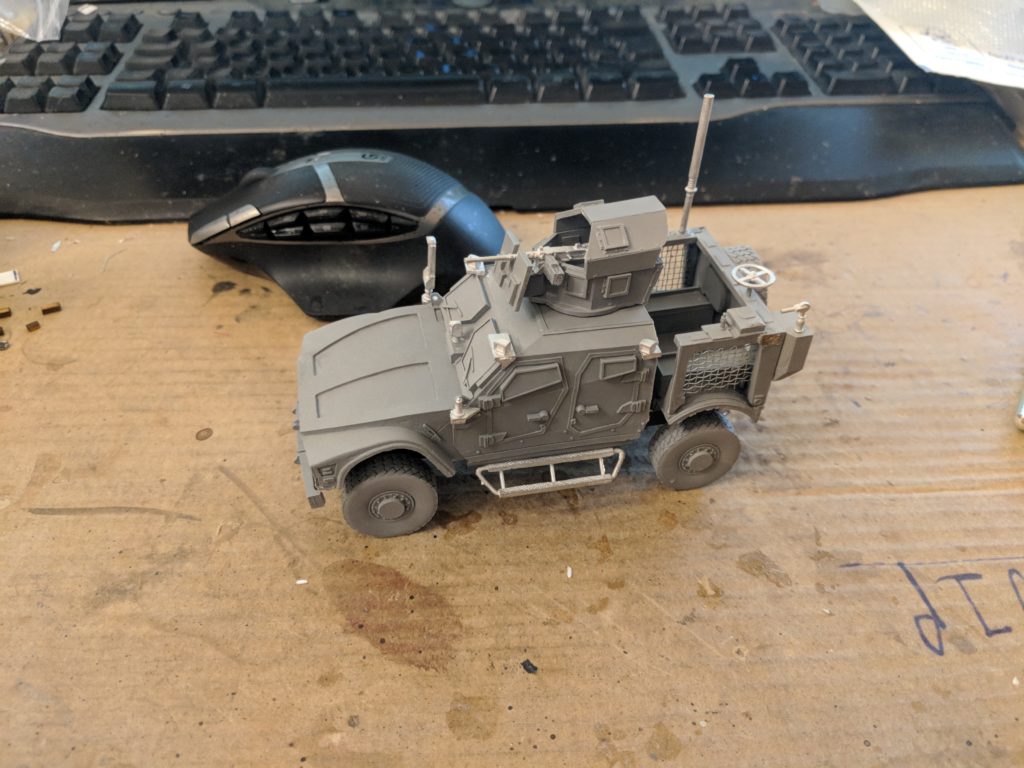
So that’s talking about the kit. As it comes out the box I think it’s fine but there were a couple of tweaks I did to the vehicle while assembling it. Inspired by some points raised on the Queeg’s rather excellent work on them, I decided to do some adjustments. Now, I’d safely say my hobby skills are journeyman level – not complete beginner but not great. Some of these tweaks look a little rough (especially compared to the Queeg’s stuff) but it was fun to do.
First up, the rear cargo bed. Technically the bed on the Empress version is way too low. It doesn’t provide the same amount of travel on the wheels. However, increasing the height would require adding more details such as the suspension. I’m not that fussed so I decided to raise that vehicle up. I assembled several panels of plasticard to raise it to the correct height, including pips for the locator lugs.
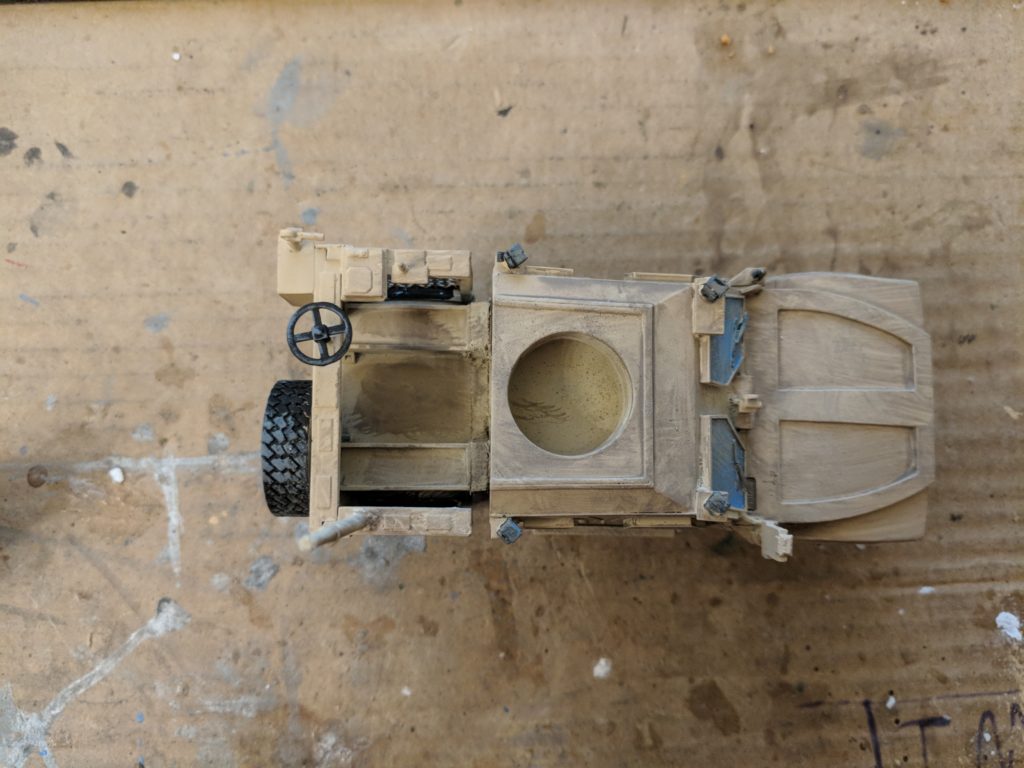
The second tweak was to fill in part of the gap between the rear cargo bay and the main cab. I wasn’t a huge fan of the gap and reference photos seem mixed on how much space there was on the real vehicles. I decided to fill the gap entirely and extended the storage bins backwards. This gives me a larger area to fill with kit once I’ve divvied up my stowage between this one and it’s brother coming soon.

Another tweak was adjust the turret. After clearing the turret of flash, it sat flush with the top of the cab. However, the cab has a lip that was colliding with the bottom of the HMG mount. To fix this, I made a shell out of plasticard to sit in the bottom of the turret well and just make it smoother to turn.
Finally, purely for a visual improvement and based on a stock photo I had seen of the M-ATV, I added some mesh panels to the site. This just makes the rear cargo bay look a bit more practical than it would be if left empty without filling it with plain storage boxes. This mesh was made out of an old sieve, with some careful clipping to avoid sending bits of metal flying round the room. This was then glued into place to the existing frame.
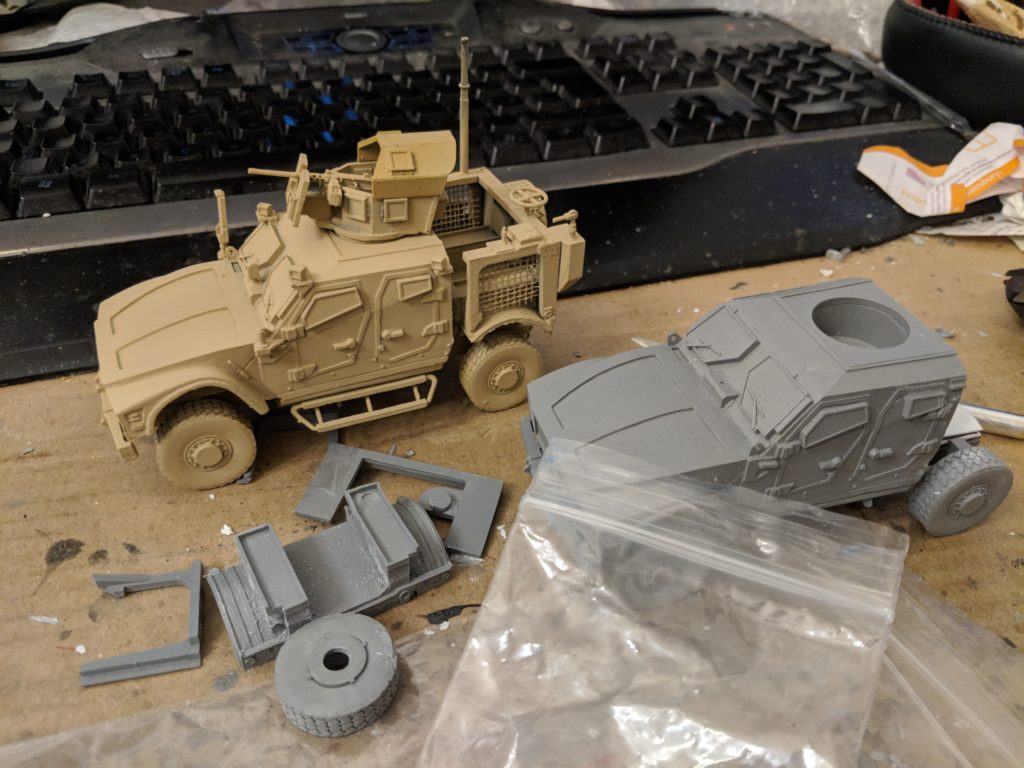
That’s it for the M-ATV but as I mentioned I’m converting a second M-ATV to SF standard. Expect more details in an upcoming article.


Leave a Reply