I’ve previously mentioned that, as part of my Long War series against the tactics of the Dastardly Regular Opponent, we would shortly begin a Pint Size Campaign-inspired set of missions pitting our tactical minds against each other in the deserts of North Africa. After some research, and agreeing to play some games with the Germans on the offensive rather than sitting back with the MGs, the DRO decided upon Torbruk, pitting the Germans on the offensive against British and Commonwealth positions.
With initial planning for the campaign being done by the DRO channelling some of his day job (hitting the spreadsheets), I soon realised that, aside from playing and writing out the battle reports, there wasn’t much else I could do to assist. My opponent would be providing the table, the board, the armies and the scenario. On the one hand, I could have drawn a sigh of relief and gone to do something else (like paint some MDF) but there is something about commanding figures you personally own over those you’re merely borrowing. That and the Western Desert is a frequent setting for our games – both the Dastardly Regular Opponent and the Creative Regular Opponent have forces for the region, so it makes sense that I should join them. Plus, neither of them has any Australian troops, so it gives me a chance to be a little unique.
The question is, how to build my platoon of Diggers? The traditional way is to pick up a pile of metal figures and get to work. But, with World War 2 being one of the biggest parts of the historical hobby, plastic kits are also available, especially if you’re working on the Desert Rats.
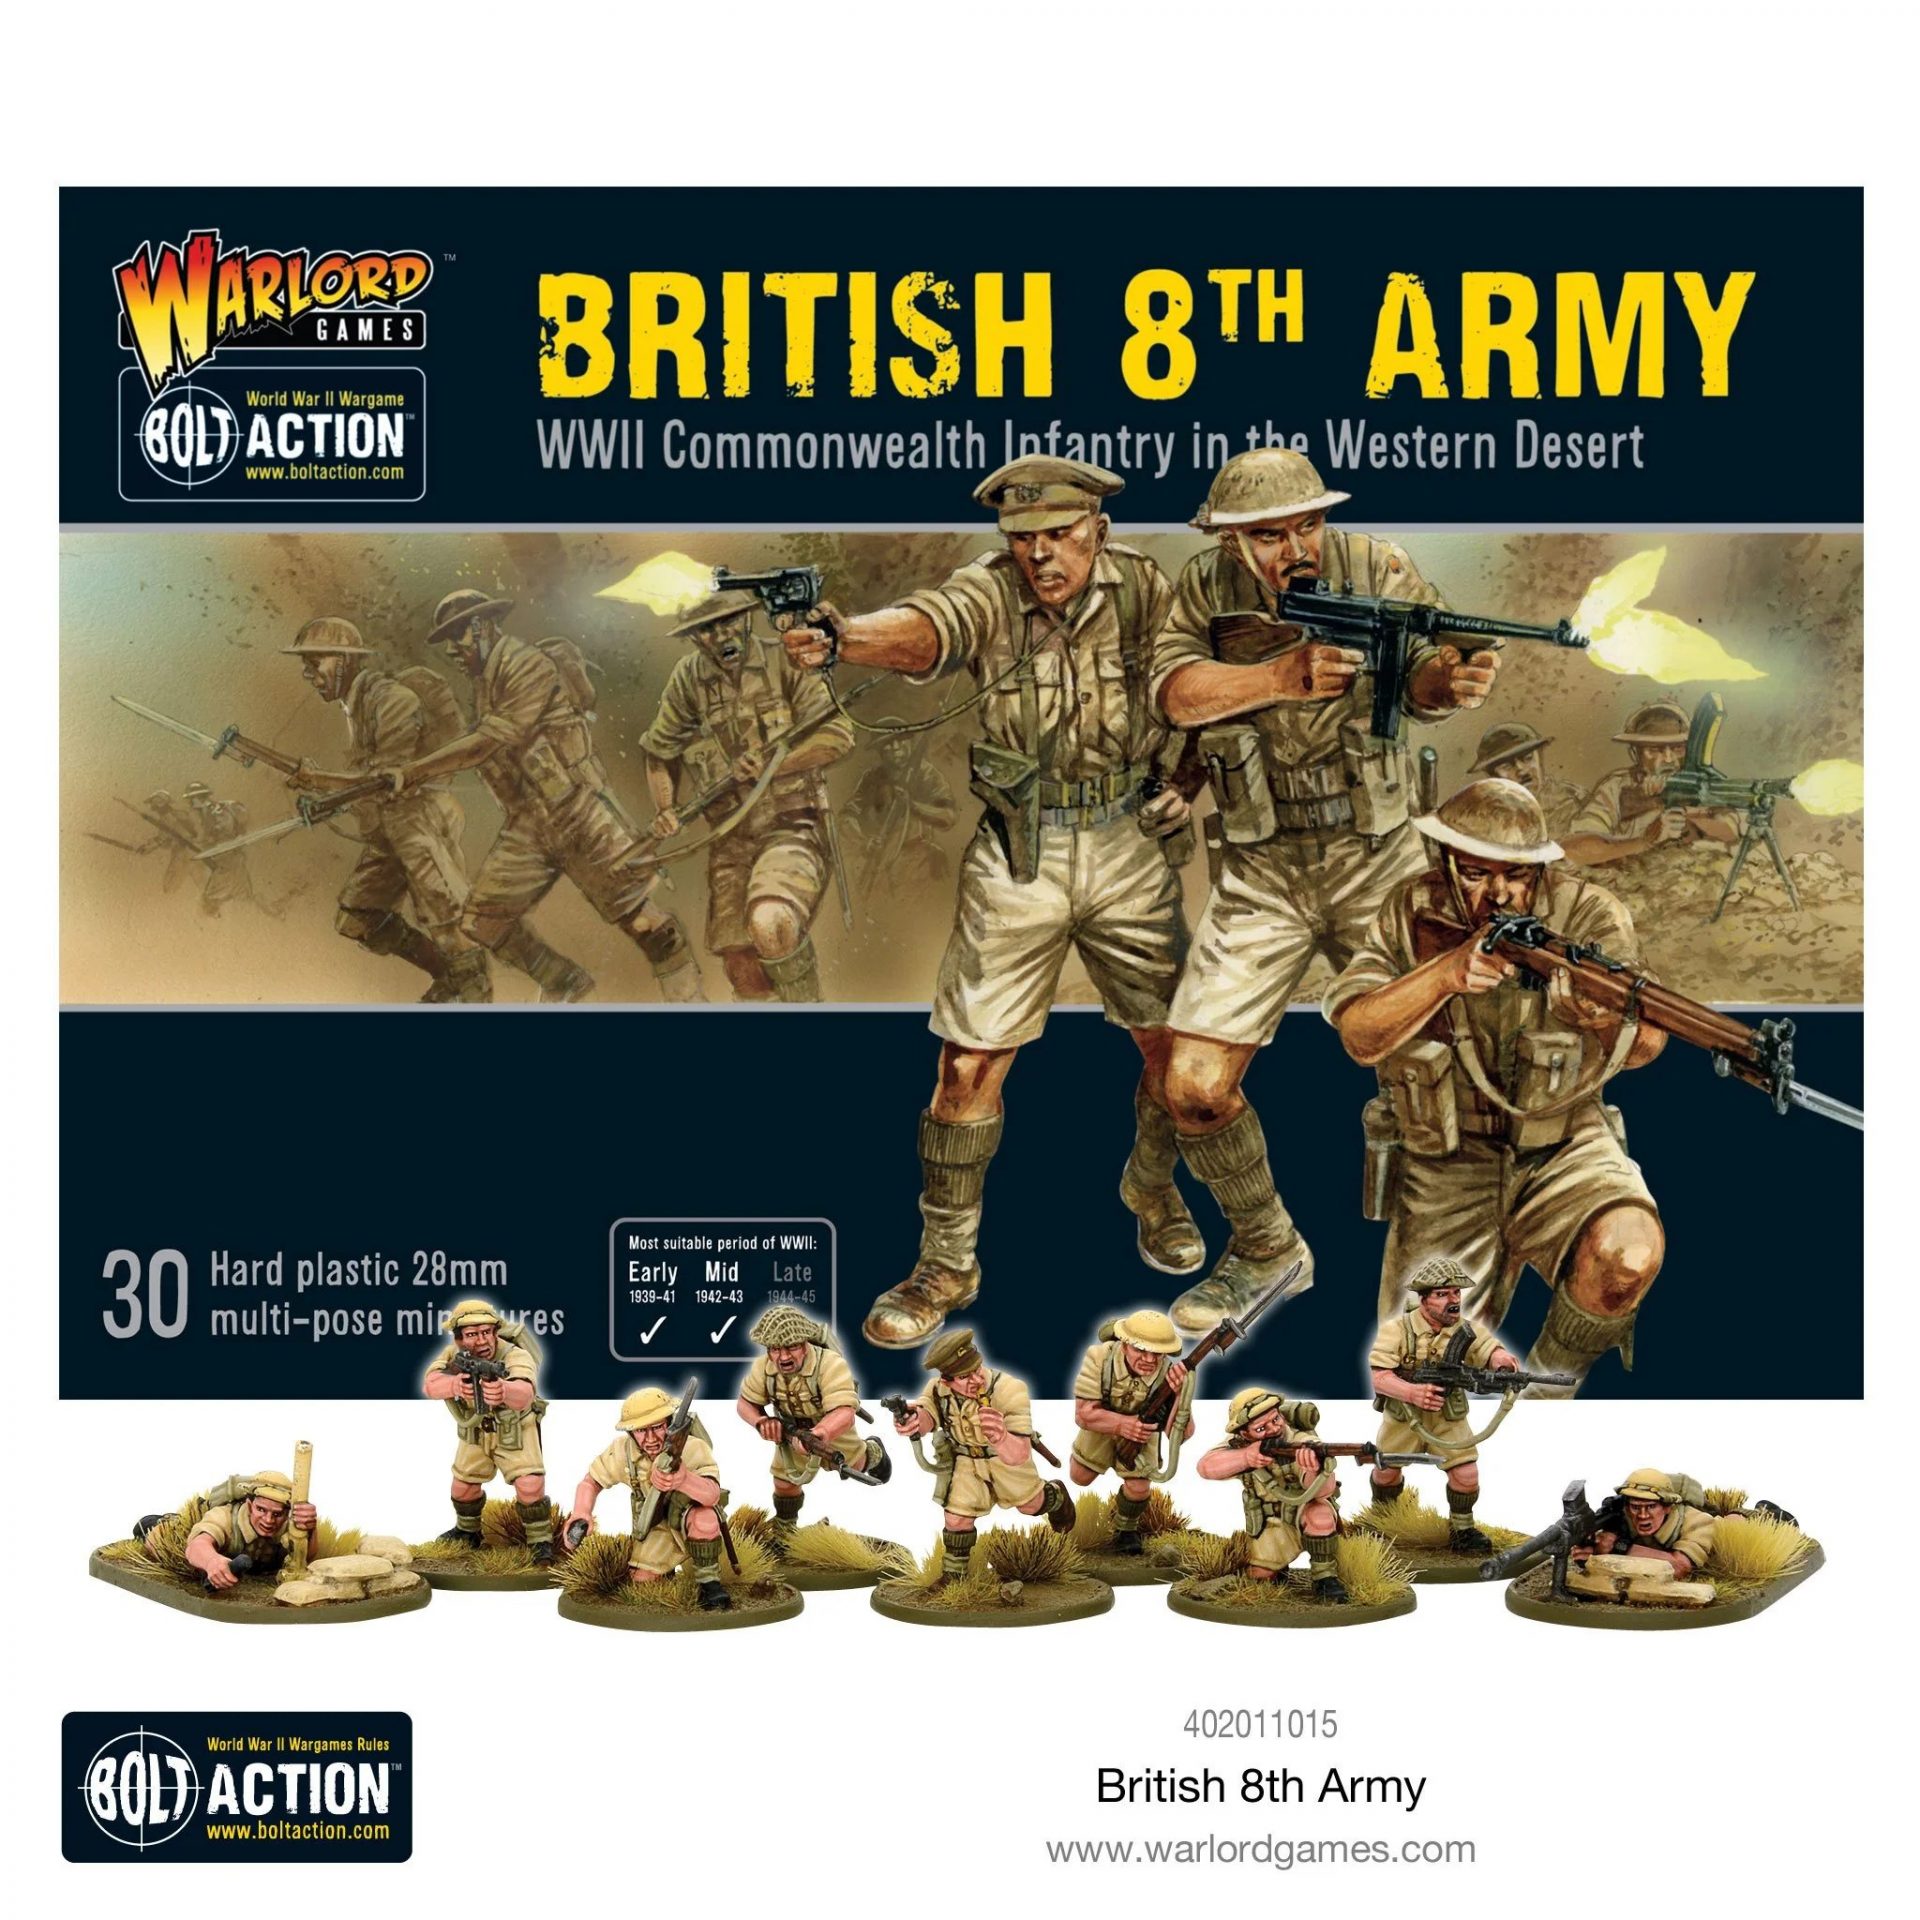
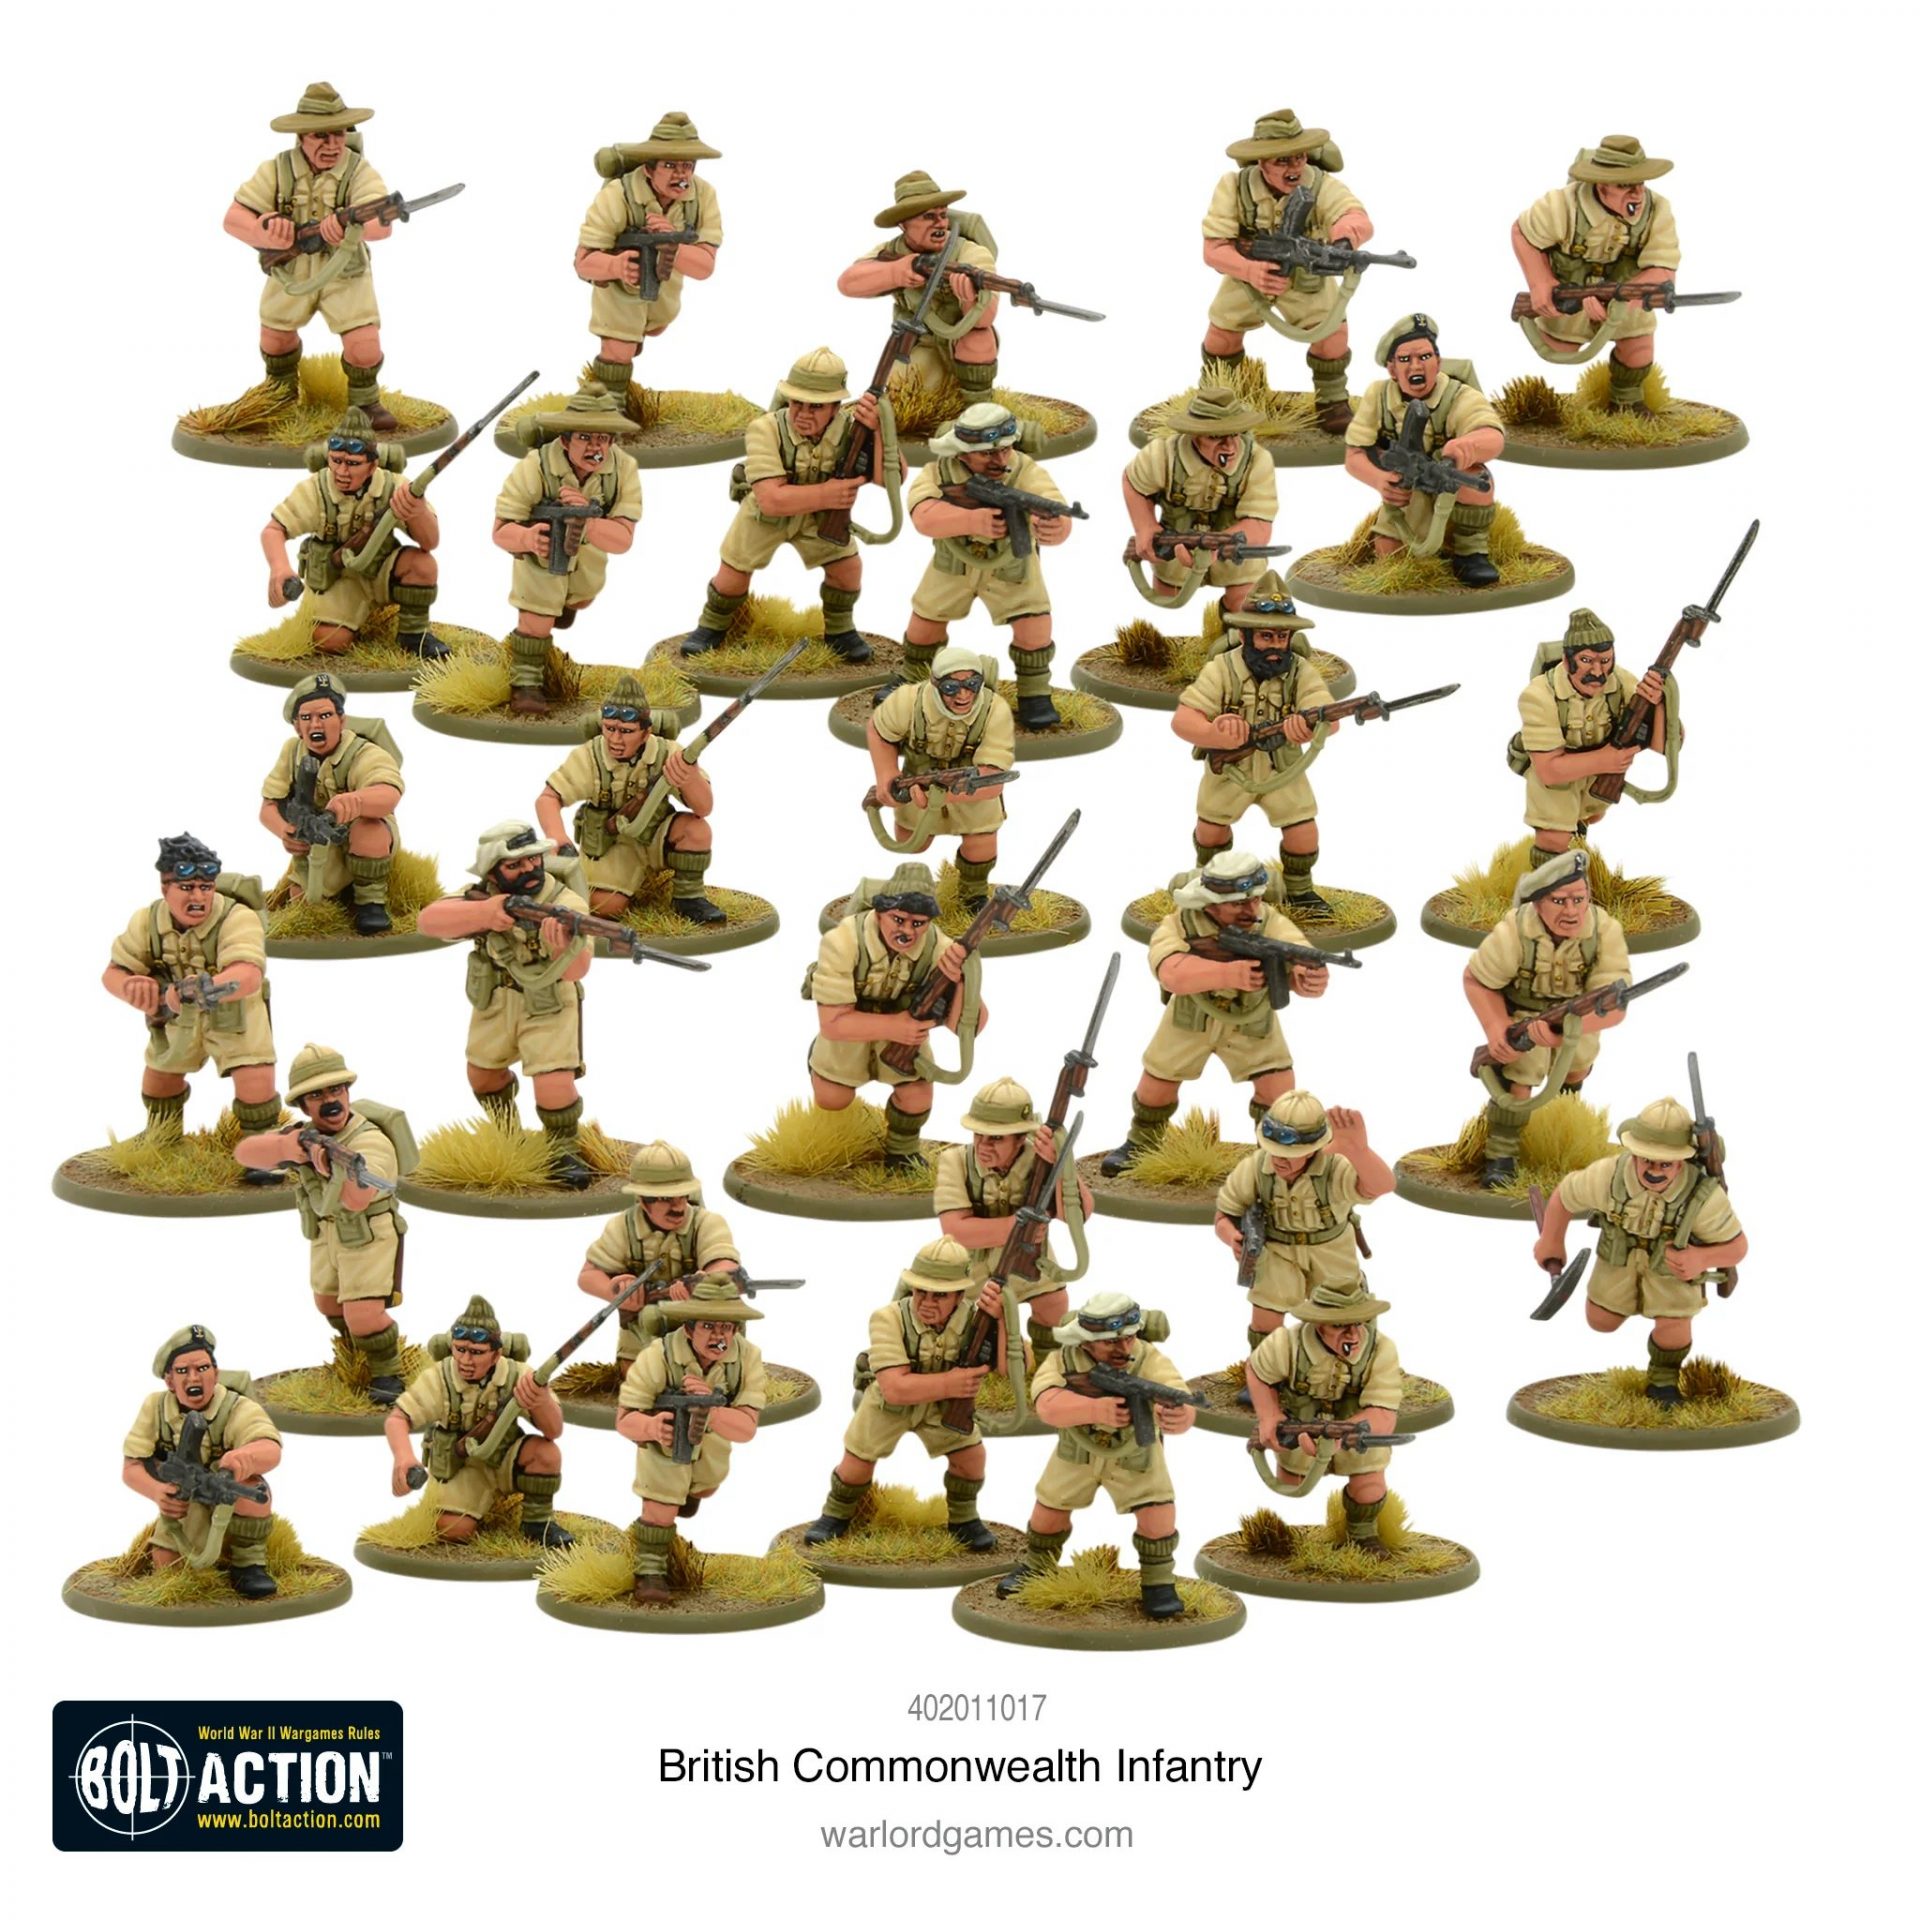
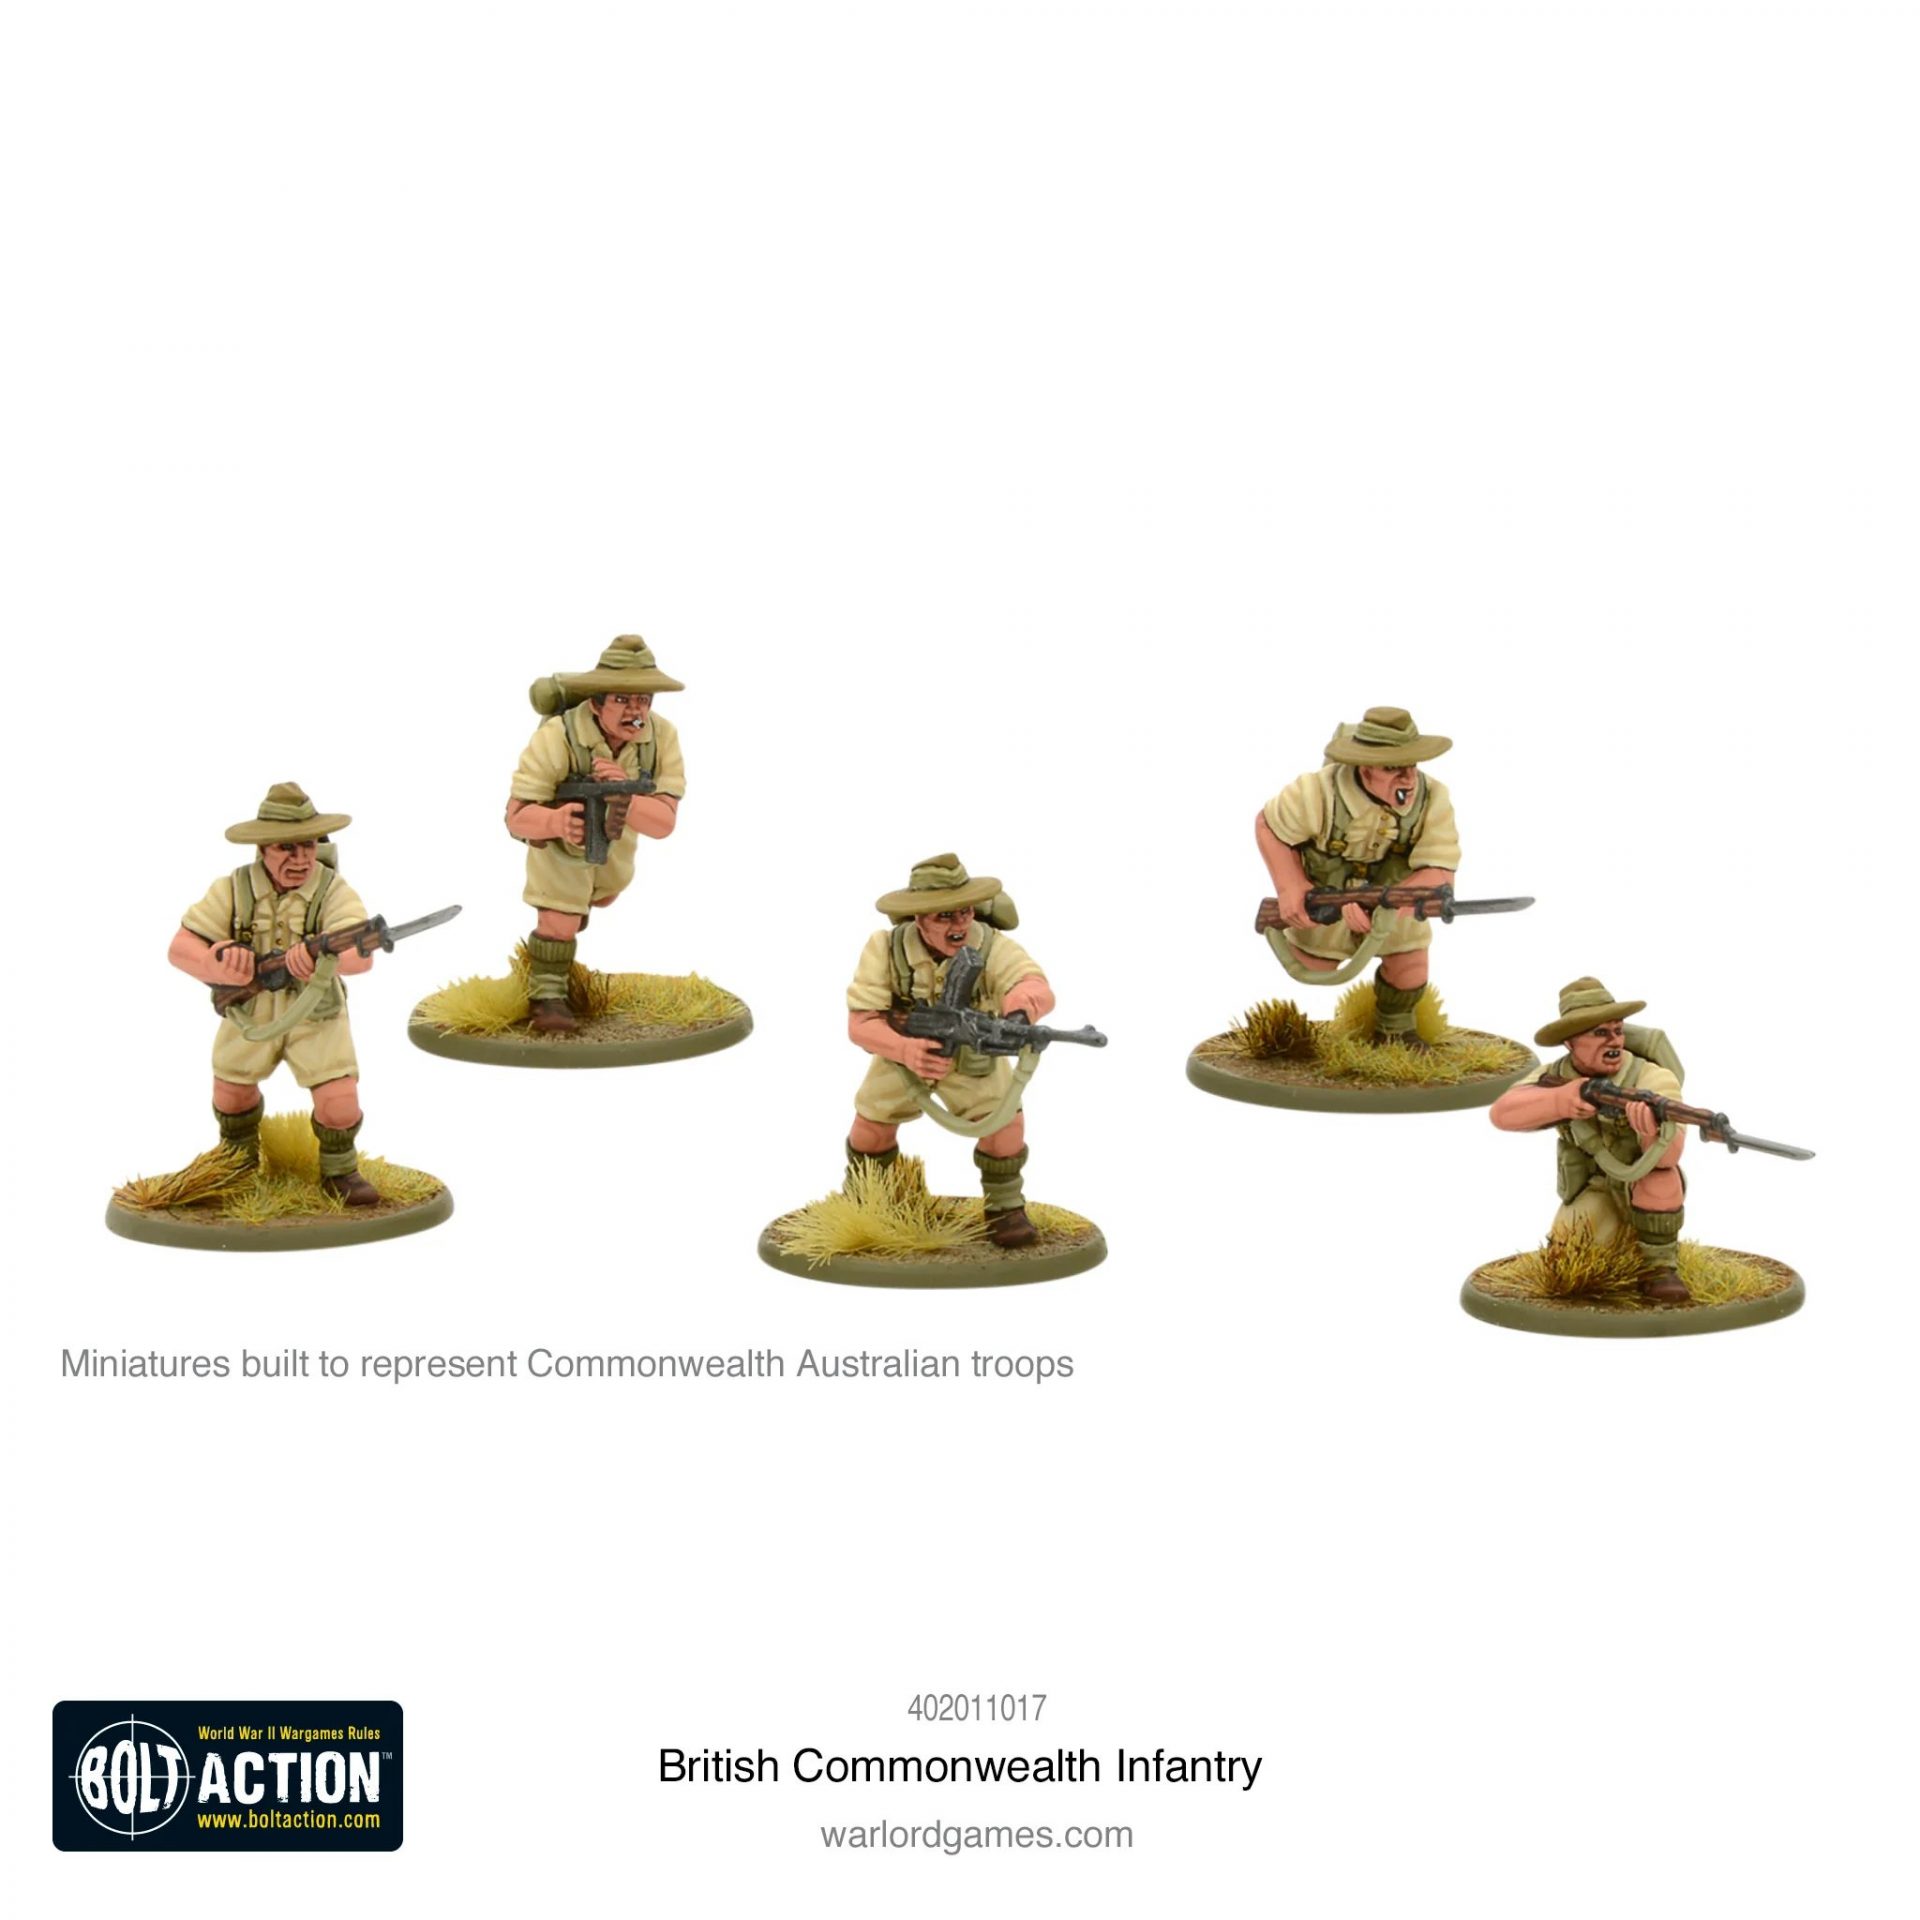
Warlord Games, a company whose game Bolt Action is the number 1 reason we have some of the truly weird and wonderful elements of the war, have two different plastic kits for British infantry in the desert war. The first covers the 8th Army’s British, Indian (with several variations) and Scottish troops, giving you unique head combinations to make the force stand out. The second goes further, offering you hats more suitable for the South African, Kiwi and Australian troops, as well a literal pile of suitably beardy and varied heads for the various Special Forces that had their birth in the deserts of North Africa such as the LRDG, SAS, Popski’s Private Army (thanks Call of Duty: Finest Hour) and more. From looking at the raw numbers, these are some fantastic boxes, offering you 30 figures with plenty of options.
Sounds great, what’s the problem? Well, from a mechanical point of view, the kits offer you enough guys to build your sections, but not enough to fill out the entire platoon. British Platoons consist of three 10-man sections, two leaders (the Platoon officer and his NCO), a Boys AT Rifle team (two men) and a 2″ mortar team (two men) so a single Warlord kit is not quite enough – I’d need to scrounge the Platoon’s integrated teams from somewhere else or (if I wanted it entirely in plastic) buy a whole other box/an extra sprue. I could find a use for these additional figures (extra sections, engineering teams or more) but looking at £35 for a single box, this extra stuff would kick a hole in the project before I’d even started.
The other issue with Warlord is their sculpting style. I have heard some people refer to them as gorillas which I think might be a little on the mean side. They are however, definitely bigger and bulkier, heroically sculpted and looking like the characters from the front cover of a 1970s Commando comic. Faces are chewing gravel, big meaty arms wrenching back on charging handles and generally bulkier than the figures my opponent already owns. Sadly, they do nothing for me – as I’ve mentioned in the past, I always lean towards the more realistic-looking figures when it comes to moderns or historicals.
Putting these reasons together, I decided to look elsewhere.
This brings me to the other plastic option, The Perrys.
The Perrys probably don’t need much introduction, but seeing as every blog post might be someone’s first, so let’s go. Alan and Michael Perry are, to put it mildly, legends in the wargaming space. If you’ve owned Warhammer figures, you’ve probably used some of their work. If you’ve played the Lord of the Rings miniatures game, you have DEFINITELY touched models sculpted by their hands. They are also notorious for having a giant wargames table that is truly the envy of any man.
Outside of work for Games Workshop and Foundry, they also have a lovely set of their own historical releases, covering periods from the Medieval times through to WW2 (with a large collection of Napoleonics that the Creative Regular Opponent is rather keen on). The sculpting style is much more realistic than Warlord, with much more slender figures and finer detail on the weapons themselves. They also, usefully for me, have a range of plastics covering the eras they sell models for, including boxes for the Afrika Korps and the Desert Rats that give you basically a force in a box.
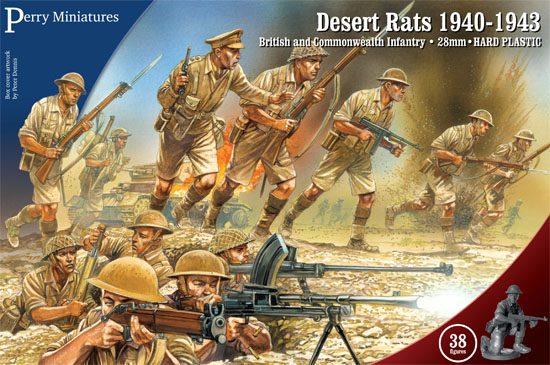
The Desert Rat box comes with 38 figures, giving you enough for a full platoon on the roster (including the radioman abstracted away by Chain of Command). This includes your platoon weapons (2″ mortar and Boys AT rifle) as well as a Bren gun for each section. For someone wanting to build a platoon on a budget, this is the ideal setup.
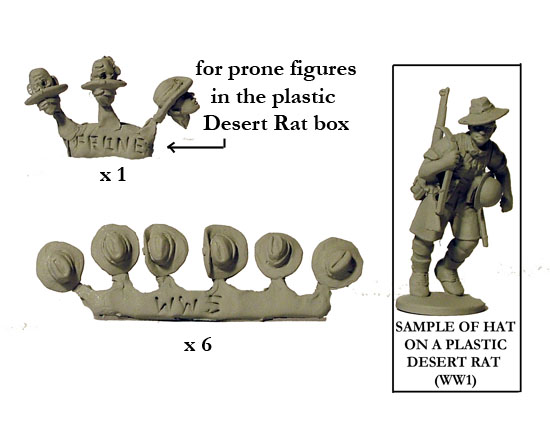
Additionally, The Perrys have also done something very clever with the headgear options. Rather than going the usual route of cutting the head off at the neck, they instead give you a full formed head but leave it bald, without even a scrap of hair on their head. This then lets you slot on your chosen headwear, either the varieties included on the sprue (helmet, helmet with net or an officer’s hat) or pick from one of the many alternatives available on the Perry website. As I wanted to make my Desert Rat Antipodean, I decided to go with pack WW5, giving me enough slouch hats to fill out the platoon. With a relatively simple order in, I sat back and waited for the parcel to arrive.

The following Wednesday, this cardboard parcel dropped through the door. Speedy shipping!
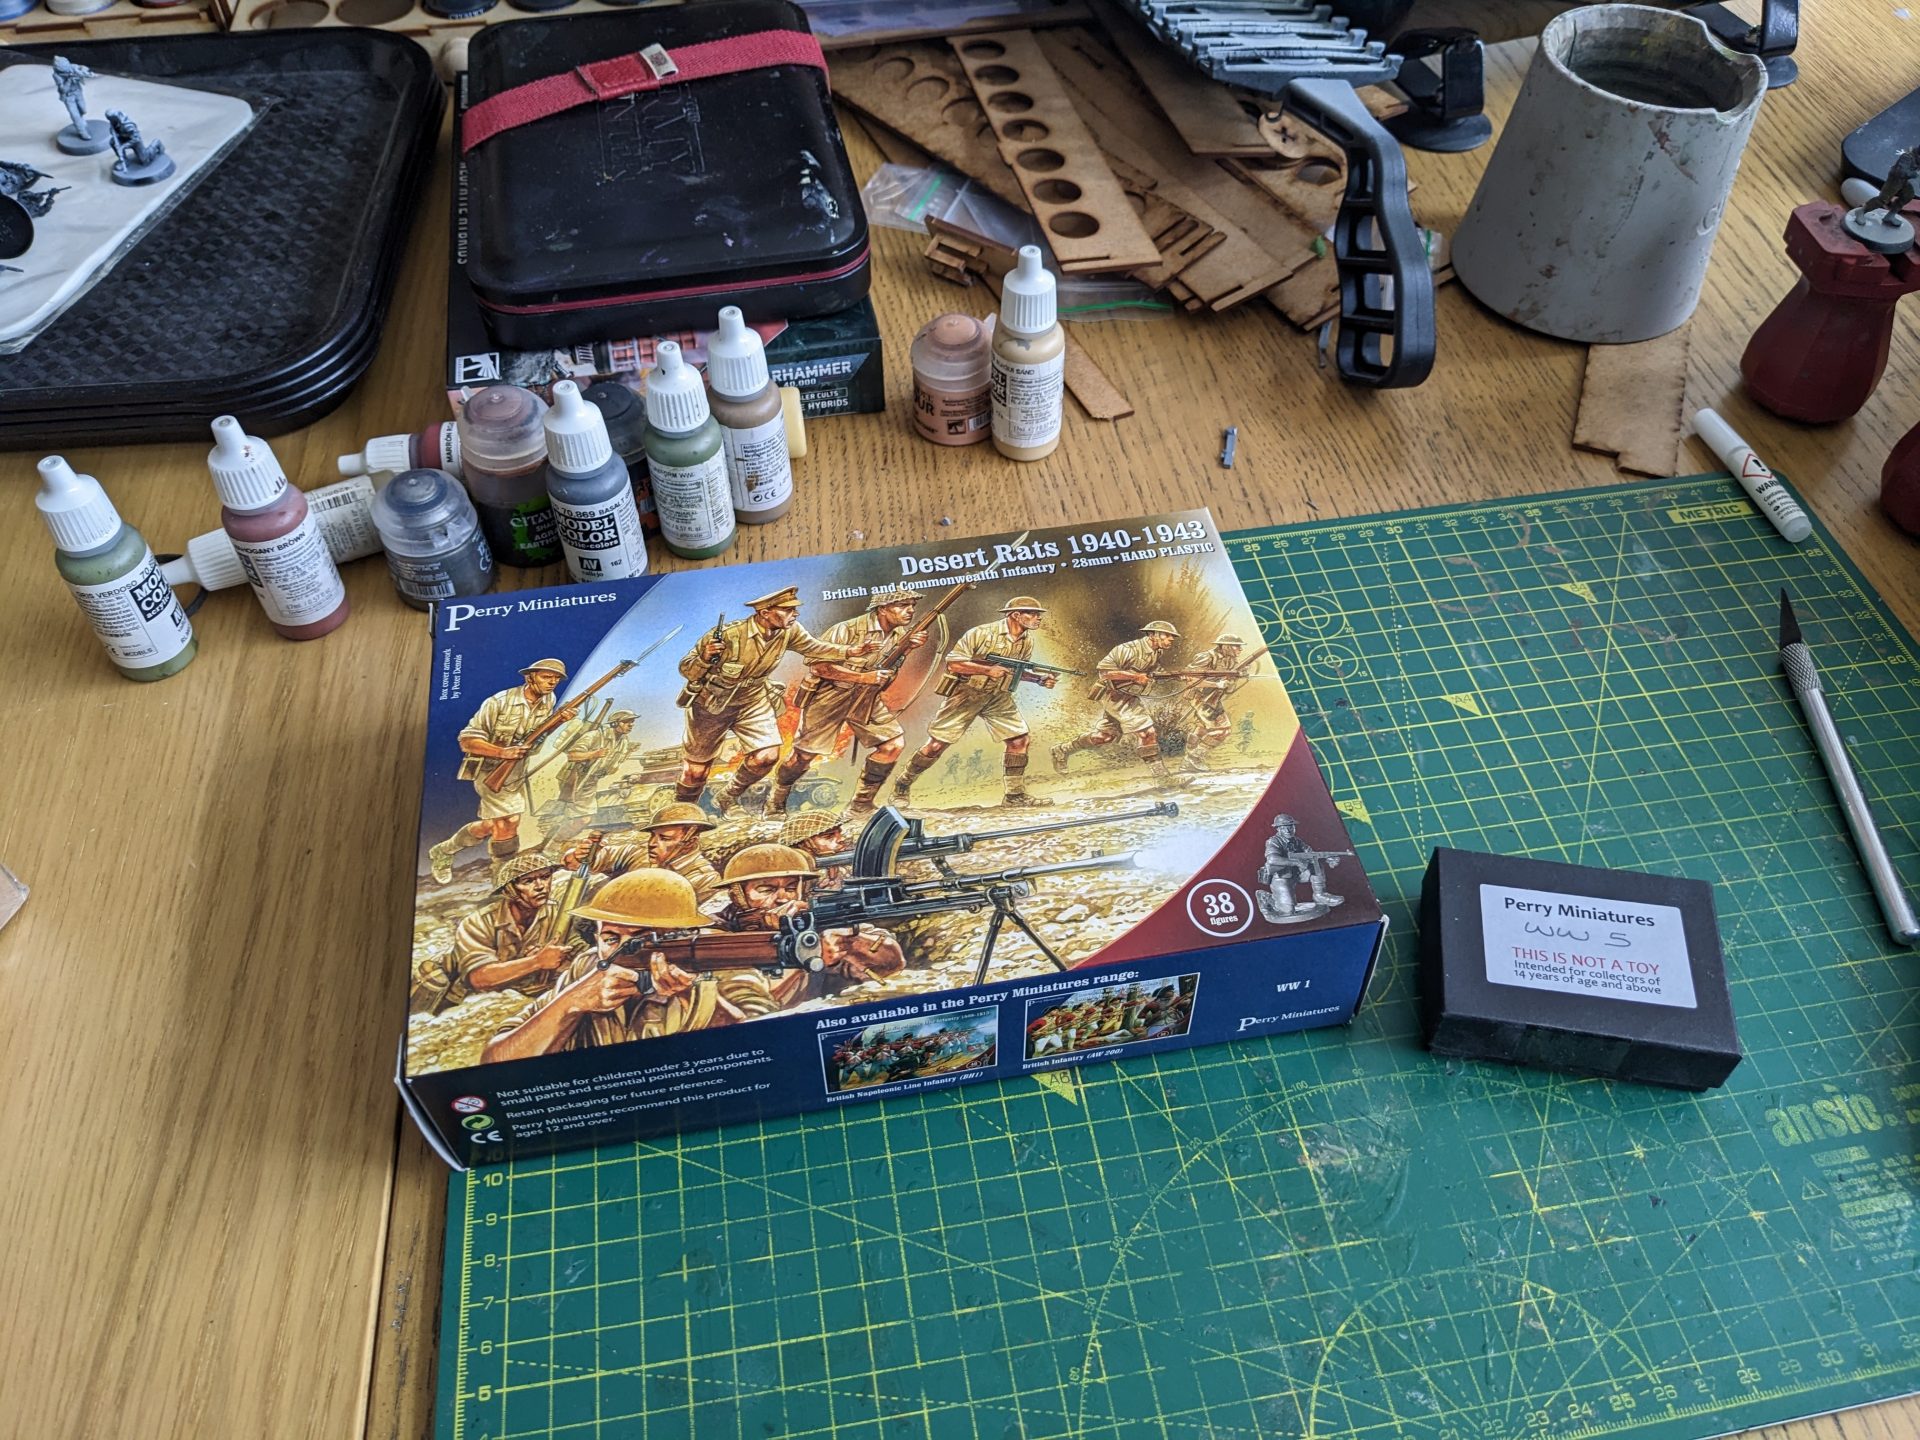
Inside the outer box, I was presented with two items. The plastic kit come in a full colour cardboard box, complete with Peter Dennis art on the front and some basic colour illustrations on the back There are also several tempting shots of other Perry kits on the long edge, just to show you what else you could be making…
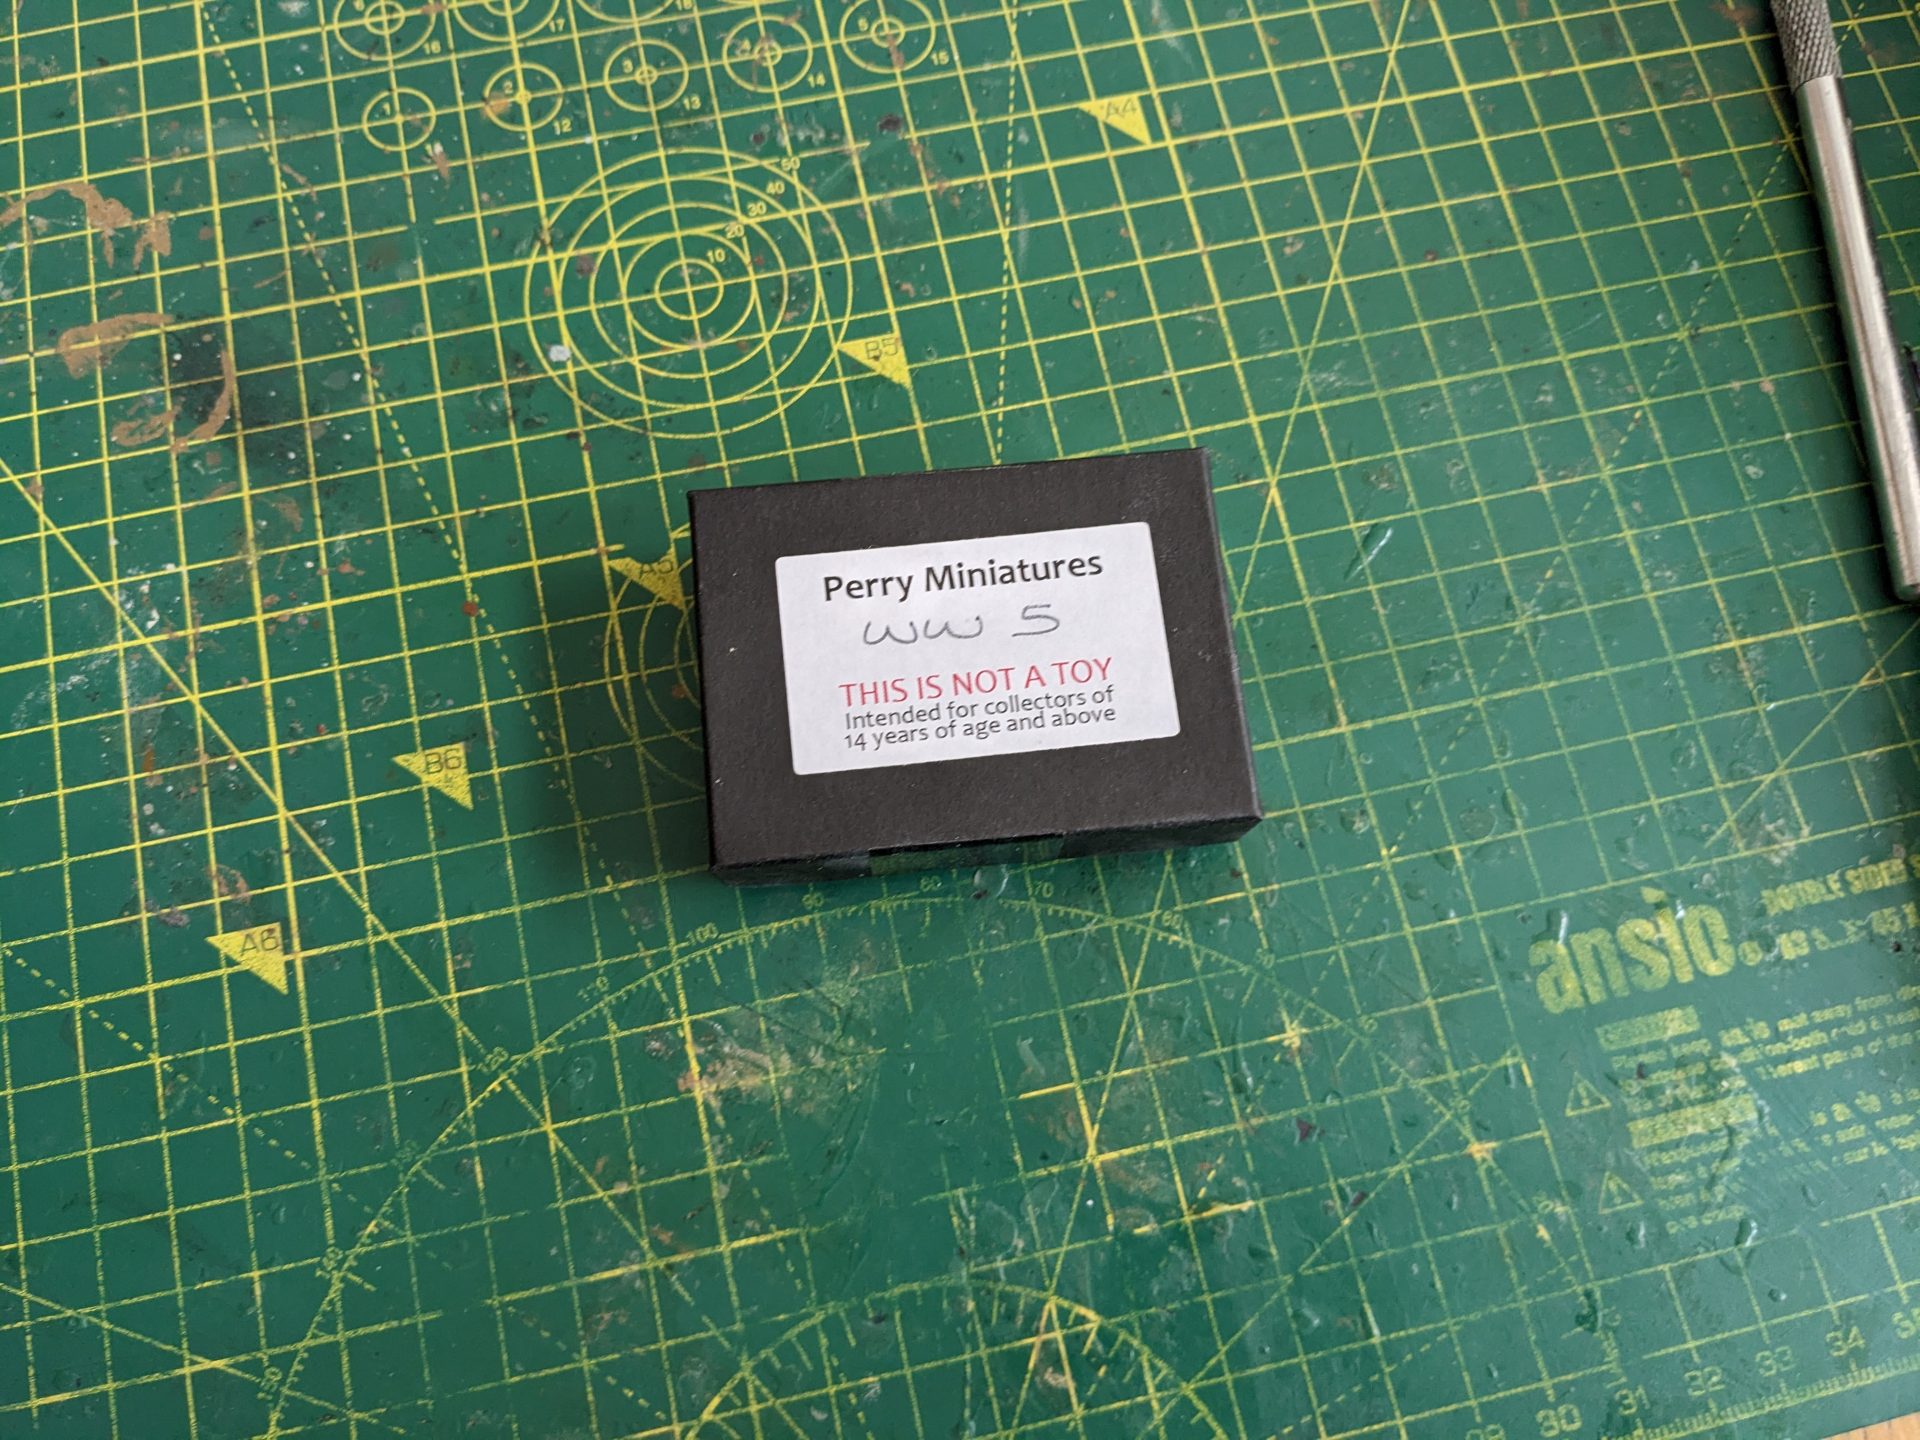
The metal heads came in a box style that I’m pretty sure many Spectre fans will recognise from the early days. We’ll cover what’s actually inside it in a second because first of all… SPRUES!
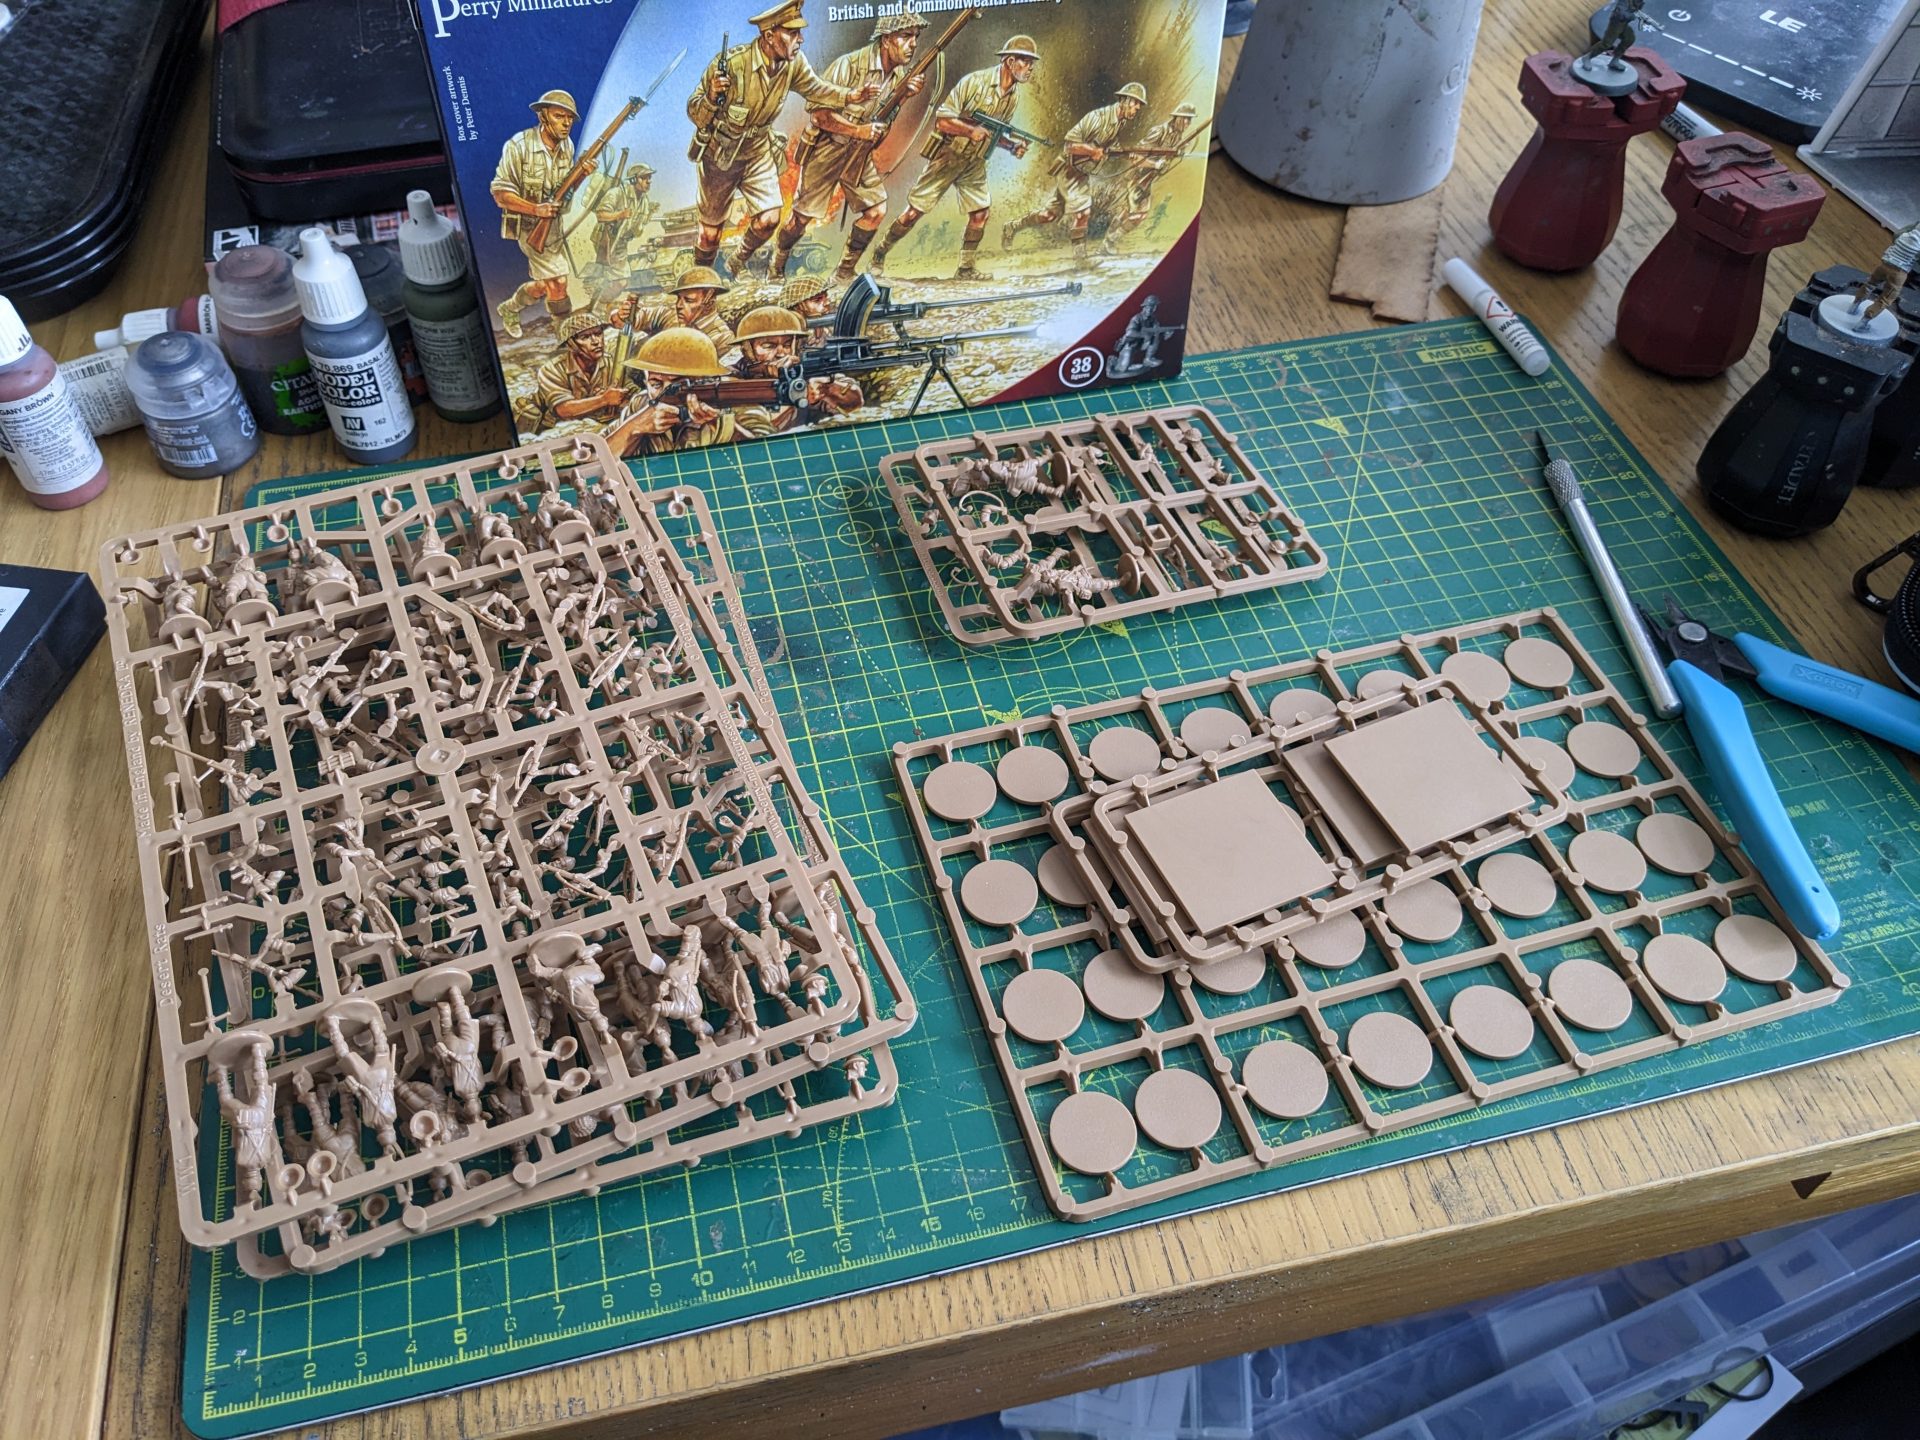
The good bit of any plastic kit – breaking out the sprues and taking a look at what you have to play with. This set comes with three of the main sprue, two of the command sprue and a pile of bases. If you recognise the style of base, that’s because these sprues are made in the UK by Renedra who also provide bases for North Star, so they popped up during my adventures into Frostgrave figures. They are really nicely made, with basically no cleanup required during assembly – always a positive!
I’m not using these bases though. For one, square bases for weapons teams are an odd choice. For another, I have plenty of Warlord-style bases (including various sizes ideal for prone figures) and don’t really want to reintroduce this base style to my database. Luckily, my Creative Regular Opponent uses these bases for Napoleonics, so they will be making a journey north at some point.
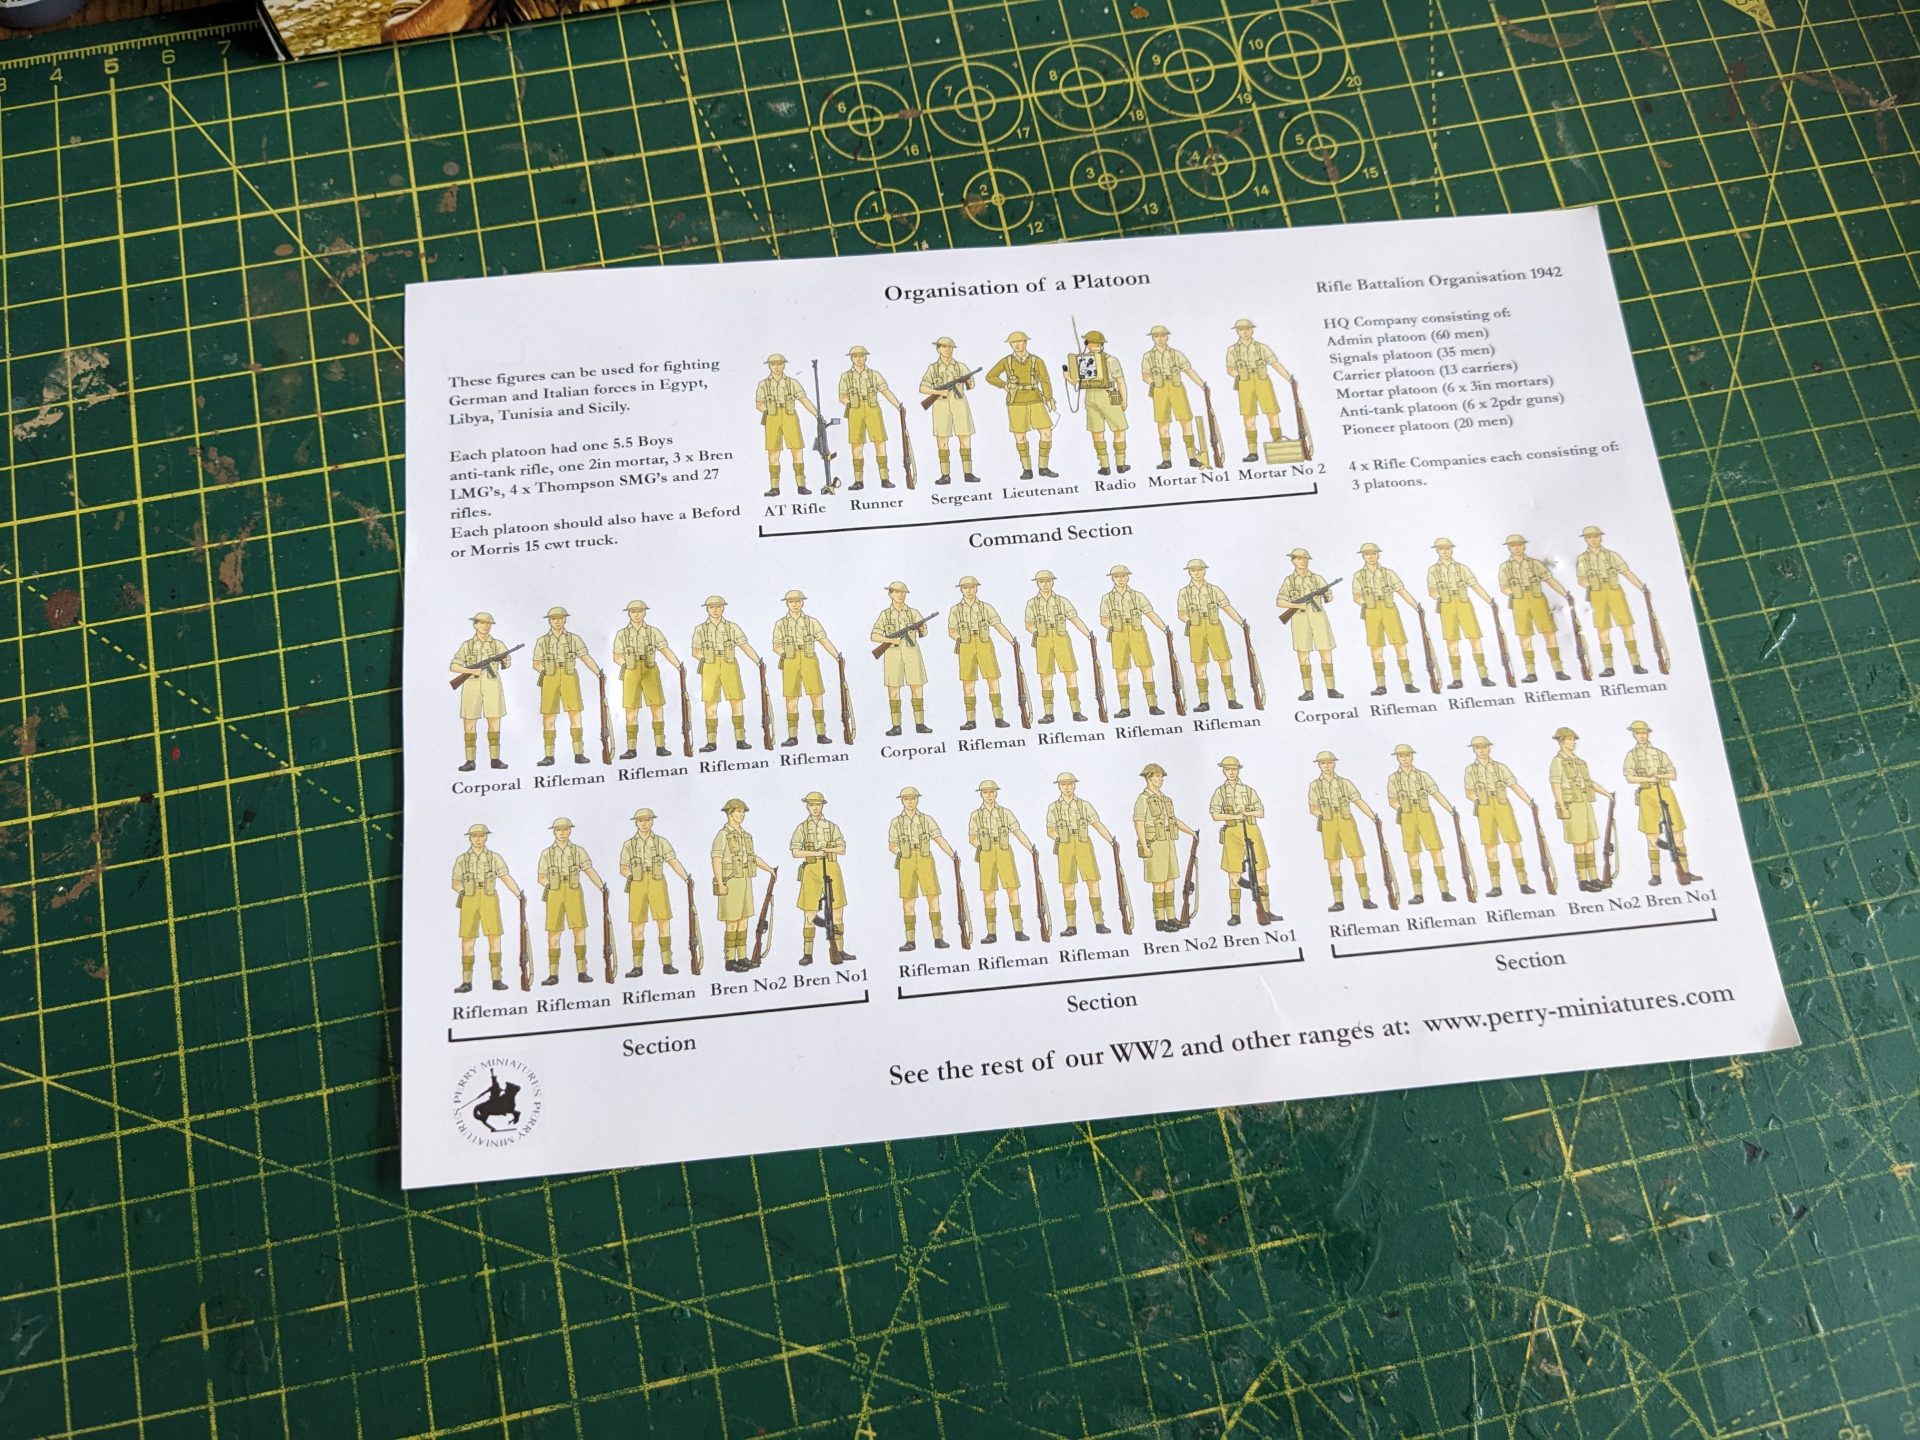
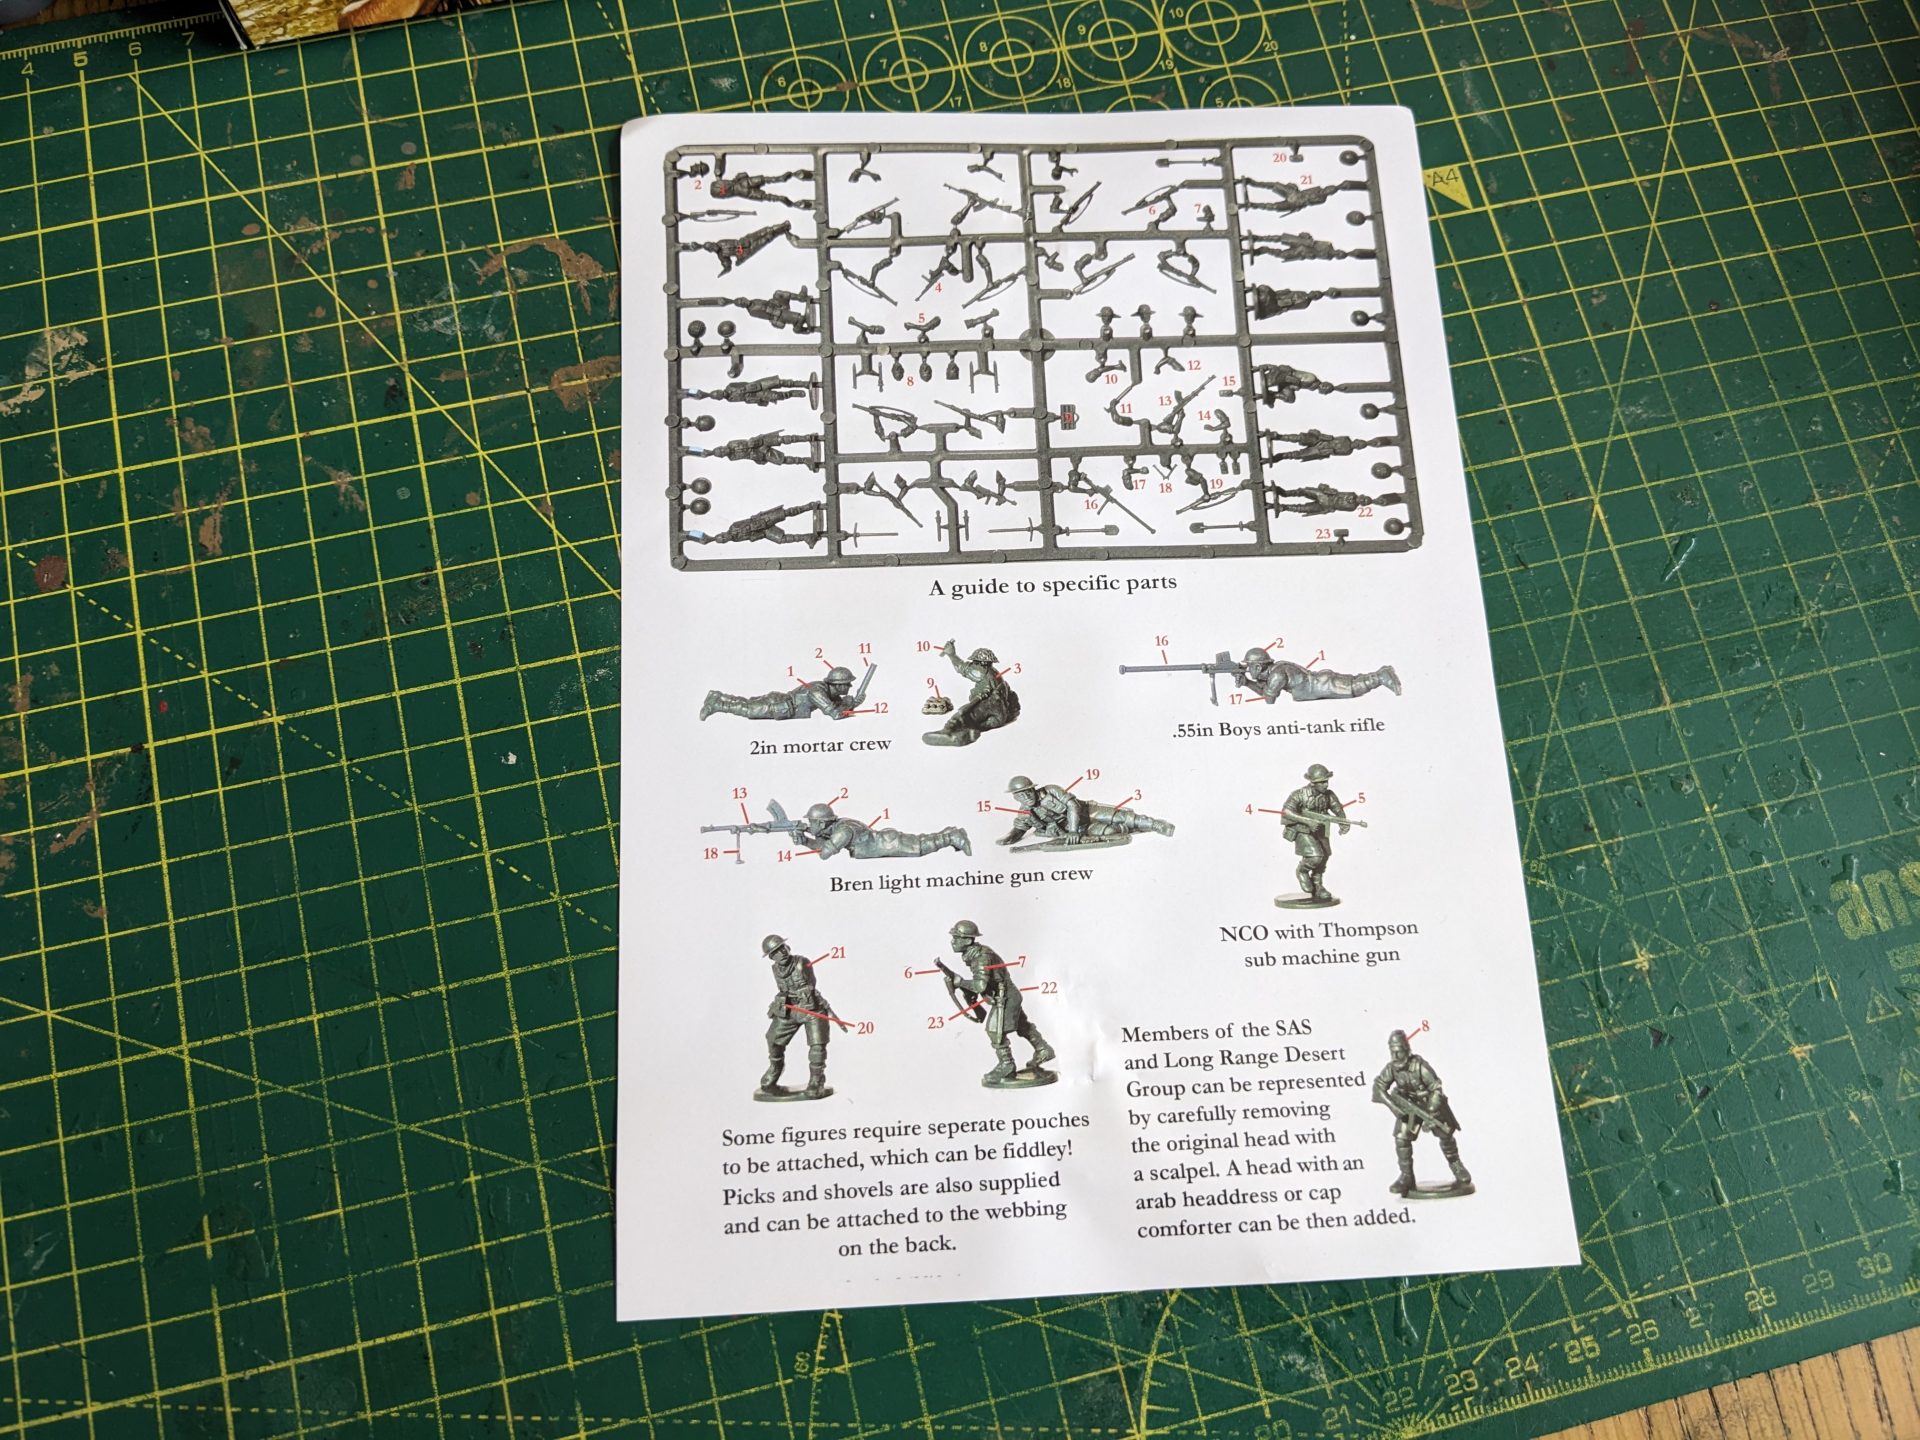
This box also comes with a double-sided information sheet. One side gives you the British Platoon layout, as well as information such as weapons issued and the Rifle Battalion layout in 1942. The other side has the more important things such as a sprue overview. It’s not a comprehensive set of instructions or even a list of what the parts are but it does provide some advice when it comes to the figures needing specific parts for a combination such as the 2inch mortar and the prone Bren team.
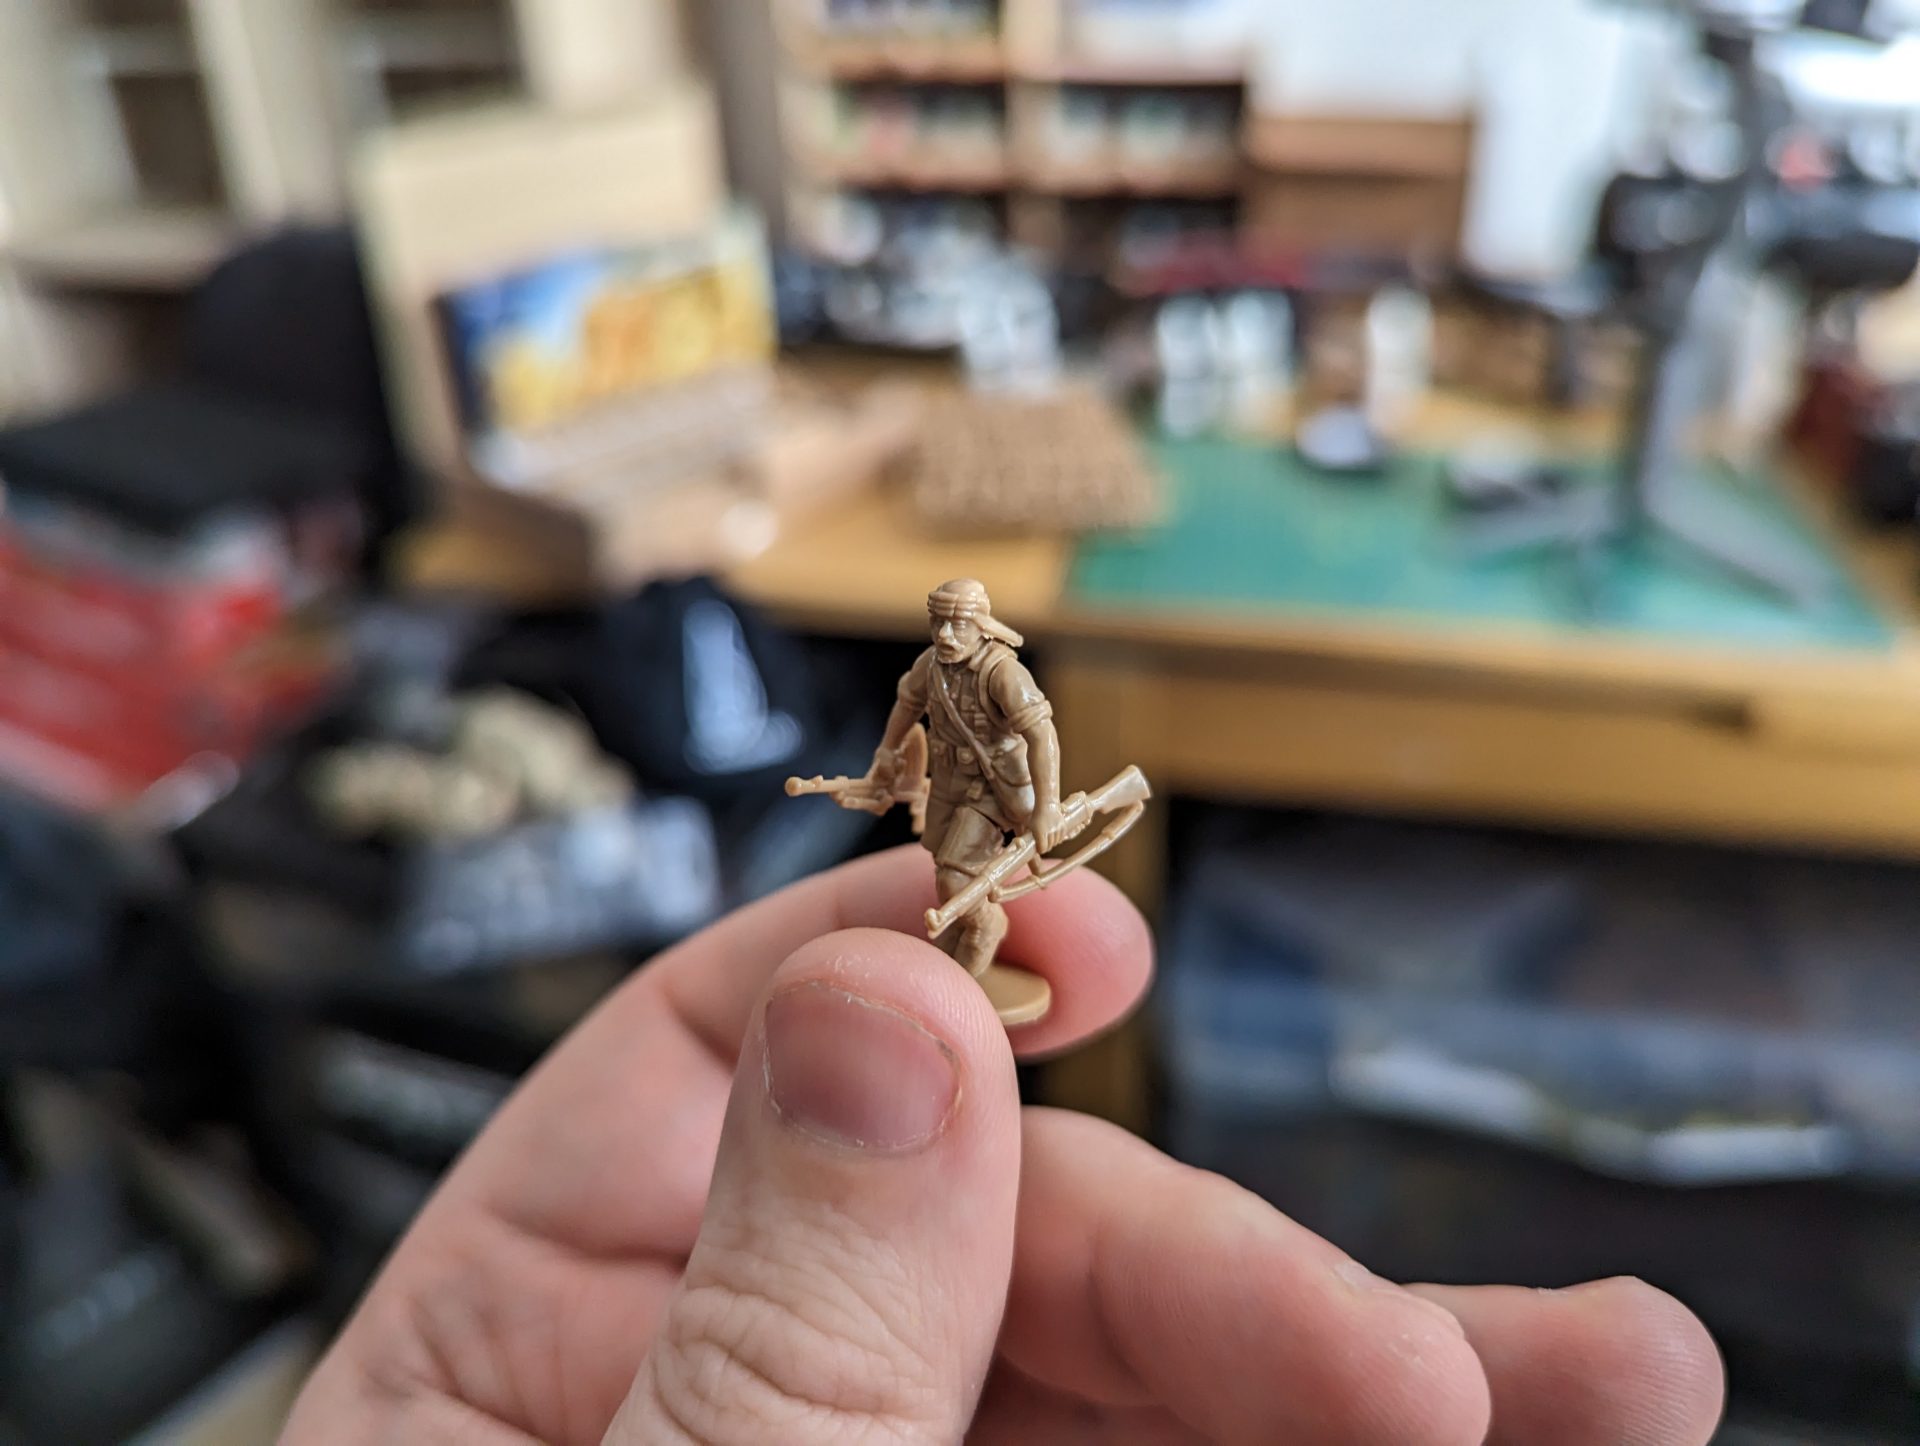
It also reveals an interesting point about some additional heads in the box – those of the SAS/LRDG. These are complete head replacements and you get six of them (three with camp comforters and three with kaffiyehs). To mount, you’ll need to break out the scalpel and cut through the neck, leaving a nice flat surface to then glue the head to. This process is the same as you’d have to do if you chose to order the Sikh heads (WW6) which would definitely extend the assembly time if you were replacing all the heads with their metal equivalents.

The core of the box is of course the main sprue. This has 12 bodies on it, with two of them in the prone position, giving you enough parts to assemble a full section and a weapon team per sprue. There are plenty of arms with rifles, including several with rifle held in one hand, leaving the other ready to sling a grenade or show them on the move. There is also the Thompson, (two sets of arms), the Bren gun (two sets of arms with a big asterisk on that statement), a Boys AT Rifle and 2″ mortar with a set of arms for the loader. There is also a pair of arms with the Lee Enfield Rifle Grenade Launcher, which is an interesting addition although not massively used in many WW2 games by British forces. Finally, there is a pile of add-on parts – shovels, picks and bayonet frogs. There are also some pouches designed to be fitted to specific bodies (presumably left off to assist with the production process) but could probably be added as extra details if you want some guy covered in webbing.

The command sprue has the parts for your officer, senior NCO or radio telephone operator. There are two bodies (one of them in a fancy jumper, the other has headphones on for the RTO) as well as a set of arms holding weapons in one hand (leaving the other for all-important tactical gesturing) which include a Thompson, a Lee Enfield and a revolver. There are also two parts for the radio, a back piece and a separate arm holding the mouthpiece. Arms and bodies are cross-compatible between this sprue and the main one (the slung rifle arm appears on both), which can lead to some really cool combinations.
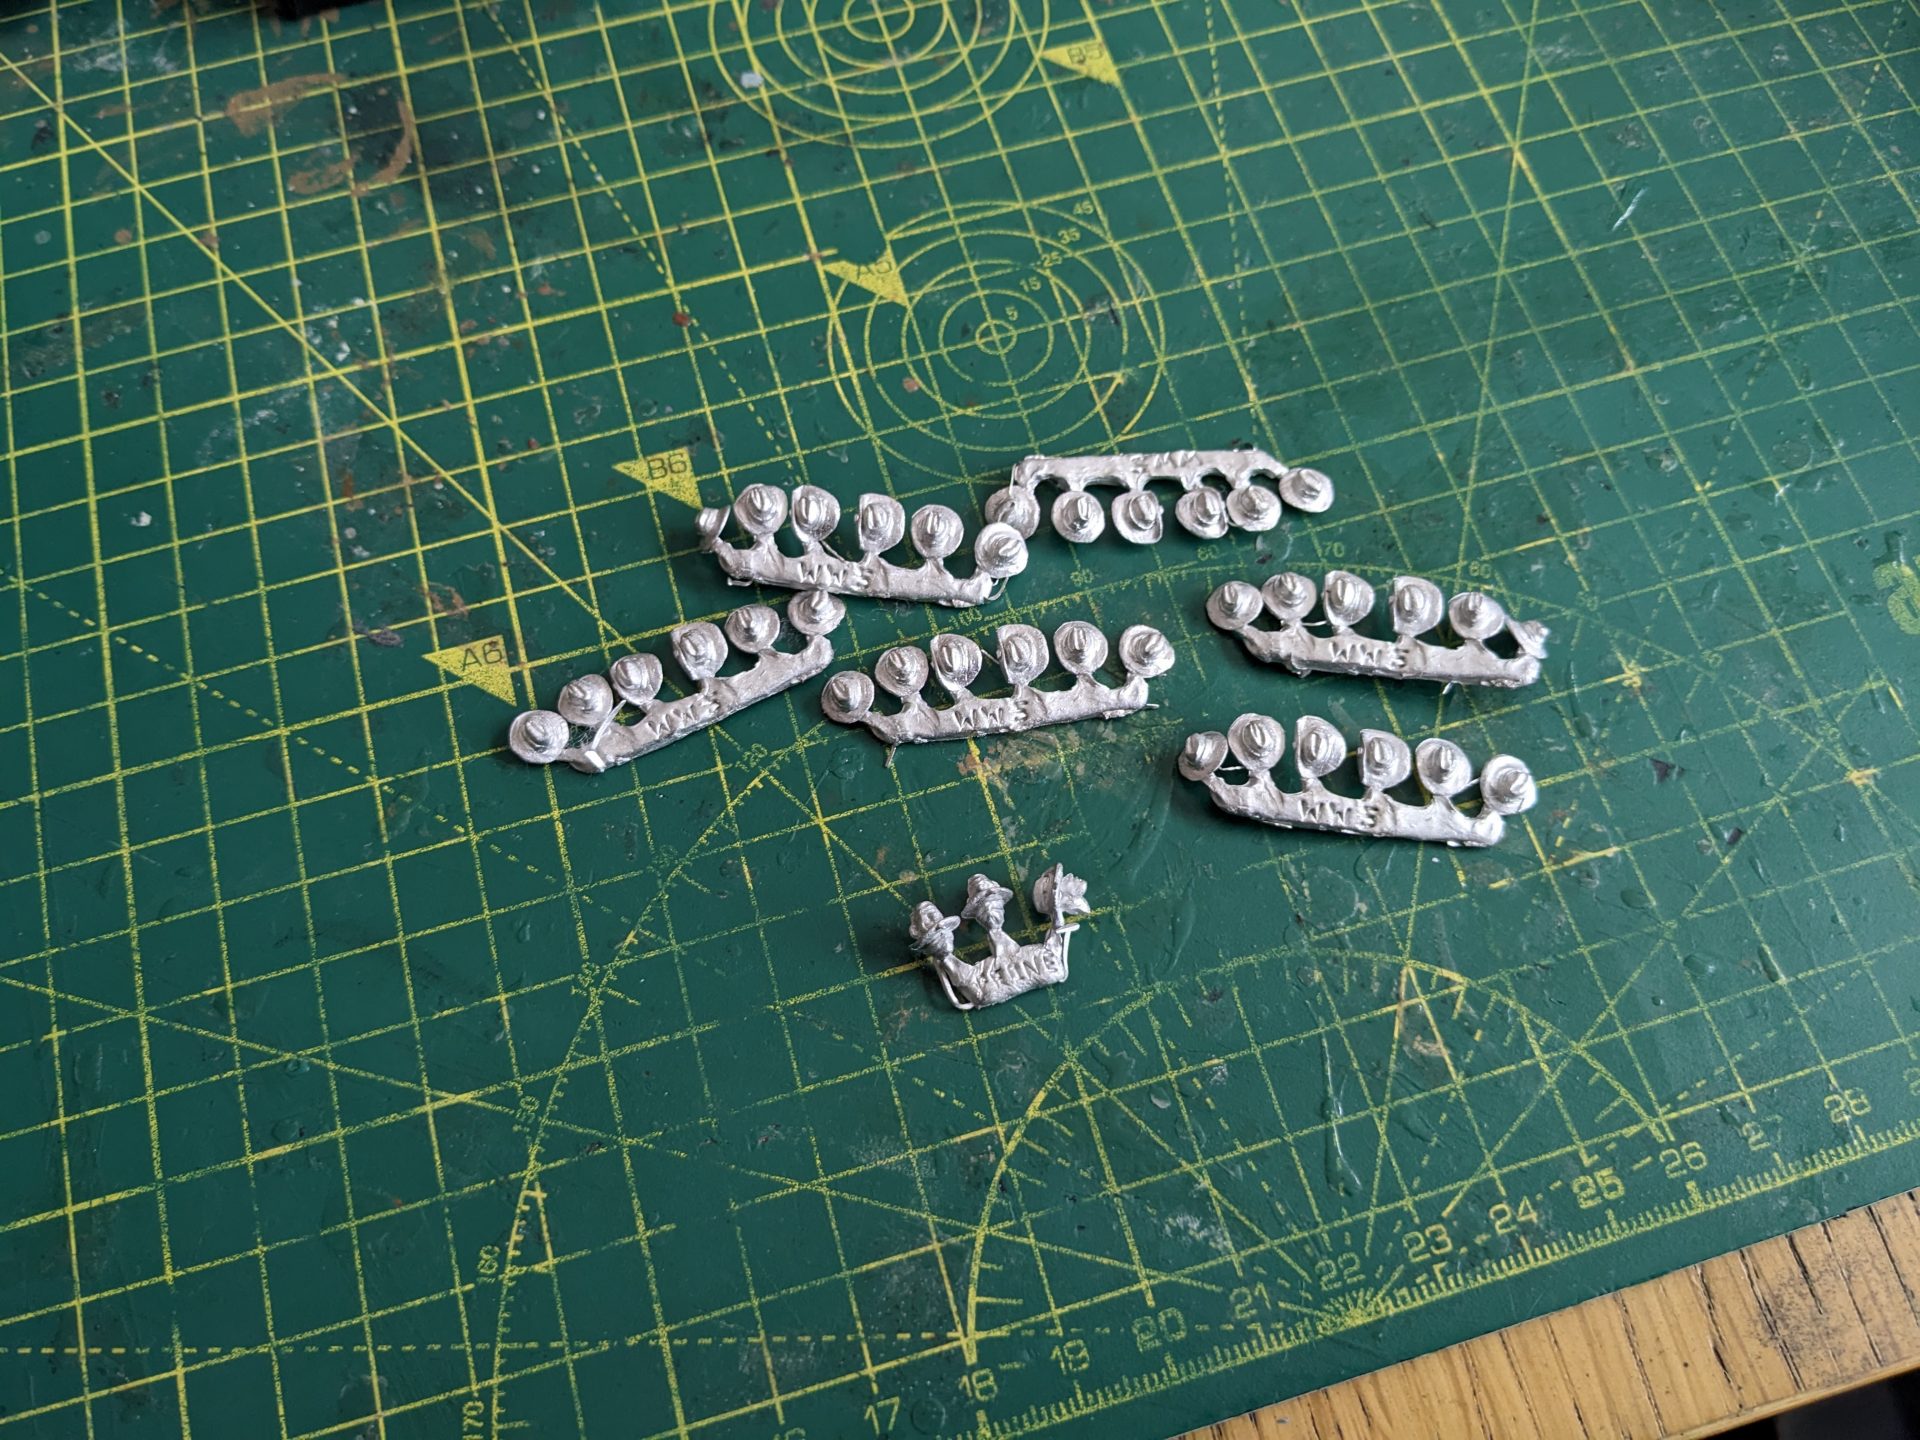
Finally, we have the metal head pack. Inside the box are 7 metal pieces, 6 giving you the hats for most of the regular infantry heads while the last one is for the figures lying prone. There is a nice level of variation among the different heads – some have one side folded, while others look a touch more weather beaten. There are definitely some that fit better than others on the base plastic heads, and a fair amount of minor clean up to do but the end result is pretty damn cool. It might have been nice to have a slightly smaller set available (and make building a mixed platoon slightly easier) but this is probably the easiest/cost effective way of releasing a niche add-on product.
Of course, we can talk about the contents but the proof is in the making. Part of the fun of plastics (depending on who you ask) is the build process – actually putting the parts together, combining them and (eventually) breaking the instructions to kit bash new setups.
On the whole, these were pretty damn easy to put together. Most models are merely three parts (body, arms, hat), meaning you can really hammer through assembling a squad in an evening. There is a pretty good amount of compatibility between the arms and the bodies – all of them can be easily made to fit without requiring any cutting or shaving down. This obviously gives you a massive variety in terms of the figures you can assemble, easily letting you assemble a full platoon (or maybe more if you’re so inclined) without two figures looking too similar.
There are a few things to mention. The main one is about the Bren gun. Each sprue has two Bren arms – one for firing from the prone, the other for carrying by the carry handle. However, if you use any of the prone figures for your 2″ mortar or your AT Rifle, it means your Bren team will not be able to be assembled in a shooting pose, or even one that looks ready for action. Now of course, there is something to be said about now having someone trying to Rambo with the Bren gun and yes technically it’s a team weapon that would be mostly shot from the prone position. But, it is something to be aware of when constructing. I ended up assembling one of my Bren gunners by combing a crouching body with the firing arms – I’ll be adding a piece of wall to his base to support it, as well as some work to make it suitably “middle of the desert” looking.
The other thing is about the arms. The positive above about them working with all the bodies without cutting or modifying is countered by the fact that you probably should do some tweaks to them. While assembling, there are plenty of fits that need a little bit of gap filling once in place or some minor adjustment just to make them fit. I think this ties into one of the downsides of multi-part plastics – it provides a massive amount of flexibility but the more flexibility you have, the less perfect each figure will be.
There are also a few of the bodies that have extra details to make them look more suitable for the LRDG, with goggles around the neck. These are a nice addition but they are going to stand out a little bit among the rank and file – if you’re looking for a section where all the guys are the same, this maybe a little annoying (I personally don’t mind, it adds some extra character in). I’m also not a huge fan of one of the poses that has the guy figure kneeling with both knees on the floor; although I’ve adopted this pose while airsofting, it’s not a particularly action-packed pose, more suited to a weapon team or radio operator rather than a basic infantry pose.
There is one final thing to mention – the price. In total this platoon + specialists worth of figures cost me £36, including postage and packing. If you didn’t want the custom hats, the box of plastics by itself is £22 and you can usually find someone selling it at a wargames show. Despite a few points I raised during assembly, I think this is probably the most cost-effective way to get a Desert Rat platoon. The Perrys also have a collection of metal models to accompany this set, so if you wanted some guys with trousers, then you have a source for that. There are also other supporting elements, such as a vickers team and AT guns.

After a couple of nights of work, and a long session supergluing all the hats and cursing my lack of accelerant, I managed to assemble my full platoon as well three additional figures. Realistically, it is unlikely these guys would be wearing their slouch hats in action (helmets are better at absorbing shrapnel hits) but I was aiming for a distinctive look. From briefly looking around, the hats were worn frequently during the campaign in Syria… maybe I need some Vichy French to fight…
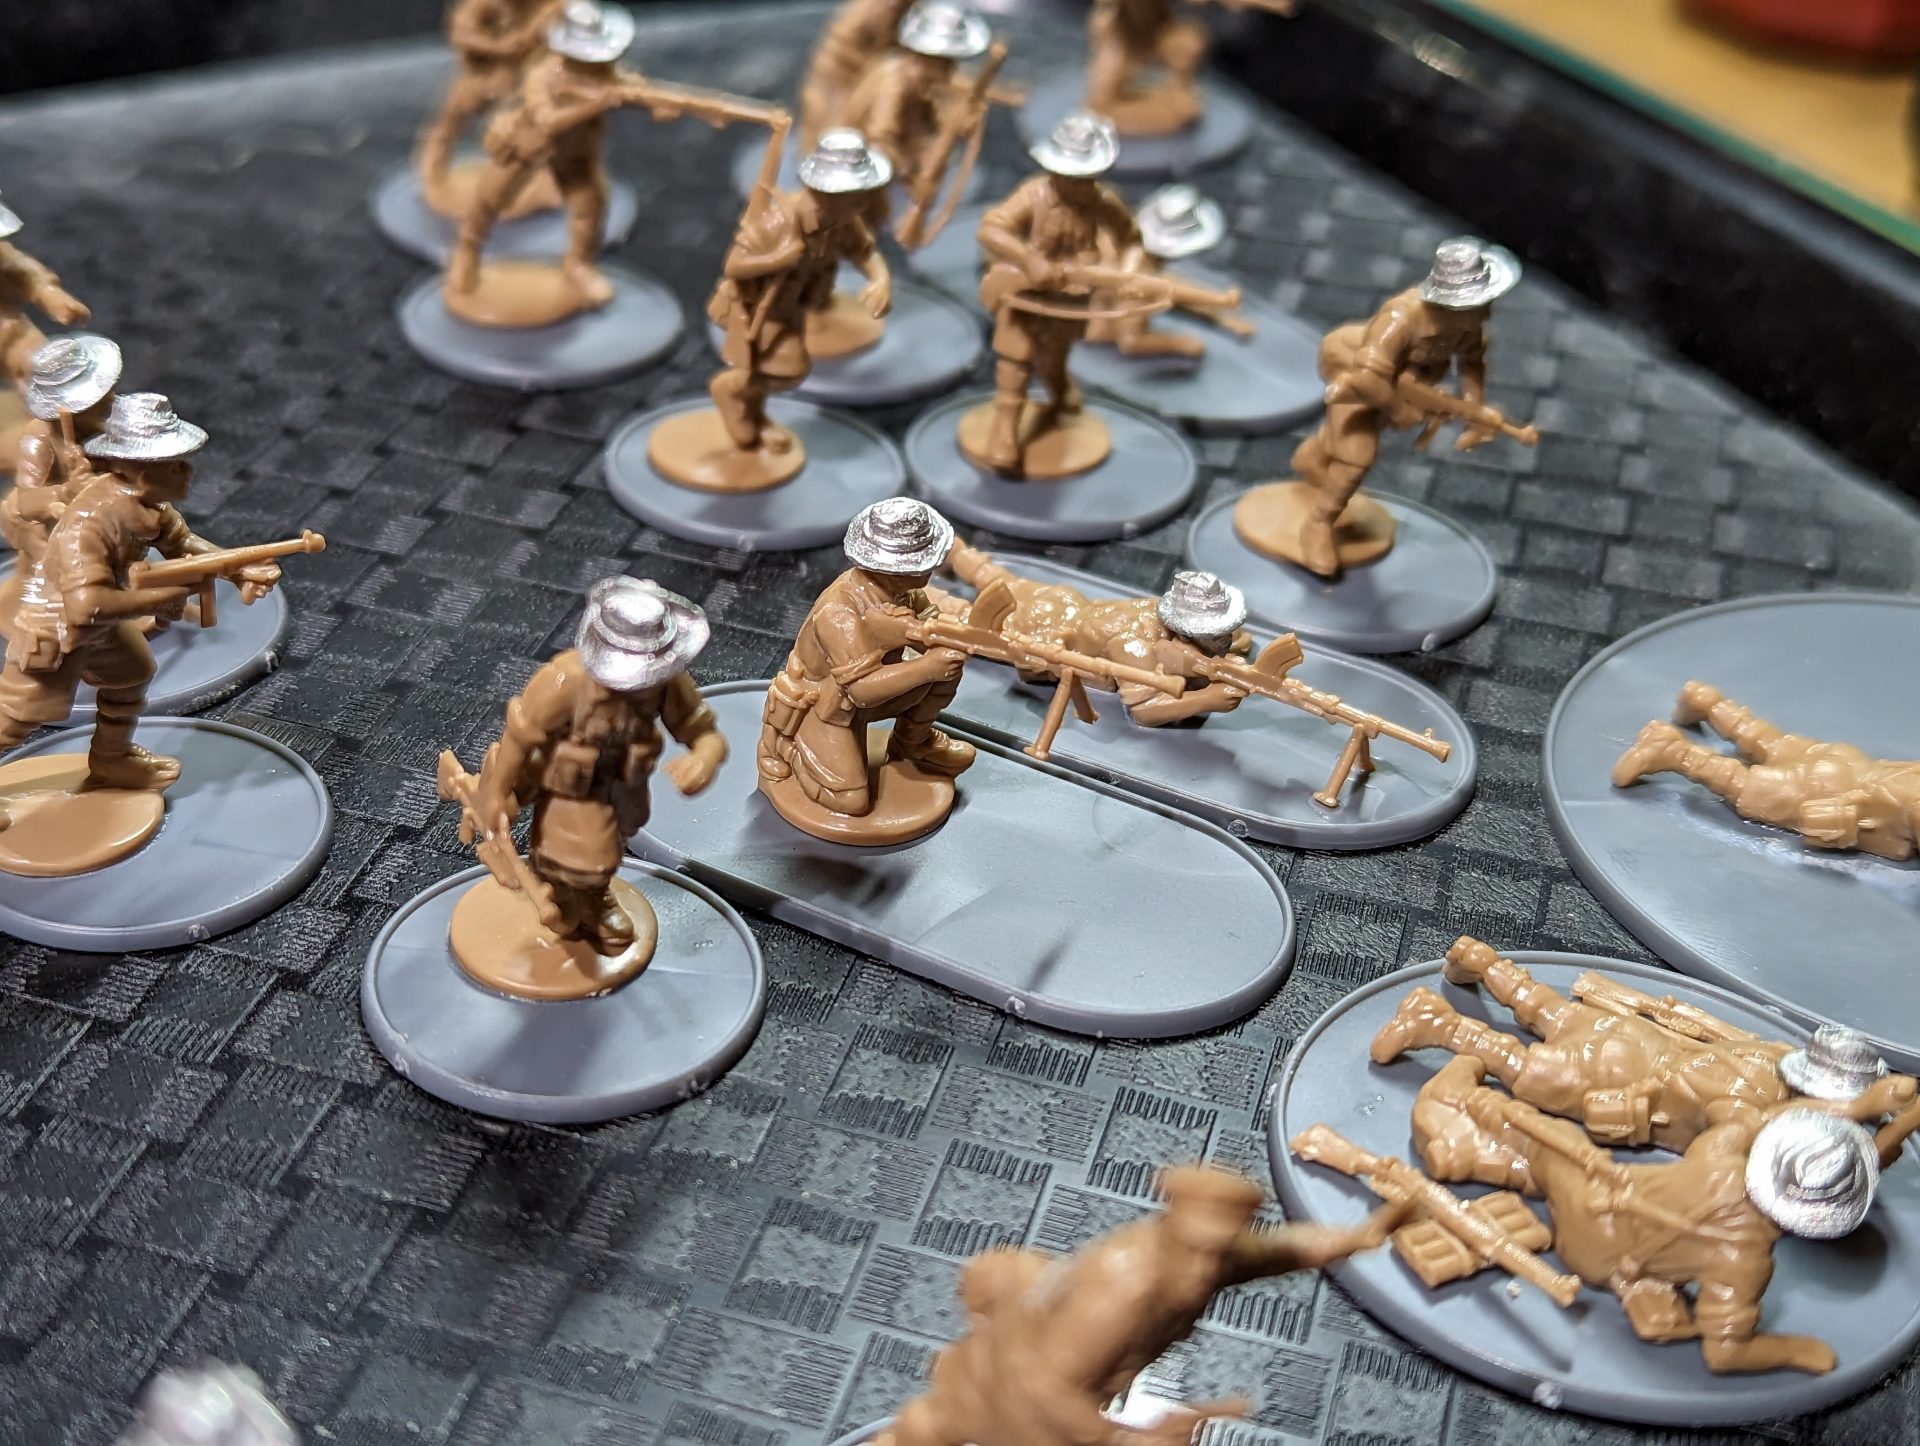
As for the figures, I’m happy with the end result. Like with any plastic kit, the quality of the poses vary from model to model but looking at it from afar, I’m happy with the overall feel of the force. A good mix of combat poses and slightly more relaxed. I still need to properly sort them into squads, but the core elements (Squad Leader and machine gun teams) all look suitably different.
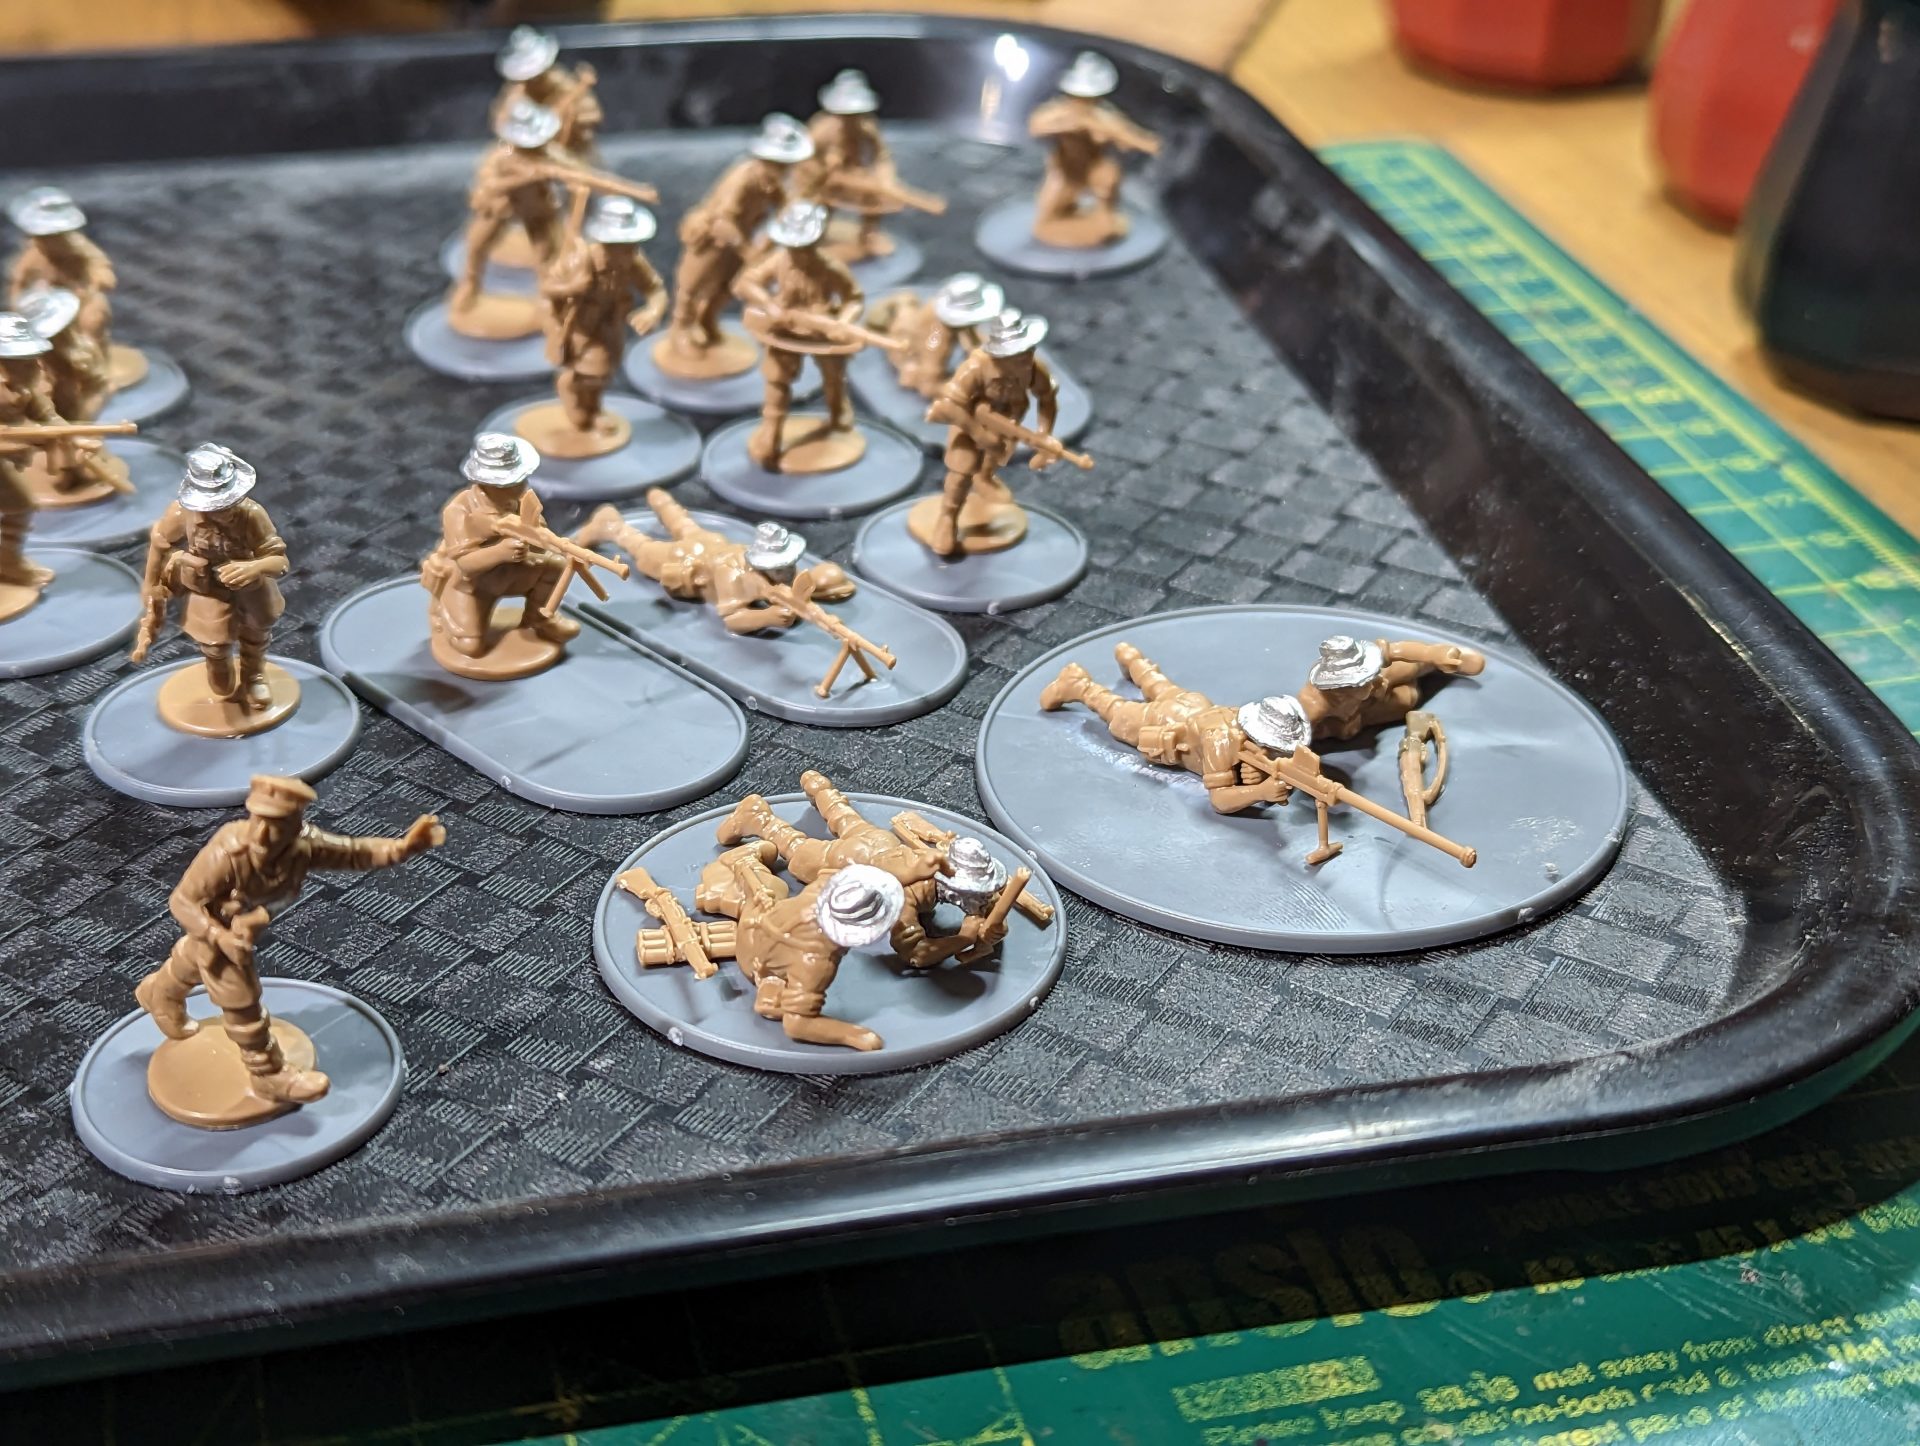
I decided to base the weapon teams together on a single base due to how they interact with each other – the runner spotting for the Boys rifle, the loader passing the next round to the 2″ mortar. The Boys is on a 60mm base due to the positioning of the spotter and the long plastic barrel. I tried both a 40mm base and two pill bases but they all just seemed cramped. The only downside to this larger basing is I might struggle with deploying the team behind smaller pieces of cover.
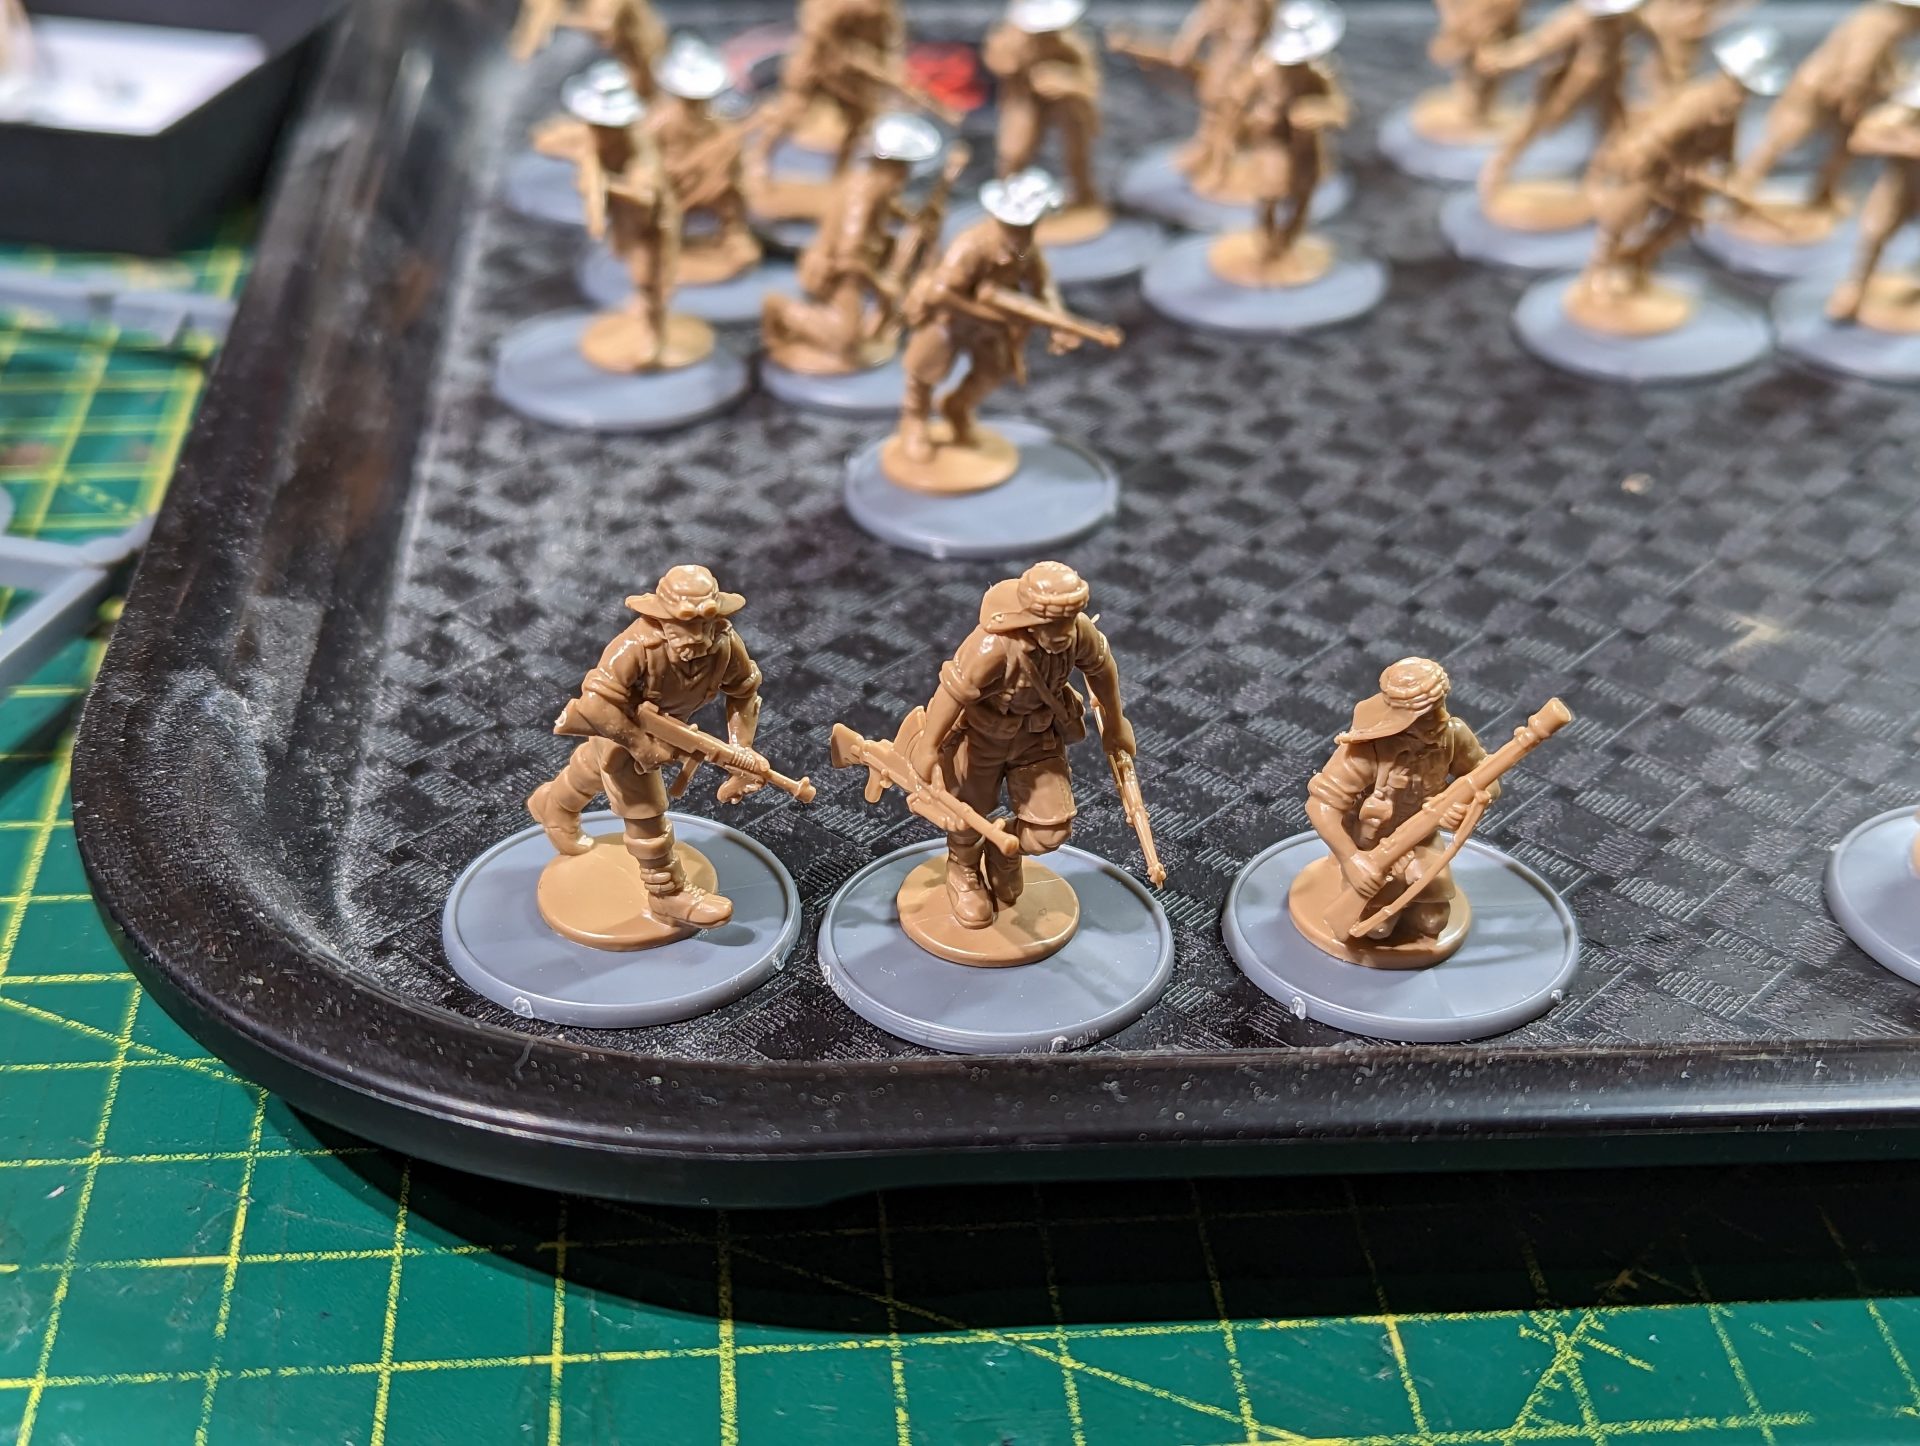
With the additional figures, I decided to go with the LRDG look, giving them kaffiyehs and some interesting bits of kit (such as the guy hefting a rifle and Bren having just dismounted it from the vehicle). These guys will probably end up being used in the Patrol phase as markers, or forming an additional Bren team when the platoon needs backup.
The next stage is, of course, getting them painted up. As an experiment (and because I want them done quickly), I’m going to be using Sonic Sledgehammer’s contrast method. I haven’t really done a full project using primarily Contrast but both Regular Opponents have been using his recipes to full effect (and cranking out armies at full speed). This should mean once I start, I’ll be ready to get these guys on the table ASAP.
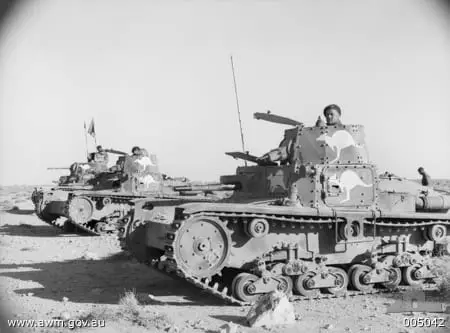
Of course, it wouldn’t be a ChargeBlog project without thinking ahead so time for one last little teaser. When you say Tobruk to me, there is one very specific picture that comes to mind. I’ve included it below. Maybe a sign of what may happen later in the campaign.
See you next time after I get these guys painted up.


Leave a Reply